

You have a great idea for a video, but no camera, no editing software, and no budget. Until recently, that meant the idea stayed in your head. Melies AI changes that. It is a free, browser-based AI video generator powered by ByteDance’s Seedance model, and it turns a short text prompt — or a single photo — into a finished video clip of up to 30 seconds, with native sound included, right in your browser. There is no app to install, no watermark on the free output, and you can start with free credits.
Melies AI appeared among the new AI launches of November 2026, and it stands out for one simple reason: it removes almost every barrier that used to stop beginners from making AI video. You do not need a powerful computer, because the generation happens in the cloud. You do not need to learn a timeline editor, because you describe the video in plain words. And you do not need to pay before you know whether the tool works for you, because the free tier is genuinely usable. In this beginner-friendly guide, you will learn how to use Melies AI free, step by step, from your first prompt to your first watermark-free download.
Step 1: Understand What Melies AI Actually Is
Before you click anything, it helps to know what you are working with. Melies AI is a web-based video generator built on Seedance, ByteDance’s AI video model. Seedance is a multimodal model, which means it understands more than just text. It can take a written prompt, a still image, a video clip, and even an audio clip, and combine them into one finished video. Melies AI puts that model behind a simple browser interface, so you get the power of Seedance without touching code or a developer tool.
The current engine behind Melies AI is Seedance 2.5, the latest flagship version of the model. It generates clips from 4 to 30 seconds long in a single generation, creates native audio at the same time as the picture, and accepts up to 50 reference inputs in one pass. That last number matters more than it sounds: references are how you keep a character, a product, or a place looking the same from one clip to the next, which is the hardest part of AI video.
Here is what Melies AI does in plain language:
- Text to video: type a description of a scene and get a moving video clip.
- Image to video: upload a photo and watch it come alive with motion, camera moves, and sound.
- Video to video: give it a short clip as a starting point and transform it into something new.
- Native audio: the sound — voices, ambience, music, effects — is generated together with the picture, so lips and sound stay in sync.
- Multi-shot scenes: a single generation can contain several shots, like a tiny film, instead of one static camera angle.
If you have read our guide on Seedance AI, the model will feel familiar. Melies AI is simply the easiest front door to it: open the browser, describe, generate, download. No setup, no waiting room, no software.
Step 2: Check the Free Plan Before You Start
The most common beginner mistake with AI video tools is generating blindly and running out of credits in ten minutes. Melies AI works on a credit system, and the free tier is generous, but it is not unlimited. Take two minutes to understand it before your first generation.
Every new account receives free credits to start, and the free tier refreshes daily, so you get a fresh allowance each day rather than a one-time trial that expires. Credits are spent per second of video, and the cost depends on the resolution you choose and whether you upload a video reference. Shorter clips and lower resolutions cost fewer credits, which is why your first experiments should be short. Failed generations are refunded automatically, so a bad render never costs you anything — if the job fails, the credits come back.
Three free-tier facts that make Melies AI worth your time:
- No watermark: videos generated on the free tier download clean, with no watermark stamped on them. That is rare — many competing tools watermark every free export.
- No credit card required: you can start without entering payment details.
- Full commercial rights on the free plan: the output is yours to use in your own projects and social posts, within the tool’s terms of service.
A practical tip: plan your first day around the free credits. Generate three or four short test clips at a modest resolution first, learn what prompts work, and only then spend credits on a longer, higher-resolution final clip. If you run a small business or a digital agency and want to test AI video for client work, this free-first approach lets you prove the quality before you spend anything.
Step 3: Open Melies AI and Set Up Your Free Account
Melies AI runs entirely in the browser, so there is nothing to download or install. The whole setup takes about two minutes.
- Open your browser and go to the Melies AI website. Use the official site, not a lookalike — search results and launch directories link to the real one.
- Click Sign up or Try free. Creating an account takes only an email address.
- Confirm your email if the site asks you to. Your free credits are added to the account as soon as you are signed in.
- You will land on the generator screen. The tool is the first thing on the page: a prompt box, an upload area for references, and settings for length and aspect ratio.
Before you generate anything, look around the screen for thirty seconds. Find the credit balance, the duration selector, the aspect-ratio selector, and the model selector. Knowing where these four controls live will save you from wasting credits later. If you are used to other AI video tools, the layout will feel familiar — prompt on top, settings on the side, results in a gallery below.
Step 4: Create Your First Text-to-Video Clip
Your first generation should be a simple text-to-video clip. The goal is not a masterpiece; it is to learn how the tool responds to your words.
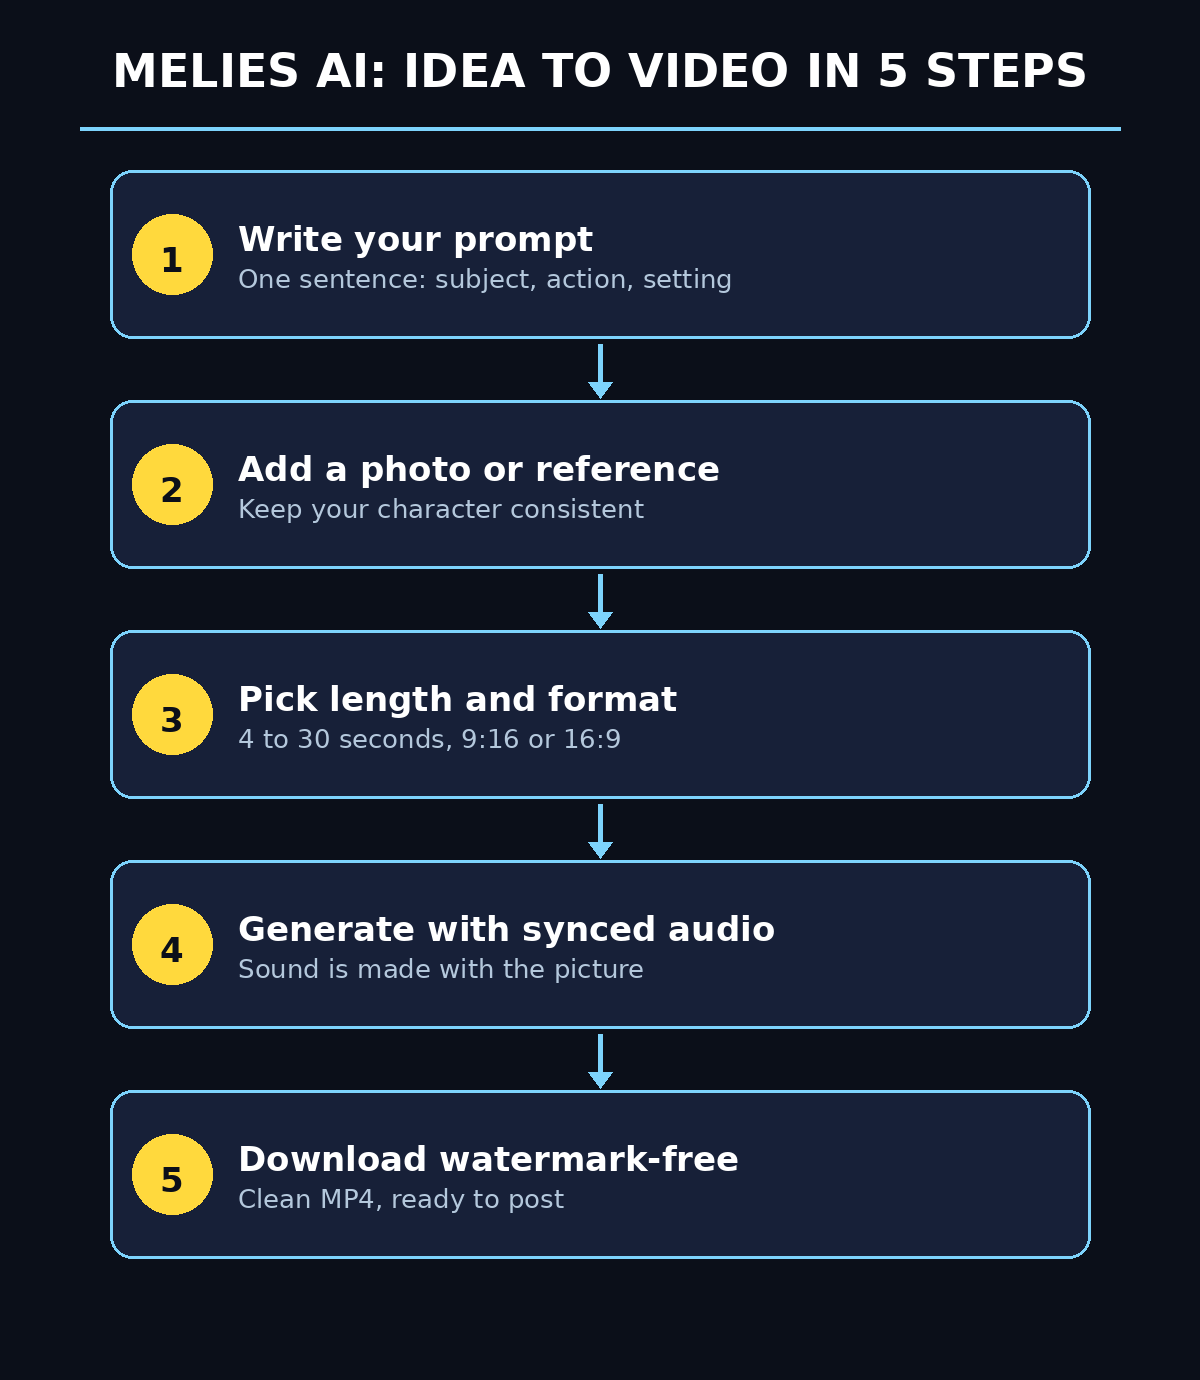
Write your prompt like a short film direction, not a keyword list. A good prompt has four parts: the subject, the action, the setting, and the camera. For example: “A young street-food vendor in Lahore flips parathas over a glowing griddle at dusk, steam rising, warm neon signs behind him, slow cinematic camera push-in.” That one sentence tells the model who is in the scene, what they are doing, where they are, and how the camera should move.
Follow these steps for your first clip:
- Type your prompt into the prompt box. Keep it to one or two sentences — long prompts confuse the model more than they help it.
- Set the duration to the shortest useful length for your test, such as 4 or 5 seconds. Short clips cost fewer credits and render faster.
- Pick your aspect ratio before you generate: 9:16 for TikTok, Reels, and Shorts, or 16:9 for YouTube and websites. Changing it later means generating again.
- Choose 720p for a test. You can go higher for the final version.
- Click Generate and wait. A short clip usually takes a minute or two. Do not close the tab while it renders.
When the clip appears, watch it twice. First, watch it like a viewer: does it look good? Then watch it like an editor: is the motion smooth, does the subject stay consistent, does anything melt or warp? Note what worked in your prompt and what did not. That note is the most valuable thing you will produce today, because it teaches you how to write the next prompt better.
Step 5: Turn a Photo Into a Moving Video
Image-to-video is where Melies AI feels like magic, and it is the feature most beginners use every day. Instead of describing a scene from scratch, you upload a photo and tell the model what should move.
This is perfect for product photos, portraits, travel pictures, and thumbnails. A still photo of a handmade product can become a five-second clip with a slow zoom and a gentle rotation. A portrait can become a talking-head style clip with subtle head movement and blinking. A landscape photo can become a living scene with drifting clouds and moving water.
Here is how to do it:
- Click the image upload area and choose a clear, well-lit photo. Sharp, high-quality photos give the best results — blurry inputs produce blurry videos.
- In the prompt box, describe only the motion and the camera, not the scene itself. The photo already tells the model what the scene is. For example: “Slow camera push-in, the subject smiles gently, hair moves slightly in the breeze, warm afternoon light.”
- Keep the motion small. Beginners often ask for wild action — jumping, spinning, running — and the model struggles. Gentle, realistic motion looks far more professional.
- Set the duration to 5 seconds for your first image-to-video test, then extend it once you trust the result.
- Generate, watch, and compare the clip with your original photo. The subject, the colours, and the background should match the photo closely.
One warning: do not upload photos of real people and ask the model to make them do things they never did, especially for anything misleading. Melies AI is a creative tool, and using it responsibly keeps your account — and your reputation — safe.
Step 6: Keep Characters Consistent With Reference Images
The biggest frustration in AI video is that the same character looks different in every clip. Melies AI solves this with references: you can attach up to 50 images, video clips, and audio clips to a single generation, and the model uses them to keep the subject consistent.
Think of references as casting the same actor in every scene. Upload two or three clear photos of your character from different angles, and the model will keep the face, the clothes, and the style stable across clips. Upload a photo of your product, and it will look like the same product in every shot. Upload a short audio clip, and the generated sound can follow its rhythm and tone.
To use references well:
- Use two to five references, not fifty, for your first attempts. More references give more control, but they also cost more credits and slow the generation.
- Make the references consistent with each other. Three photos of the same person in the same outfit work far better than three photos of three different people.
- Name your references mentally by role: one for the face, one for the outfit, one for the setting. That keeps your prompt simple.
- If a character still drifts between clips, add one more front-facing reference photo and reduce the prompt’s description of the character. Let the reference do the describing.
This is the feature that turns Melies AI from a fun toy into a serious content tool. A small brand can shoot one product photo and then generate a whole week of short clips with the same product looking identical in each one. A creator can build a recurring character and use it across a series. If you work with AI automation services for content production, reference-based generation is the workflow that makes AI video repeatable instead of random.
Step 7: Add Native Audio and Multi-Shot Scenes
Most AI video tools generate silent video and leave you to add sound later. Melies AI is different: Seedance 2.5 creates the audio together with the picture. Dialogue, ambient sound, and music are generated in the same pass, in more than ten languages, so a character’s lips match the words and a footstep lands when the foot lands.
You do not need a separate audio setting to get sound — it is built in. But you can guide it with your prompt. Mention the sound you want in plain words: “with the sound of sizzling food and distant street traffic,” or “a calm female narrator says, welcome to our kitchen.” Keep audio directions short and concrete, the same way you keep visual directions short.
Multi-shot scenes are the other feature that makes Melies AI feel professional. Instead of one unbroken shot, a single generation can cut between angles — a wide shot, then a close-up, then a detail shot — like a real video edit. To get this, describe the shots in order in your prompt: “Wide shot of a market stall, cut to a close-up of hands kneading dough, cut to a detail shot of steam rising from the bread.” The model understands shot lists, and the result looks edited even though you never opened an editor.
Two practical rules for audio and multi-shot work:
- One idea per shot. If each shot in your prompt is a simple, clear idea, the model cuts cleanly. If each shot is a paragraph, the cuts get messy.
- Check the audio with headphones. Small sync problems are easy to miss on phone speakers. Listen once with headphones before you publish anything with dialogue.
Step 8: Edit, Extend, and Fix a Clip Without Starting Over
A bad first render does not mean you have to start from zero. Seedance 2.5 supports local editing: you can change a region, an object, or a character in a clip while keeping the rest of the video exactly as it is. You can also extend a good clip, adding a few more seconds to it instead of generating a whole new one.
Here is the fix workflow that saves the most credits:
- Something small is wrong: a warped hand, a strange object in the corner, a sign with garbled text. Use local editing to change just that region. Describe only what should change, and leave everything else alone.
- The clip is good but too short: extend it. Ask for a few more seconds that continue the same action and the same camera move. The extension keeps the character and setting consistent.
- The clip is wrong from the first frame: do not try to fix it. Change the prompt instead. The most common causes are a prompt that asks for too much at once, a motion that is too fast, or a camera move that is too complicated. Simplify the prompt and generate again.
- The motion looks jittery: regenerate at the same settings but with slower, simpler motion words — “slow,” “gentle,” “smooth” — instead of “fast,” “dynamic,” or “dramatic.”
Keep a small log of your prompts and results. After five or six generations you will see a pattern: the prompts that worked share a structure, and the ones that failed share a mistake. That pattern is your personal style guide, and it is worth more than any tutorial.
Step 9: Export and Download Your Video Without a Watermark
When a clip is ready, exporting is the easiest part of the whole process — and it is where Melies AI beats most free tools.
- Open the finished clip in your gallery or project view.
- Click Download or Export. The video downloads as a standard MP4 file you can use anywhere.
- Check the file before you post it: play it once from start to finish, check the sound, and confirm there is no watermark. Free-tier exports from Melies AI carry no watermark, but it costs you ten seconds to verify and saves you from an embarrassing re-upload.
- Save the original file with a clear name, such as
melies-product-launch-5s.mp4, and keep it in a project folder. If you need a different aspect ratio later, you will generate a new version — but the original is your backup.
Your downloaded clip is ready for TikTok, Instagram Reels, YouTube Shorts, Facebook, or your own website. Because the file is a normal MP4, you can also drop it into any editor — CapCut, Instagram Edits, or a desktop editor — for captions, trimming, or combining with other clips. For a full comparison of what you can do next with your clip, our guide on Pika H3 Flex shows another free video tool with synced audio that pairs well with Melies AI in a creator workflow.
Step 10: Pro Tips, Best Prompts, and Mistakes to Avoid
You now know the whole workflow. These final tips are the difference between clips that look AI-generated and clips that look professional.
Write prompts like a director, not a searcher. A search query is a list of keywords. A director’s prompt is a sentence with a subject, an action, a setting, and a camera move. “Golden retriever puppy runs through autumn leaves in a park, low-angle tracking shot, soft morning light” will always beat “dog, park, leaves, cute, 4k, cinematic.”
Use the 30-second limit as a feature, not a flaw. Thirty seconds is the perfect length for a short-form clip. Plan one idea per clip, not a whole story. If your idea needs more time, generate two or three clips and stitch them together in a free editor. A series of strong five-second shots beats one rambling thirty-second shot every time.
Start at 720p, finish at 1080p. Test generations at a lower resolution to save credits, then regenerate your best prompt at 1080p for the final export. The quality jump is real, and you only pay the higher cost once.
Keep the camera still or slow. The single biggest beginner mistake is asking for fast, complex camera moves. Slow push-ins, gentle pans, and static shots look cinematic. Fast spins and whip-pans look broken. When in doubt, write “static camera” and let the subject do the moving.
Avoid these common mistakes:
- Asking for more than one action in a single clip — the model will blend them into something strange.
- Using text or signs in the scene — AI video still struggles with readable words on screen, so keep signage out of your prompts.
- Generating the same prompt five times hoping for a different result — change one thing in the prompt each time instead.
- Spending your whole daily credit balance on the first idea — test short, learn fast, then commit.
Think in series, not singles. The creators who get the most from Melies AI do not make one video; they make a series with the same character, the same setting, and the same style. References make that possible. Pick a character, pick a setting, and generate five short clips that tell one small story. That is a week’s worth of social content from one afternoon of work.
Melies AI vs Other Free AI Video Tools
How does Melies AI compare with the other free video generators beginners usually try? This table gives you a quick, honest comparison based on each tool’s free tier as of November 2026.
| Feature | Melies AI (Seedance 2.5) | Pika H3 Flex | Runway (free plan) | Luma Dream Machine (free plan) |
|---|---|---|---|---|
| Runs in the browser | Yes, no app needed | Yes | Yes | Yes |
| Free tier | Yes, daily free credits | Yes, limited credits | Yes, limited credits | Yes, limited credits |
| Watermark on free exports | No watermark | Watermark on free plan | Watermark on free plan | Watermark on free plan |
| Longest single clip | Up to 30 seconds | 5–15 seconds | Up to 16 seconds | Up to 10 seconds |
| Native audio with video | Yes, synced audio | Yes, synced audio | Limited | Limited |
| Reference images for consistency | Up to 50 references | Up to 12 references | Limited | Limited |
| Multi-shot scenes | Yes, in one generation | Yes | No | No |
| Best for | Social clips, product videos, series | Short clips with sound | Quick experiments | Dreamy, stylised clips |
The table makes the trade-off clear. Melies AI wins on clip length, watermark-free exports, and reference-based consistency, which are the three things that matter most to a beginner who wants to publish. Pika H3 Flex is a strong second choice when you want very short, punchy clips with sound. Runway and Luma are excellent tools, but their free tiers are more limited and watermarked, so they are better as a second opinion than as your daily driver.
Frequently Asked Questions
Is Melies AI really free?
Yes. Melies AI gives every new account free credits to start, and the free tier refreshes daily, so you get a new allowance each day. You do not need a credit card to start, and videos generated on the free tier download without a watermark. Credits are spent per second of video, so short test clips cost very little. If a generation fails, the credits are refunded automatically.
Do Melies AI videos have a watermark?
No. One of the biggest advantages of Melies AI is that even free-tier videos are watermark-free. Many competing tools stamp a watermark on every free export and charge you to remove it. Melies AI exports are clean and ready to publish as soon as you download them.
How long can a Melies AI video be?
A single generation can be anywhere from 4 to 30 seconds long. Thirty seconds is the current maximum for one clip. If your idea needs more time, generate two or three clips with the same references and stitch them together in a free editor such as CapCut or Instagram Edits. That is how most creators build 60-second videos from Melies AI clips.
Can Melies AI keep the same character in every video?
Yes, and this is its strongest feature. You can attach up to 50 reference images, video clips, and audio clips to one generation. Upload two or three clear photos of your character, and the model keeps the face, outfit, and style consistent across clips. For best results, use a small number of consistent references and let the reference do the describing instead of writing long character descriptions in the prompt.
Does Melies AI add sound to the video?
Yes. The Seedance 2.5 model behind Melies AI generates audio together with the picture, so dialogue, ambience, and music are created in the same pass and stay in sync with the visuals. You can guide the sound by mentioning it in your prompt, for example “with the sound of rain and distant thunder.” The audio supports more than ten languages.
Do I need to install anything to use Melies AI?
No. Melies AI runs entirely in your web browser. There is no app to download and no software to install, and the generation happens in the cloud, so it works on a normal laptop or even a modest computer. You only need a browser, an email address for the free account, and an internet connection.
Final Thoughts
Melies AI is one of the easiest ways for a complete beginner to start making AI video in November 2026. It takes the most powerful parts of ByteDance’s Seedance 2.5 model — 30-second clips, native synced audio, multi-shot scenes, and up to 50 references for character consistency — and puts them behind a browser page that anyone can use in two minutes. The free tier is genuinely useful, the exports carry no watermark, and the credit system is forgiving enough to learn on.
Start small. Make one five-second text-to-video clip today, then one image-to-video clip tomorrow, then try references on the third day. By the end of the week you will have a personal prompt style, a character you can reuse, and a folder of clips ready to post. That is how a beginner becomes a creator: one short clip at a time.
If you make videos for clients or for your own brand, remember that the tool is only half the workflow. The other half is planning: one idea per clip, slow camera moves, and a series mindset. Do that, and Melies AI will give you professional-looking video without a camera, a studio, or a budget.
Explore More Free AI Tools
Want to keep building your AI toolkit? Try these free tools on AIToolSteps: our AI Title Generator helps you write clickable video titles for every clip you make with Melies AI, the Meta Description Generator writes search-friendly descriptions for your video pages, the AI Rewriter polishes your video scripts and prompts, and the Keyword Density Checker makes sure your video descriptions and blog posts are SEO-ready. You will find them all at AIToolSteps.com — free, no sign-up needed.