

Do you record videos on your phone and then struggle to edit them on a tiny screen? Instagram heard that complaint from creators for years. On 5 November 2026 it finally answered with Instagram Edits for Mac — a free desktop video editor with a proper multi-track timeline, keyframes, color grading and watermark-free 4K export. The surprise inside the launch is even bigger. Instagram Edits for Mac ships with a Model Context Protocol (MCP) connection, so an AI agent such as Meta’s Muse can open your project and build a rough cut for you while you watch. In this beginner-friendly guide, you will learn how to use Instagram Edits for Mac AI free, step by step, from the download to your first published Reel.
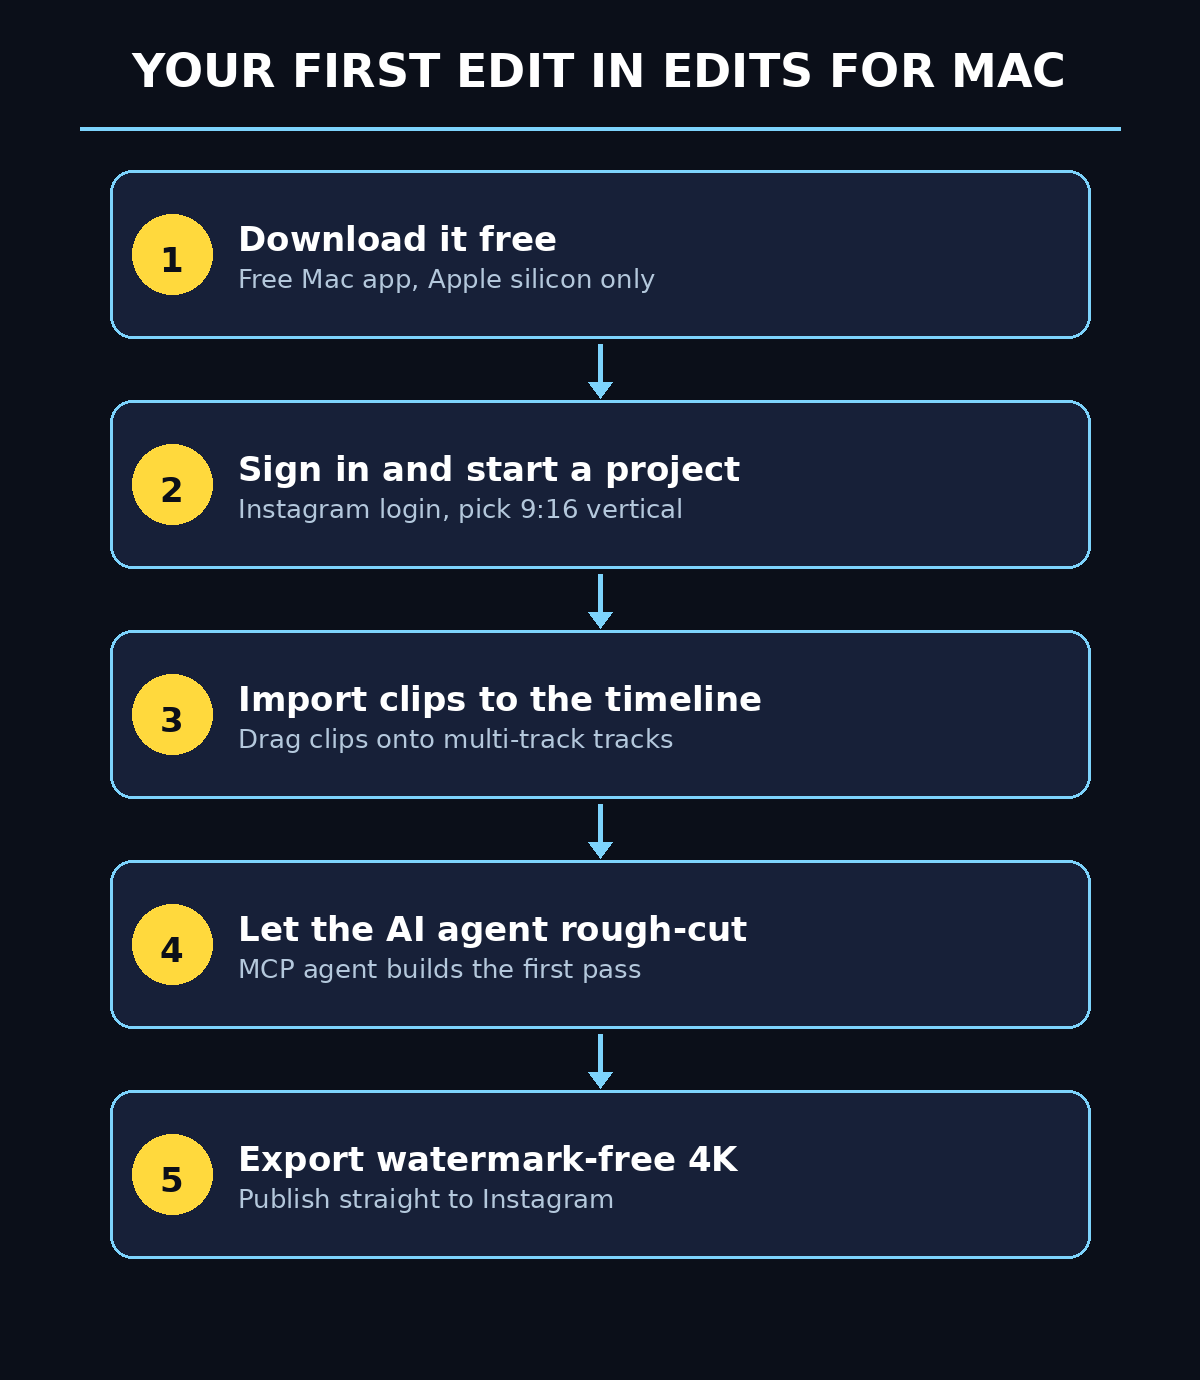
Step 1: Check If Your Mac Can Run Instagram Edits for Mac
Before you download anything, check your Mac, because Instagram Edits for Mac does not run on every Mac. The app needs a Mac with Apple silicon — an M1 chip or later — and it is free to download with no paid tier listed. Intel Macs are not supported, and there is no Windows or Linux version yet, with no release date announced for Windows. You also need an Instagram account, because the app asks you to sign in with one before you can edit.
Here is the quick checklist to run through before you start:
- Apple silicon Mac: M1, M2, M3, M4 or later. Click the Apple menu, then About This Mac, and look at the chip name. If it says Intel, Instagram Edits for Mac will not install on your machine.
- A recent macOS version: keep your Mac updated so the app runs smoothly and you receive the weekly updates Instagram has promised for the desktop app.
- An Instagram account: any normal Instagram account works. If you manage a business or creator account, sign in with the one you want to publish from.
- Free space for video: video projects eat storage fast, so make sure you have at least a few gigabytes free before you import your first clips.
If you are on Windows, nothing changes for you yet — you will need to keep using the mobile Edits app or another free editor until Instagram announces a Windows version. Mac owners, on the other hand, finally get a desktop editor that does not charge for 4K exports or stamp a watermark on the result. That alone makes Instagram Edits for Mac worth trying, even before you touch the AI features.
Step 2: Download and Install Instagram Edits for Mac Free
Instagram Edits for Mac is completely free, and you download it from Instagram’s official website rather than from a third-party download site. The mobile version of Edits launched on phones in April 2025. Instagram previewed a desktop version back in June 2026, so the Mac release on 5 November 2026 was the moment many creators had been waiting for.
Follow these steps to get it on your Mac:
- Open your browser and go to Instagram’s official Edits page on instagram.com. Look for the Mac download option on the page.
- Download the installer and open it. Your Mac may ask you to confirm that you want to open an app downloaded from the internet — click Open to continue.
- Drag the Edits app into your Applications folder if the installer asks you to, then launch it from Launchpad or Spotlight.
- The first time it opens, Edits asks you to sign in with your Instagram account. Use the account you want your edits tied to, and approve the sign-in on your phone if Instagram asks for it.
The whole install takes only a few minutes, and there is no card, no trial countdown and no subscription screen waiting at the end of it. Instagram describes the desktop editor as free, and the page lists no paid tier, so what you download is what you get. Once you are signed in, you will see the project screen, which is where every edit in Instagram Edits for Mac begins.
Step 3: Sign In and Create Your First Project in Instagram Edits for Mac
When you first open Instagram Edits for Mac, the home screen looks calm and simple, which is a welcome change if you have ever opened a professional editor and felt lost in panels and menus. Your projects live here, and starting a new one takes three clicks.
Here is how to create your first project:
- Click the New Project button on the home screen of Instagram Edits for Mac.
- Give your project a clear name, such as “Cafe Reel — November” or “Product Launch Teaser”, so you can find it again later. A clear name also helps when an AI agent works on the project, because it can tell your projects apart.
- Choose the aspect ratio for your video. For Instagram Reels, TikTok and YouTube Shorts, pick vertical 9:16. For a YouTube video or a landscape clip, pick 16:9 instead.
- Click Create, and the empty timeline opens, ready for your clips.
Before you import anything, take thirty seconds to look around the editor. The preview window sits at the top, the timeline runs along the bottom, and your media, text, audio and effects live in a panel on the side. That layout will feel familiar if you have used the mobile Edits app, because the desktop version keeps the same interface ideas with much more room to work. The extra space is the whole point of Instagram Edits for Mac. A phone screen forces you to edit one tiny clip at a time, while the Mac version lets you see your whole video at once.
Step 4: Import Clips and Learn the Multi-Track Timeline
The multi-track timeline is the biggest upgrade Instagram Edits for Mac brings over the phone app. It is the feature that makes the desktop version feel like a real editor instead of a toy. Multiple tracks mean you can stack video clips, B-roll, text, stickers, music and sound effects on separate layers, and move each one without disturbing the others.
Import your footage like this:
- Click Import or drag clips straight from Finder into the media panel of Instagram Edits for Mac. You can import video shot on your phone, your camera or your screen.
- Select the clips you want and drag the first one onto the main video track on the timeline. It snaps into place at the start of the project.
- Drag extra clips after it to build your sequence, or drop B-roll onto a track above the main video so it plays over the top.
- Add a music track or a voiceover on an audio track below the video. That keeps the sound separate from the picture, so it is easy to adjust later.
A few habits will save you time on every project in Instagram Edits for Mac. First, import everything you might use before you start cutting, so you are not hunting for files mid-edit. Second, keep your main story on the lowest video track and your overlays above it, so the structure stays clear when the timeline gets busy. Third, press the space bar to play and pause while you work — it is the fastest way to check a cut without reaching for the mouse. Once your clips are on the timeline, you are ready to make your first real edit.
Step 5: Make Your First Cut in Instagram Edits for Mac
Cutting is where a pile of clips becomes a video, and Instagram Edits for Mac keeps the tools simple enough for a complete beginner. You do not need to learn keyboard shortcuts or a complicated razor tool — the basics are click, drag and split.
The Four Basic Cuts Every Beginner Needs
Work through your first cut in this order:
- Trim the ends: click a clip to select it, then drag its left or right edge inward to cut off the shaky start or the awkward pause at the end. Most clips get much better when you trim the first and last second.
- Split in the middle: move the timeline cursor to the exact frame where you want a cut, select the clip, and use the split command. The clip becomes two pieces, and you can delete the boring middle or rearrange the order.
- Delete the dead air: watch each clip once and remove the pauses, the filler words and the moments where nothing happens. Short, tight clips hold attention far better than long, loose ones.
- Reorder freely: drag any clip left or right on the timeline to change the order of your story. Try putting your strongest moment first — the first two seconds decide whether a viewer keeps watching.
A good first project in Instagram Edits for Mac is a 30-second Reel made from five or six short clips. Cut each clip down to three or four seconds and put the hook first. Then watch the result from start to finish. If a cut feels jumpy, add a simple transition between the two clips, such as a quick fade or a cut on movement. The goal of this step is not perfection; it is to learn how fast you can go from raw footage to a watchable video when the timeline is big enough to see everything at once.
Step 6: Let an AI Agent Build Your Rough Cut in Instagram Edits for Mac
This is the step that makes Instagram Edits for Mac different from every other free editor. The desktop app includes an MCP interface — the Model Context Protocol, an open standard that lets an AI assistant call an app’s own tools directly — covering all of the tools inside Edits. In plain words, you can ask an AI agent to do the first pass of your edit for you, and then you take over and refine it by hand. Instagram’s head of product management for Edits, Matthew Simari, confirmed the desktop release includes this MCP interface, and creators can choose Meta’s Muse or another compatible agent to do the work.
Turn On the AI Agent Connection in Settings
The MCP connection is switched on in the Settings of Instagram Edits for Mac. Open Settings, look for the AI agent or MCP option, and enable it. You will be asked which agent you want to connect — Meta’s Muse is the natural choice if you already use it, but other agents that speak MCP can connect too. Keep in mind that at launch the Edits download page itself does not describe this feature in detail. Treat it as announced and rolling out rather than fully documented, and check Settings again after each weekly update if you do not see the option yet.
Ask the Agent to Build Your Rough Cut
Once the connection is live, the workflow is simple. Tell the agent where your clips are and what you want. For example, you can ask Muse to use the Edits MCP on a video stored in your Downloads folder and build a 30-second Reel from your three best clips, cutting out the pauses and adding captions. The agent can see your project, use the editor’s own tools, and assemble a rough cut on the timeline. You watch it happen, then you step in and fix anything that feels off — a cut that lands too early, a clip in the wrong order, a caption with a typo.
Take Back Manual Control and Refine
The agent is a starting point, not a replacement for your judgment. After the rough cut appears, go through it clip by clip in Instagram Edits for Mac and make it yours. Tighten a cut by a few frames, swap in a stronger opening shot, or change the pacing so the video matches your music. The best way to think about it is that the AI does the boring first hour of editing and you do the creative final ten minutes. That split is exactly why the MCP feature matters for beginners — it removes the blank-timeline fear that stops so many people from ever finishing a video.
This agent-first workflow is part of a much bigger shift in how software gets made and used. If you want to understand where AI agents are heading beyond video editing, the team at Agentic Affairs covers AI agents and automation in depth. It is a useful place to keep learning once you have your first rough cut done.
Step 7: Add Automatic Captions, Music and Sound
Most people watch Reels and Shorts with the sound off, which is why captions are not optional any more. Instagram Edits for Mac can generate captions automatically from the speech in your video, and adding music and sound effects takes only a few clicks.
Here is how to make your video watchable with or without sound:
- Automatic captions: select your video track and turn on automatic captions. Instagram Edits for Mac listens to the speech and writes the words on screen, timed to match what is being said. Read through the captions once and fix any word the AI misheard, especially names and brand words.
- Captions style: pick a caption style that is easy to read on a phone — large text, high contrast, and positioned where it does not cover faces. Short lines of two or three words at a time are easier to follow than a full sentence across the screen.
- Music: add a music track from the audio library, then lower its volume so it sits under your voice instead of fighting it. A good rule is that you should still hear every word clearly over the music.
- Sound effects: use a soft whoosh or pop on scene changes to make cuts feel intentional. One or two effects per video is enough — too many makes the edit feel noisy.
The mobile Edits app already had an AI creative assistant added in September 2026. The desktop version carries that same idea forward: the AI handles the repetitive work, such as caption timing, while you decide the look and the feel. Once captions, music and sound are in place, your video will already look far more professional than most of what scrolls past on Instagram every day.
Step 8: Color Grade and Polish with Keyframes in Instagram Edits for Mac
Color grading is what separates a flat phone clip from a video that looks filmed on purpose. Instagram Edits for Mac includes color grading tools and keyframes, so you can change the look of a clip over time instead of applying one flat filter to everything.
Fix Exposure First, Then Add Your Look
Try this simple polish pass on your first project:
- Fix exposure first: before you add any style, correct the basics. Brighten a dark clip slightly and pull back a clip that is blown out. Then make the brightness match across your clips, so the video does not flicker between light and dark shots.
- Add a consistent look: pick one color style for the whole video. Warm and bright suits a travel Reel, while clean and cool suits a product video. Apply it lightly to every clip. A light touch looks professional; a heavy filter looks like a mistake.
- Use keyframes for movement: keyframes let you change a setting at one point in time and have it shift gradually. For example, set a slow zoom-in on a still photo by placing one keyframe at the start and another at the end. You can also fade a clip’s brightness up as a scene begins.
- Keep text readable: if you add titles or labels, check them on a phone-sized preview. Text that looks fine on a Mac screen can be tiny on a phone, so make it bigger than you think you need.
This polish step is also where good videos become client-ready videos. Creators who edit for brands often work alongside a digital agency that handles the wider campaign, and a clean, well-graded edit is what makes your work easy for an agency or a client to approve. Even if you only edit for yourself, a consistent grade across your videos builds a recognizable style that followers start to remember.
Step 9: Export Watermark-Free 4K Video from Instagram Edits for Mac
Exporting is the moment many free editors ruin the experience — they stamp a watermark on your video or lock 4K behind a paid plan. Instagram Edits for Mac does neither. The desktop editor exports in 4K resolution with no watermark, completely free, which is the single most attractive feature of the whole launch for creators who post on more than one platform.
Export your finished video like this:
- Watch your whole video from start to finish in Instagram Edits for Mac before you export. Check the captions, the music level and the last frame, because fixing a mistake after export means exporting again.
- Click Export and choose 4K resolution. The app exports without a watermark, so the same file works on Instagram, TikTok and YouTube Shorts without advertising another editor.
- Pick a clear file name and save the video to a folder you can find easily, such as a dedicated Exports folder inside your project folder.
- Wait for the export to finish before closing the app. A 4K file takes longer than a 1080p file, especially for longer videos, so give it a minute or two.
One honest limit to remember: a 4K export makes a large file, so it will take longer to upload on a slow connection, and it will use more storage on your Mac. For most Reels and Shorts, 4K is still worth it. Platforms compress your video when you upload it, so starting from 4K means the compressed result still looks sharp. If you are in a hurry or on a slow connection, 1080p is a fine fallback for a quick draft.
Step 10: Publish Straight to Instagram and Reuse Your Video Everywhere
The last step is the easiest one. Instagram Edits for Mac supports publishing directly from the desktop editor, including features such as location tagging, so you can go from the timeline to a live Reel without moving files between devices.
Publish and reuse your video in this order:
- Click Share or Publish inside Instagram Edits for Mac and choose Instagram. Add your caption, hashtags and a location tag if the video is about a place.
- Pick a strong cover frame — the first frame is not always the best one, so scroll through and choose a frame with a clear face or a bold moment.
- Post it as a Reel, then check it on your phone to make sure the captions, the framing and the sound all survived the upload.
- Because your export has no watermark, upload the same 4K file to TikTok and YouTube Shorts as well. One edit, three platforms, no extra work.
There is one limitation to plan around: you cannot yet edit the same project across phone and desktop. Instagram says project hand-off is in development. For now, a project you start on your Mac stays on your Mac, and a project on your phone stays on your phone. Instagram also promises weekly updates to the desktop app, so check for new features often — cross-device editing is the most requested feature from testing, and it is the one most likely to arrive soon. Until then, pick your device at the start of each project and stick with it.
Instagram Edits for Mac vs CapCut vs iMovie
Instagram Edits for Mac arrives in a crowded field. It helps to see how it compares with the two free editors most beginners already know. The table below compares the features that matter most when you are choosing an editor for Reels and Shorts.
| Feature | Instagram Edits for Mac | CapCut Desktop | iMovie (Mac) |
|---|---|---|---|
| Price | Free, no paid tier listed | Free with paid Pro features | Free with every Mac |
| 4K export | Yes, watermark-free | Yes, some features need Pro | Yes, up to 4K |
| Watermark | None | None on most exports | None |
| Multi-track timeline | Yes | Yes | Single track only |
| AI agent editing (MCP) | Yes, via MCP | No agent connection | No |
| Automatic captions | Yes | Yes | No built-in auto captions |
| Direct Instagram publishing | Yes | No | No |
| Platform | Mac, Apple silicon only | Mac and Windows | Mac only |
The honest summary is simple. Instagram Edits for Mac wins for Instagram creators who want a free, watermark-free 4K editor with AI agent help and one-click publishing. CapCut still wins if you are on Windows or want its huge template library, and iMovie still wins for the simplest possible first edit. But if you own an Apple silicon Mac and your home is Instagram Reels, Instagram Edits for Mac is now the most obvious free choice, and the MCP agent support is something neither rival offers at all.
FAQ: Instagram Edits for Mac
Is Instagram Edits for Mac really free?
Yes. Instagram describes the desktop editor as free, and the download page lists no paid tier. You can download it, edit with the full multi-track timeline, and export watermark-free 4K video without paying anything. You only need a Mac with Apple silicon and an Instagram account to sign in.
Does Instagram Edits for Mac work on Windows or Intel Macs?
No. Instagram Edits for Mac runs only on macOS with Apple silicon, meaning an M1 chip or later. Intel Macs are not supported, and Instagram has not announced a Windows version or a release date for one. Windows users should keep using the mobile Edits app or another free desktop editor for now.
How do AI agents work in Instagram Edits for Mac?
The desktop app includes an MCP interface that lets an AI agent use the editor’s own tools. You turn the connection on in Settings and connect an agent such as Meta’s Muse. Then ask it to build a rough cut from your clips. The agent assembles the first pass on the timeline, and you refine it by hand afterwards. The feature was announced at launch, so check Settings after each weekly update if you do not see it yet.
Can I edit the same project on my phone and my Mac?
Not yet. Projects cannot move between the mobile and desktop versions of Edits at launch. Instagram says cross-device project editing is in development and is the most requested feature from testing, so it is likely to arrive in a future weekly update. For now, start and finish each project on one device.
Is Instagram Edits for Mac better than CapCut?
It depends on what you need. Instagram Edits for Mac is better for Instagram creators who want free watermark-free 4K export, direct publishing to Instagram, and AI agent rough cuts through MCP. CapCut is better if you are on Windows, want its template library, or need features that are still missing from the first version of Edits for Mac. Many creators will end up using both.
Do I need an Instagram account to use Instagram Edits for Mac?
Yes. The app requires you to sign in with an Instagram account before you can edit. Use the account you plan to publish from, especially if you manage a business or creator account, so your projects and your publishing stay connected.
Final Thoughts
Instagram Edits for Mac is the most interesting free video editor launch of late 2026, and not only because it is free. The multi-track timeline, the keyframes, the color grading and the watermark-free 4K export would already make it a strong choice for any creator with an Apple silicon Mac. The MCP connection for AI agents is what makes it feel like the future. A beginner can ask an agent to build the rough cut, learn from how the agent arranged the clips, and then take over to finish the video by hand. That is a completely different learning curve from staring at an empty timeline.
The first version has real limits — Mac only, Apple silicon only, no cross-device projects yet, and an agent feature that is still rolling out. None of those limits should stop you from downloading it today. Install Instagram Edits for Mac and cut one short Reel this week. Let the AI agent build your first rough cut, and see how much faster editing feels when the timeline is big, the export is free, and the first pass writes itself.
Explore More Free AI Tools
Want to keep building your creator toolkit? Try our other free AI tools on AIToolSteps. Use the AI Title Generator for video titles that get clicked, the Meta Description Generator for pages that rank, the AI Rewriter for polishing captions and scripts, and the Keyword Density Checker for keeping your descriptions SEO-friendly. Every tool is free, and every one of them pairs perfectly with the videos you will now be editing in Instagram Edits for Mac.