

Every Mac user knows the feeling. You remember a file — a contract, a logo, a spreadsheet from last month — but you cannot remember where you put it. You open Finder, click through folder after folder, and five minutes later you are still searching. Voyager AI was built to end that hunt.
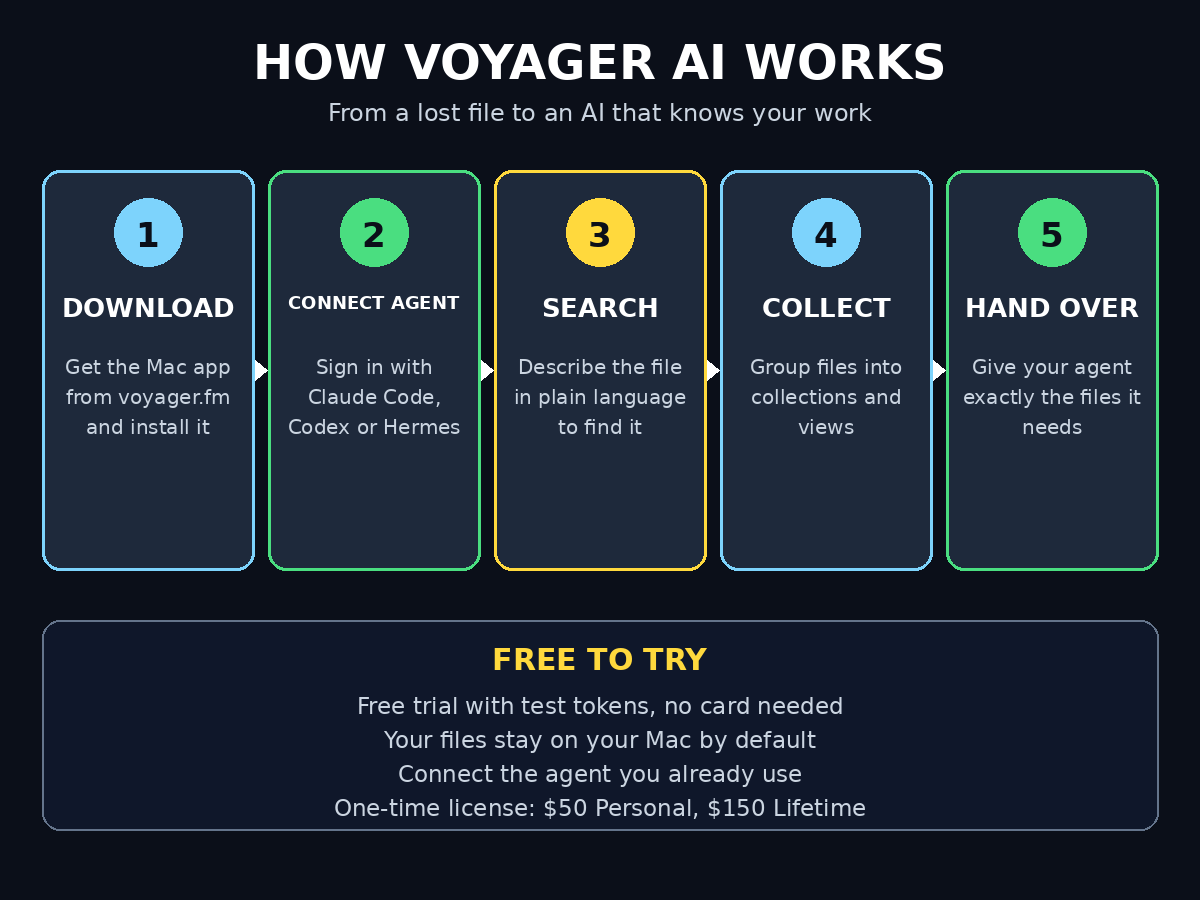
Voyager is an agentic file browser for macOS that launched on Product Hunt on November 9, 2026, where it finished #6 Product of the Day. Instead of forcing you to remember exact folder paths, it lets you describe what you need in plain language, find it in seconds, and hand exactly the right files to the AI coding agent you already use — Claude Code, Codex, or Hermes. Your files stay on your computer, and the agent works with the context you choose.
In this beginner’s guide, you will learn how to use Voyager AI step by step: installing it, connecting your AI agent, searching in plain language, organising files into collections, and using it in everyday work. No technical background needed. If you can describe a file in one sentence, you can use Voyager.
Step 1: What Is Voyager AI and Why It Is Different From Finder
Voyager is a Mac file manager built around a simple idea: your files are not messy, they are just stuck in the wrong system. Folders force one rigid structure on work that is naturally messy — the same invoice belongs to a client, a month, and a project at the same time. Voyager replaces that single hierarchy with properties and reusable collections, so one file can live in many views without being copied three times.
On top of that, Voyager is agentic. It connects to the AI agent you already run on your Mac — Claude Code, Codex, or Hermes — and lets that agent work with the files you select. You find the files, you choose what the agent should see, and the agent does the work: summarising a folder of PDFs, renaming a batch of photos, or pulling the right documents into a coding task.
One important clarification before you download anything: there are two different products called Voyager in the AI world right now. The one in this guide is the file browser at voyager.fm, made for everyday file work on macOS. The other, at voyager.so, is a creative-agent harness from Nullframe that drives Photoshop and Premiere. They are unrelated products with similar names, so make sure you land on voyager.fm.
Why beginners love Voyager:
- Search in plain language. Type “the invoice I sent to Sara last month” instead of remembering a filename or folder path.
- Collections, not copies. Group files by project, client, or status without duplicating anything on disk.
- Your agent, your files. Connect the Claude Code, Codex, or Hermes agent you already use, and give it exactly the context it needs.
- Your files stay on your Mac. Voyager is a desktop app, and your documents are not uploaded to a cloud by default.
- Free to try. A free trial with test tokens lets you test the workflow before paying anything.
Step 2: Check What You Need Before You Start
Voyager is light on requirements, but it is Mac-only, so check the list before you download.
- A Mac running macOS 13 or later. Voyager is built for current Mac systems, and there is no Windows or Linux version.
- About 10 minutes. Download, install, and the first connection take less than a quarter of an hour.
- An AI agent sign-in (optional but recommended). To use the agent features, connect Claude Code, Codex, or Hermes — the same agent you already use on your Mac. If you do not have one yet, you can still use Voyager as a smart file browser and connect an agent later.
- Your own AI provider key (for automation features). Voyager supports bring-your-own-key setup, so automation runs on your own provider instead of hosted credits.
One honest note: Voyager is a young product in active development. Its roadmap lists tab browsing, split panes, semantic search, and a full file-management agent — some of those are still arriving. The core workflow in this guide — search, collections, and handing files to your agent — already works today.
Step 3: Download and Install Voyager AI on Your Mac
Getting started takes about five minutes, and there is no account wall before you can try the app.
- Open voyager.fm in your browser. This is the official download page for the file browser. Double-check the address — remember the similarly named creative tool lives elsewhere.
- Download the Mac app. Voyager ships as a DMG download for macOS. Click the download button and wait for the file to finish.
- Open the DMG and drag Voyager to Applications. This is the standard Mac install flow: double-click the downloaded file, then drag the Voyager icon into your Applications folder.
- Launch Voyager and grant folder access. On first launch, macOS asks which folders Voyager may read. Start with your Documents and Downloads folders — you can add more later from settings. Voyager can only see what you allow it to see, which is exactly how it should be.
- Let the first scan finish. Voyager indexes the folders you approved so plain-language search works instantly later. On a typical Mac this takes a couple of minutes in the background.
Tip: do not approve your entire home folder on day one. Start with two or three working folders, learn the workflow, and widen access once you trust the tool. A smaller index is also faster while you are learning.
Step 4: Connect Claude Code, Codex or Hermes as Your Agent
The agent connection is what turns Voyager from a nicer Finder into a genuinely different tool. You are not renting a new AI — you connect the agent you already use and pay for, and Voyager becomes the place where that agent meets your files.
- Open Settings, then the Agents section. You will see the supported agents listed: Claude Code, Codex, and Hermes.
- Pick the agent you already use. If you write code with Claude Code, pick Claude Code. If your workflow runs on Codex, pick Codex. There is no wrong choice — you can connect more than one and switch between them.
- Sign in with your existing account. Voyager connects to the agent through your own sign-in, so your existing subscription or plan carries over. Voyager does not bill your Claude or ChatGPT subscription separately.
- Choose what the agent may touch. Start narrow: allow the agent to read the folders you approved in Step 3, and keep write access off until you have watched it work a few times. You can loosen permissions later once you trust a workflow.
- Run a tiny test task. Ask the agent to summarise one small folder, for example “summarise the three PDFs in my Invoices folder.” If the summary is correct, the connection works.
If you do not have any of these agents yet, skip this step for now. Voyager still works as a fast, collection-based file browser, and you can connect an agent whenever you are ready.
Step 5: Find Any File with Plain-Language Search
This is the feature you will use every day, and it is the easiest to learn. Forget filenames. Describe the file the way you would describe it to a colleague.
- Click the search bar and type a sentence. Try “the presentation I made for the March product launch” or “photos from the beach trip with Sara.”
- Refine with properties. Voyager files carry properties — type, date, project, client — and you can filter by them. “Invoices from October, over $500” narrows a hundred files to a handful.
- Preview before you open. Click any result to preview it in place. You can check a document, image, or PDF without launching another app.
- Save searches you repeat. If you look for “unpaid invoices” every Friday, save that search. Next Friday it is one click.
A good habit: when a search works well, save it immediately. A personal library of saved searches becomes one of the most valuable things in Voyager within a week, because your future self searches for the same things your present self does.
Step 6: Organise Files into Collections and Property Views
Collections are Voyager’s answer to folders. A collection is a reusable view — a set of files grouped by meaning, not by location on disk. The same file can sit in a “Q4 Launch” collection, a “Client: Sara” collection, and an “Urgent” collection at the same time, without being copied.
- Create your first collection. Pick a real project, for example “Website Redesign” or “Tax 2026”, and add the files that belong to it — wherever they currently live on disk.
- Use natural language to build a collection. Describe the collection in a sentence, such as “all contracts signed this year”, and Voyager assembles the matching files for you to review.
- Add properties that matter to you. Tag files with a client, a status, or a deadline. Properties turn a pile of files into a small database you can sort and filter.
- Switch views by task. The same folder can be viewed as a grid of images, a table of invoices sorted by amount, or a list of documents sorted by date. Pick the view that fits the job in front of you.
- Review before you trust it. When Voyager builds a collection automatically, scan the results once and remove anything that does not belong. The tool learns from your corrections.
Start with three collections at most: one active project, one recurring admin job (like invoices or receipts), and one personal group (like travel or photos). Three good collections teach you the system faster than twenty half-finished ones.
Step 7: Hand Files to Your AI Agent as Context
This is where Voyager earns its name as an agentic file browser. Instead of copying file paths into a chat window, you select files in Voyager and hand them to your agent as working context.
- Select the files the task needs — nothing more. Open a collection, tick the relevant files, and send them to your connected agent. Giving the agent ten files instead of a thousand means faster, more accurate answers.
- Ask for a concrete outcome. “Summarise these five meeting notes into action items” beats “look at these files.” The clearer the outcome, the better the result.
- Review the agent’s work in Voyager. Results come back alongside the files they came from, so you can check the source instead of trusting a summary blindly.
- Use it for real team workflows. A small studio preparing a client report can hand the agent the brief, the last three reports, and the new data — and get a first draft that already sounds like their own work. If you run a small agency and want this kind of file-to-delivery workflow set up properly, a digital agency can help you design it around the tools you already use.
For anyone following the wider shift toward agents that do real work, the agentic AI coverage at Agentic Affairs is a useful place to see how tools like Voyager fit into the bigger picture of agent-powered workflows.
Step 8: Everyday Workflows — Rename, Sort and Clean Up
Beyond search and collections, Voyager speeds up the boring file chores that eat a little time every day.
- Batch rename with the agent. Select a folder of photos named IMG_4821.jpg and ask the agent to rename them by date and event. Check the preview, then confirm.
- Sort a messy Downloads folder. Ask Voyager to group the folder by type — installers, PDFs, images — and move each group into a collection for review before anything is moved on disk.
- Find duplicates before they multiply. Search for files with the same name or size, review them side by side, and delete the copies you do not need.
- Archive finished projects. When a project ends, move its collection to an archive view instead of deleting it. The files stay searchable, but they stop cluttering your daily views.
The golden rule for every automated file action: preview first, confirm second. Voyager shows you exactly what will change before anything moves, and that preview is your safety net. Never approve a bulk rename or move without reading it.
Step 9: Keep Your Files Private — Permissions and What Voyager Sees
Handing files to an AI agent raises an obvious question: what leaves your computer? With Voyager the answer is refreshingly short.
- Your files stay local by default. Voyager is a desktop app, and your documents are not uploaded to a Voyager cloud. The app’s own FAQ says projects and files stay on your computer.
- Only the task’s context goes to the model. When a task needs a model, the agent sends that provider the files and context the task uses. That is why Step 7 says to select only the files the task needs — less context means less shared.
- Keep sensitive folders out. Do not approve folders with passwords, private keys, or medical records. If a folder should never reach any AI, do not give Voyager access to it at all.
- Review permissions monthly. As your work changes, so should your approvals. A five-minute monthly review — which folders, which agent, which permissions — keeps the setup honest.
- Read the agent’s output before sharing it. A summary that quotes a private file is only as safe as where you paste it. Check before you forward anything outside your team.
Step 10: Pro Tips, Limits and When Finder Still Wins
Voyager is excellent at finding and organising, but it is not a replacement for everything. Knowing the edges keeps you fast.
- Use Finder for the basics. Quick file moves, AirDrop, and system tasks are still faster in Finder. Voyager is for finding, grouping, and agent work — not for every click.
- Keep collection names boring. “Invoices 2026” beats “Important Stuff!!” every time. Boring names are searchable names.
- Let the roadmap set expectations. Tab browsing, split panes, semantic search, and a full file-management agent are on the roadmap. If a feature you want is not there yet, check the changelog before assuming it will never arrive.
- Price it honestly. The core app is a one-time purchase — a Personal license is $50 and a Lifetime license is $150 — with test tokens for a free trial so you can try the workflow first. Bring-your-own-key setup lets automation run on your own AI provider instead of hosted credits. Check the pricing page at voyager.fm before you buy, because young products adjust prices after launch.
- Check the launch context. Voyager launched on Product Hunt on November 9, 2026 and finished #6 Product of the Day with 176 upvotes — a solid debut for a file tool, and a sign the maker is actively listening to early users.
Voyager AI vs Finder vs Spotlight: Which Should You Use?
Most Mac users already have Finder and Spotlight. Here is how Voyager compares, so you can decide when each tool earns its place.
| Feature | Voyager AI | macOS Finder | Spotlight |
|---|---|---|---|
| Plain-language search | Yes — describe the file in a sentence | Basic filename and tag search | Yes, but mostly by name and content |
| Collections and views | Yes — properties and reusable collections | Smart Folders only | No |
| Hand files to an AI agent | Yes — Claude Code, Codex, Hermes | No | No |
| Batch rename and organise | Yes, with agent help and preview | Manual, one by one | No |
| Price | Free trial, then $50 one-time | Free with macOS | Free with macOS |
| Best for | Finding and agent-powered file work | Everyday moves and system tasks | Opening a known file fast |
The honest answer is that you will use all three. Spotlight opens the file you already know. Finder moves the file you can see. Voyager finds the file you forgot and hands it to the agent that can do something with it. Each tool has a job; Voyager’s job is the one the other two cannot do.
Frequently Asked Questions About Voyager AI
Is Voyager AI really free?
There is a free trial with test tokens, so you can test the full workflow before paying. The core app itself is a one-time purchase — a Personal license costs $50 and a Lifetime license costs $150 — and bring-your-own-key setup lets automation run on your own AI provider. There is no permanent free tier for the paid app, so try the trial first and check the current pricing at voyager.fm.
Does Voyager AI work on Windows?
No. Voyager is a macOS-only app and requires macOS 13 or later. There is no Windows or Linux version listed. If you work on Windows, you will need a different file tool for now.
Which AI agents can I connect to Voyager?
Voyager connects to the agents you already use on your Mac: Claude Code, Codex, and Hermes. You sign in with your existing account, and Voyager does not bill your Claude or ChatGPT subscription separately.
Is Voyager AI the same as the Voyager creative agent?
No, and this is the most common confusion. Voyager at voyager.fm is the agentic file browser in this guide. Voyager AI at voyager.so is a separate creative-agent tool from Nullframe that drives apps like Photoshop and Premiere Pro. Same name, different products, different websites.
Are my files uploaded to the cloud?
By default, no. Voyager is a desktop app and your files stay on your Mac. When a task needs a model, the agent sends that provider only the files and context the task uses — which is why you should select only the files a task needs and keep sensitive folders out of Voyager entirely.
Do I need coding skills to use Voyager?
No. Searching, building collections, and handing files to an agent all happen in plain language. If you can describe a file in one sentence, you can use Voyager. The agent features are optional — the file browser works fine on its own.
Final Thoughts
Finder has not changed much in years, but the way we work with files has. We juggle more projects, more formats, and more AI tools than ever, and the folder tree from 1995 is not keeping up. Voyager AI is a serious attempt to fix that — not by adding another cloud drive, but by making the files already on your Mac searchable in plain language, organisable into collections that match how you actually think, and ready to hand to the AI agent you already trust.
Start small: install it, approve two folders, connect your agent, and build three collections. Use it for a week on real work — finding the invoice, grouping the project files, asking the agent to summarise the meeting notes. If the plain-language search saves you even ten minutes a day, it has earned its place on your Mac. And if it does not, the free trial costs you nothing but an afternoon.
The file browser is finally catching up with the AI era. Voyager is one of the first tools to show what that looks like — and for Mac users who live in their files, it is well worth a try.
Explore More Free AI Tools
Found this guide useful? Keep exploring with our free tools at AIToolSteps: try the AI Title Generator for headlines that get clicks, the Meta Description Generator for search snippets, the AI Rewriter to refresh old content, and the Keyword Density Checker to keep your articles SEO-friendly. Every tool is free, and every guide on this site follows the same beginner-friendly steps.