
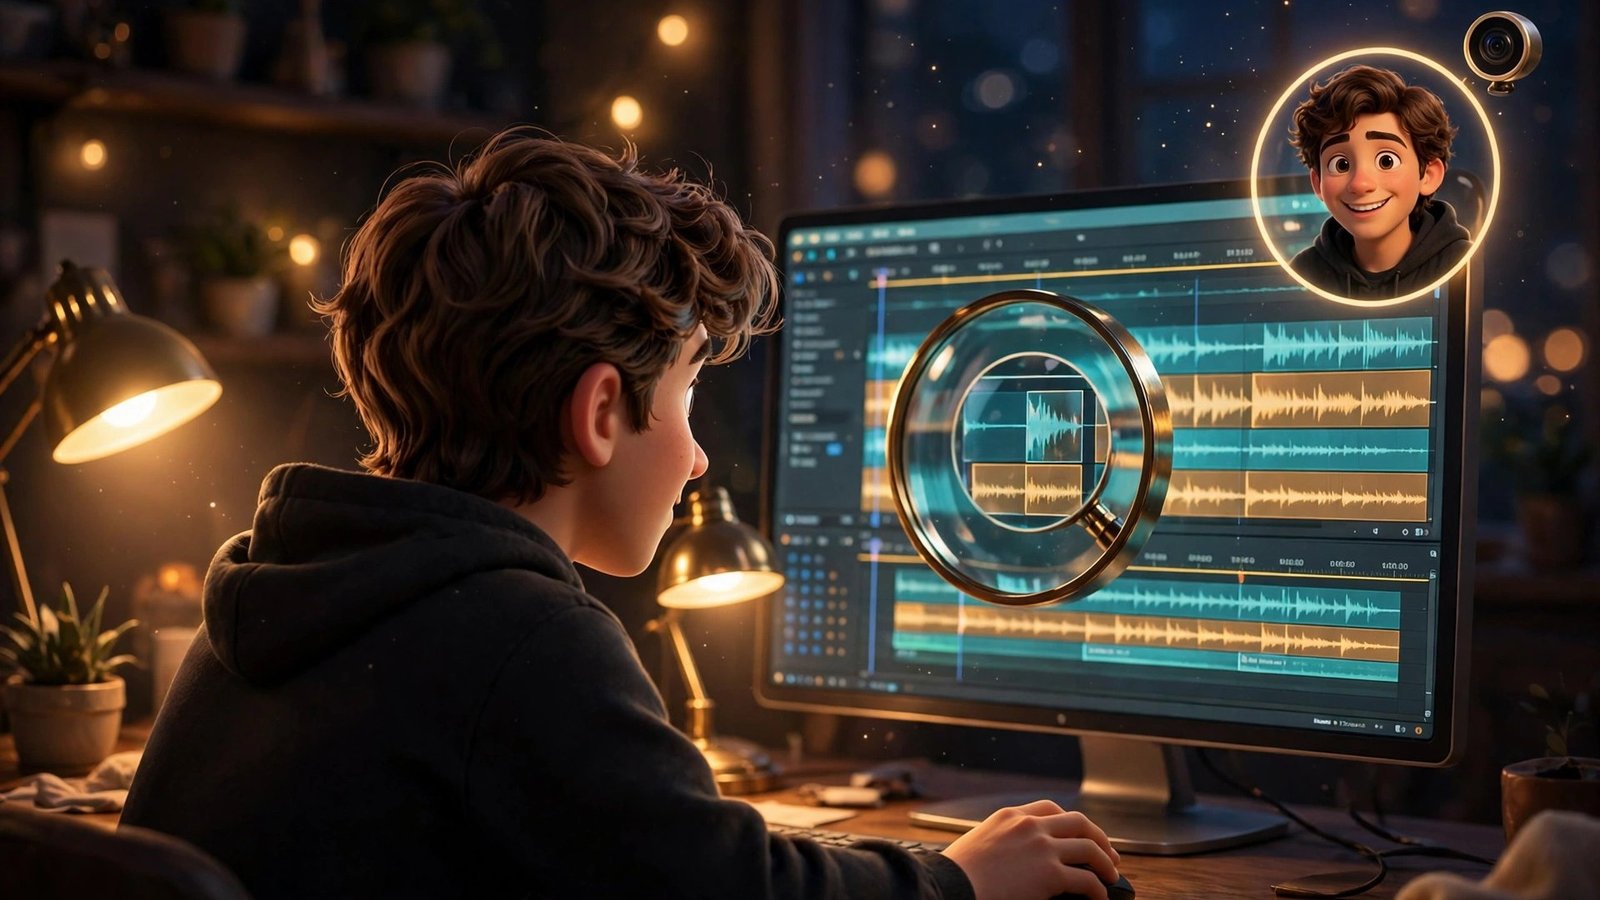
If you have ever recorded a screen tutorial on your Mac and then opened the raw footage, you know the sinking feeling. The cursor wanders, the important click is a tiny speck in a corner, your webcam blocks half the screen, and the “ums” pile up. Fixing all of that in a normal video editor can take three times longer than the recording itself. Screen Studio 4.0 AI exists to delete that second job.
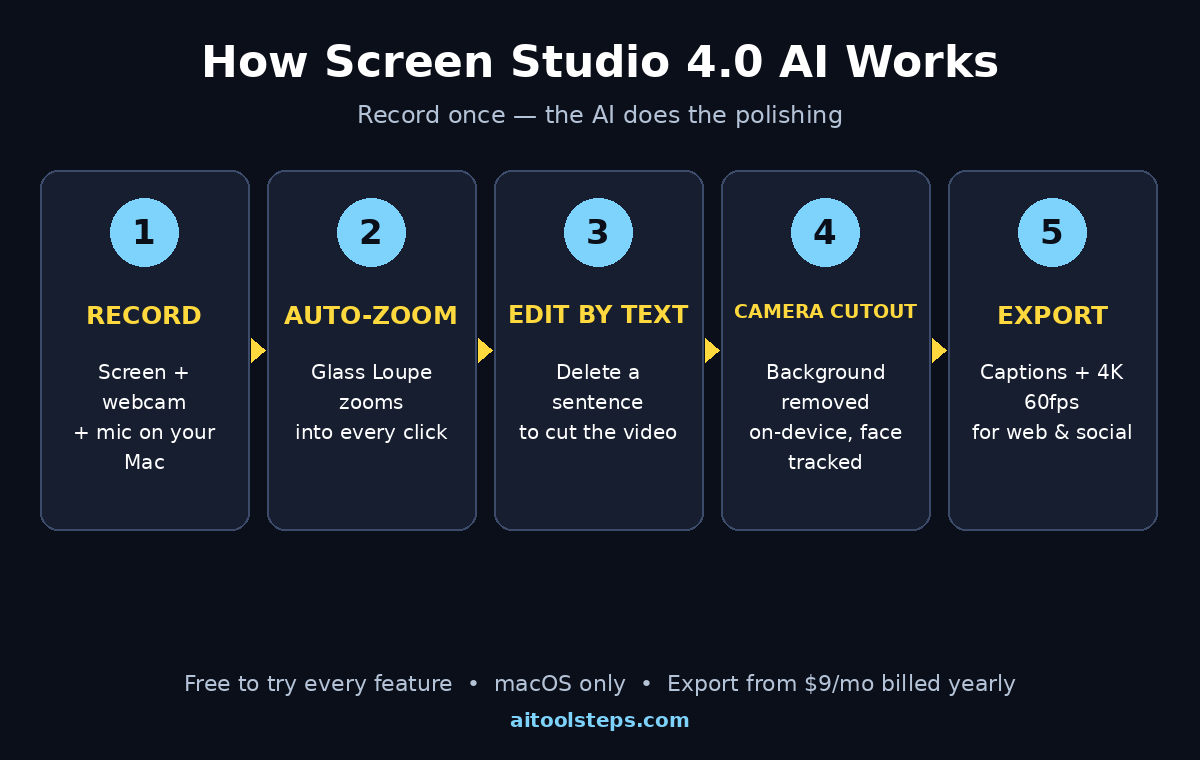
Released on 1 November 2026 and ranked the number one product on Product Hunt the same day, Screen Studio 4.0 is a screen recorder and editor for macOS that does the polishing for you. It automatically zooms into what you click, smooths your cursor, cuts out your webcam background, and lets you edit the whole video by editing its transcript — delete a sentence and the video cut follows. Everything heavy runs on your Mac, so your recordings and transcripts never have to leave your machine.
In this beginner guide, you will learn exactly how to use Screen Studio 4.0 AI from your first download to your first finished video: how to record a clean demo, how the new Glass Loupe zoom and Camera Cutout work, how to edit by transcript, and how to export a polished video for YouTube, your website, or social media. No video editing experience is needed, and you can try every feature free — only exporting a finished video needs a paid plan.
Step 1: Understand What Screen Studio 4.0 AI Actually Is
Screen Studio is an opinionated screen recorder for macOS. That is a compliment. Instead of giving you a blank timeline and a hundred buttons, it makes the decisions a good editor would make: where to zoom, when to show your face, how fast the cursor should move, and how the finished video should look.
The 4.0 release adds three headline features on top of that automation:
- Glass Loupe — a new zoom style that magnifies part of the screen inside a clean, glass-like lens instead of zooming the whole frame. It keeps the context of the full screen visible while the detail pops.
- Camera Cutout — removes your webcam background locally on your Mac and lets you place yourself anywhere in the frame, like a floating presenter over your app.
- Edit by Transcript — every recording gets a transcript generated on your Mac. Edit the text and the video edits itself.
Around those, the app keeps its core automation: automatic zooms that follow your clicks, cursor smoothing and click effects, filler-word and silence removal, on-device captions, and exports up to 4K at 60 frames per second. You can also record an iPhone or iPad over a USB cable, with the device frame rendered around the footage automatically.
One thing to know before you start: Screen Studio runs only on macOS. There is no Windows version, and the developers have said there are no near-future plans for one. If you are a Mac user who makes product demos, tutorials, courses, or launch videos, this tool is built for you. If you record on Windows, look at the comparison table near the end of this guide for alternatives.
Step 2: Download Screen Studio and Set It Up in Five Minutes
Getting started is quick, and you can explore the whole editor before paying anything.
- Open screen.studio in your browser and download the macOS app. Install it like any other Mac app.
- Grant the permissions it asks for. macOS will ask for screen recording permission and, optionally, microphone and camera access. Grant screen recording and microphone at least — without them, the app cannot do its job. You can change these later in System Settings under Privacy and Security.
- Choose a look. Screen Studio calls its visual presets “looks”. Pick one that matches your brand: a dark background with generous padding looks professional for product demos, while a light, minimal look suits help-centre videos. Every new recording starts from your last look, so your videos stay consistent without extra work.
- Check your audio. Pick your microphone in the recording bar and speak a test sentence. The app normalises your voice volume and removes background noise automatically, so a decent USB microphone in a quiet room is all you need.
- Record a 30-second test. Record yourself opening any app and clicking around. Stop, watch the automatic zooms appear, and export nothing yet — this test simply teaches you how the app thinks.
A practical tip for teams: if you make videos for clients or for a product that has not launched yet, the offline-first design matters. Recordings, projects, transcripts, captions, voice enhancement, face tracking, and camera cutouts all run on your Mac. Cloud features such as shareable links and AI voiceover are optional, and the app tells you before anything leaves your machine.
Step 3: Record Your First Demo the Right Way
Good recordings start before you press the record button. Screen Studio can fix a lot, but it cannot fix a confused script.
Write a short outline first. List the three to five things the viewer should be able to do after watching. One screen, one idea, one click at a time. If you are showing a product, write the exact clicks in order and rehearse them once. A two-minute rehearsal saves twenty minutes of re-recording.
Choose what to record. You can record your full screen, one app window, or a selected area. For tutorials, record one app window — it hides your notifications and keeps the frame focused. For a product tour, record the full screen so the viewer sees the whole journey.
Decide about your camera. You can record with your webcam as a full-screen intro, as a small overlay, split-screen beside your app, or cut out entirely from its background. Camera Cutout is the most flexible choice: your face floats over the screen without a boxy rectangle behind it, and face tracking keeps you centred if you move. Turn the camera off for silent walkthroughs — you can add an AI voiceover later.
Speak while you record, naturally. Do not worry about saying “um” or pausing to think. The transcript editor removes filler words and long silences in one pass later. What matters is that you say the key sentence clearly at the moment you perform the action on screen, so the transcript and the visuals line up.
Press record and go slowly. Move the cursor deliberately and pause half a second after each click. Those pauses are what the automatic zoom uses to decide what matters. Fast, jittery mouse movement is the one thing the app cannot fully rescue.
Step 4: Let Automatic Zoom and Cursor Smoothing Do the Editing
This is the step that saves most of your time. When you stop recording, Screen Studio has already applied its automatic treatment: zooms on your clicks, smoothed cursor movement, click effects, and a clean background with padding and a shadow.
Watch the auto-zoom first. Play the video and notice how it zooms into buttons, menus, and text fields as you use them, then zooms back out. The zoom follows the action, so the viewer never has to squint at a full desktop screenshot.
Try the Glass Loupe zoom. In 4.0, you can switch a zoom from the classic full-frame style to Glass Loupe. The loupe magnifies a circular or rounded area like a magnifying glass while the rest of the screen stays visible in context. It is ideal when you want to show a small detail — a settings toggle, a price, a line of code — without losing the surrounding interface. Use it sparingly: one or two loupe moments per video keeps the effect special.
Adjust a zoom by hand. Click any zoom on the timeline and drag its handles to change where it points or how close it gets. You can also add a manual zoom anywhere: place the playhead, click the zoom button, and frame the area yourself. Manual zooms are useful for moments the automation missed, like a hover state or a tooltip.
Tidy the cursor. If your cursor still jumps, increase the smoothing. You can hide the cursor when it sits idle, add a subtle click ripple so viewers see exactly where you clicked, or change the cursor style entirely. For fast typing sequences, speeding up that section of the timeline often looks better than watching every keystroke in real time.
Step 5: Edit Your Video by Editing Its Transcript
This is the feature that surprises new users most. Screen Studio transcribes your recording on your Mac using Whisper or Apple speech recognition — no audio is sent to a server — and opens the transcript beside the video.
Delete a sentence to cut it. Click into the transcript, select the sentence you do not want, and delete it. The video cuts at exactly that point. You can remove a whole rambling explanation the same way you would delete a paragraph in a document. This turns editing from timeline surgery into proofreading.
Remove filler words and silences in one click. Select the transcript and use the filler-removal action. The app finds the “ums”, “uhs”, and long pauses and tightens them automatically. Your delivery suddenly sounds confident, and the video gets shorter without losing any content.
Trim and speed up the rest. If a section drags, select its transcript lines and raise the playback speed for that part only. Slow, careful clicks stay at normal speed; waiting for a page to load can run at double speed. The viewer feels the pace without noticing the trick.
Fix a mistake without re-recording. If you misspoke one word, you can often cut just that word from the transcript instead of recording the whole take again. For a bigger mistake, record a short replacement clip and drop it in — the app keeps the look and framing consistent.
For creators who publish tutorials alongside their videos, this transcript is also the raw material for the written guide. Export it, tidy it, and you have the first draft of a help article — the same workflow we use here at AI Tool Steps to turn recordings into the step-by-step guides on this site.
Step 6: Use Camera Cutout to Put Yourself in the Scene
Camera Cutout is the 4.0 feature that changes how your videos look. Instead of a webcam rectangle in a corner, your figure is separated from its background on your Mac and placed over the screen recording.
Turn it on in the camera settings. Choose the Camera Cutout layout. The app removes your background locally — no green screen, no cloud upload — and you can resize and drag yourself to any corner, or centre yourself for an intro and outro.
Keep yourself small during the work. A good rule is to stay under a fifth of the frame while you demonstrate something, and grow larger when you are explaining a concept or welcoming the viewer. The app can hide your camera automatically during silence, so your face does not float on screen while nothing is being said.
Let face tracking help. If you lean or move while talking, face tracking keeps your head centred in the cutout instead of drifting toward the edge. It is subtle, and the viewer only notices it when it is missing.
Mind your lighting. Cutout quality depends on contrast between you and what is behind you. Sit facing a window or a lamp, with a plain wall behind you, and the edge of the cutout stays clean. A busy bookshelf behind you makes the separation harder and the edges noisier.
Step 7: Add Captions, Sound, and an AI Voiceover
Sound and captions are where a good recording becomes a professional one.
Turn on captions. Screen Studio generates captions from the same on-device transcript, so your video is watchable with the sound off — which is how most social media viewers watch. Check the spelling of product names and technical terms in the transcript first, because captions inherit any transcription error.
Clean up the audio. Voice enhancement normalises your volume and removes background hum. If you recorded in a noisy room, the Podcast mode setting tightens the sound further. Keep your original audio if it already sounds good; enhancement is a safety net, not a requirement.
Add an AI voiceover for silent videos. If you recorded without narration — a common choice for short social clips — you can generate an AI voiceover from a script. Type or paste the words, pick a voice, and the narration is placed over the video. This is a cloud feature, so the app will confirm before sending your script out. It is also the fastest way to make a version of your video in another language.
Add a quiet music bed if you want one. Screen Studio does not ship a music library, so bring your own royalty-free track. Keep it low under narration — the voice should always win — and cut the music out entirely under key instructions, so nothing competes with the words that matter.
Step 8: Choose the Right Layout, Background, and Export Settings
Before you export, check the frame. This is the difference between a video that looks recorded and a video that looks designed.
Match the layout to the destination. A 16:9 landscape layout suits YouTube and your website. A vertical 9:16 layout suits TikTok, Instagram Reels, and Shorts — Screen Studio reframes the recording for vertical automatically, keeping the zoomed area centred. A square layout works for feeds where landscape would be cropped.
Set the background. The padding around your screen recording is part of the design. Use your brand colour, a soft gradient, or a subtle wallpaper that matches your site. If your recordings live on a company website, matching the background to the site’s theme makes the video feel native instead of pasted in.
Pick your export quality. Export presets cover web, social media, and full quality. For a tutorial that lives on your site, export up to 4K at 60 frames per second if your Mac can handle it; for a quick social clip, 1080p is plenty and the file stays small. You can also export an animated GIF for a short looping demo, or copy the video straight to the clipboard to paste into a message or document.
Share with a link when you need feedback. Screen Studio can create a shareable link with comments tied to the exact second and a view count, which is useful when a teammate or client needs to review a demo before it goes public. For a deeper look at building a content workflow around your videos, a good digital agency can help you turn one recording into a full launch campaign, from landing page to social cut-downs.
Step 9: Record an iPhone or iPad Demo Over USB
Mobile demos are where many screen recorders fall apart. Screen Studio handles them cleanly.
- Plug your iPhone or iPad into your Mac with a USB cable and unlock the device.
- Choose the device as a recording source. Screen Studio detects the model automatically and draws the correct device frame around the recording.
- Record taps and swipes the same way you record clicks. Automatic zoom follows your taps, so small buttons stay readable.
- Edit by transcript as usual. The same transcript, zoom, and caption tools work on mobile recordings.
This is genuinely useful for app developers and for anyone who teaches mobile workflows. Instead of pointing a camera at a phone — with glare, shake, and reflections — you get a pixel-perfect recording with the phone frame rendered in. For teams that need a steady stream of these videos, pairing the tool with AI automation services can handle the repetitive parts of publishing: scheduling, captions, and distribution across channels.
Step 10: Build a Repeatable Workflow So Every Video Takes Minutes
The real win with Screen Studio 4.0 AI is not one video. It is the tenth video, when your setup is already done and your process is a checklist instead of a project.
Save your look as the default. Once your background, padding, shadow, and camera layout are set, every new recording inherits them. Your tenth video matches your first without you thinking about it.
Create a template project. Keep a project with your intro card, your outro, and your caption style. Duplicate it for each new video instead of starting from nothing.
Record in batches. Record three short demos in one sitting while your microphone and lighting are already set up. Edit them by transcript one after another — the second edit is always faster than the first, because you already know the rhythm.
Keep a transcript archive. Save the transcripts of your best videos. They become help-centre articles, email answers, and social posts. If you liked this guide, the same idea applies to other tools we cover: see our guide to Riverside Agents AI for turning one recording into clips and posts, and our Framer AI Agents guide for building the landing page your video links to.
Review once, then ship. Watch the finished video from start to finish with sound on. Check that the zooms land on the right element, the captions are spelled correctly, and your camera never covers a button you are clicking. One full watch-through catches more problems than ten spot checks.
Screen Studio vs Loom vs Camtasia: Which One Fits You?
| Feature | Screen Studio 4.0 | Loom | Camtasia |
|---|---|---|---|
| Best for | Polished demos and tutorials on Mac | Fast async team messages | Full courseware with quizzes |
| Automatic zoom | Yes, with new Glass Loupe style | No | Manual keyframes only |
| Edit by transcript | Yes, on-device | Basic transcript editing | No |
| Camera background removal | Yes, Camera Cutout on-device | No | Green screen only |
| Free option | Every feature free to try; export needs a paid plan | Free starter plan, 25 videos | Free trial, then one-time purchase |
| Starting price | $29/month or $9/month billed yearly ($108/year) | $0 starter; $18/user/month Business | One-time purchase, higher upfront |
| Platforms | macOS only | Web, Mac, Windows | Mac and Windows |
| iPhone/iPad recording | Yes, over USB with device frame | No | Limited |
| Offline-first | Yes, core features on-device | Cloud-based | Yes |
If your goal is a polished public video and you work on a Mac, Screen Studio is the strongest choice. If your goal is a quick message to a colleague, Loom is faster. If you build long courses with quizzes and callouts, Camtasia is the deeper editor. The honest answer is that most creators end up using two of the three for different jobs.
Frequently Asked Questions
Is Screen Studio 4.0 AI free?
You can try every feature of Screen Studio free, including Glass Loupe, Camera Cutout, and edit by transcript. Exporting a finished video needs a paid plan: $29 per month, or $9 per month billed yearly at $108 per year. Both plans include all features and shareable links.
Does Screen Studio work on Windows?
No. Screen Studio is made for macOS only, and the developers have said there are no near-future plans for a Windows version. Windows users should look at Camtasia or Loom, or record on a Mac if one is available.
What is Glass Loupe in Screen Studio 4.0?
Glass Loupe is a new zoom style in version 4.0. Instead of zooming the whole frame, it magnifies a rounded area of the screen like a magnifying glass while the rest of the screen stays visible. It is best for highlighting small details — a toggle, a price, or a line of code — without losing context.
Does Screen Studio send my recordings to the cloud?
No, not by default. Recordings, transcripts, captions, voice enhancement, face tracking, and camera cutouts all run on your Mac. Cloud features such as shareable links, shared projects, and AI voiceover are optional, and the app tells you before anything leaves your machine.
Can I edit a video without knowing video editing?
Yes. That is the point of the tool. You edit the transcript like a document, and the video follows. Deleting a sentence cuts the video, removing filler words tightens your delivery, and the automatic zooms handle the visual polish. Most beginners finish their first polished video in under an hour.
Can I record my iPhone screen with Screen Studio?
Yes. Connect your iPhone or iPad to your Mac with a USB cable, choose the device as the recording source, and Screen Studio records it with the correct device frame, automatic zoom, and the same transcript editing tools as a Mac recording.
Final Thoughts
Screen Studio 4.0 AI does not try to be a full video editor, and that is why it works. It takes the four jobs that used to eat your evening — zooming, cursor cleanup, transcript editing, and camera framing — and turns them into defaults. You record once, fix the words in the transcript, and export a video that looks like someone spent a day on it.
Start small. Record one short demo today, try the Glass Loupe zoom on one detail, cut one sentence from the transcript, and export it. Once you feel how fast that loop is, build your template and your look, and make the next video the same way. The tool rewards routine: the more you record, the less each video costs you in time.
If you make tutorials, product demos, or course videos on a Mac, Screen Studio 4.0 is the fastest route from a raw recording to a video you are proud to publish.
Explore More Free AI Tools
Want to keep building your content toolkit? Try these free tools from AI Tool Steps: the AI Title Generator, the Meta Description Generator, the AI Rewriter, and the Keyword Density Checker. Each one is free, runs in your browser, and pairs well with the video workflow in this guide — write the title, polish the description, then record the demo that shows it off.