

Kino AI is a code-first video editor that lets you edit video the way developers write software: with prompts, code, and AI coding agents. Relaunched on November 4, 2026, Kino is a desktop video editor and media manager where Claude Code, Codex, and your teammates can work on the same timeline in real time. Instead of dragging clips around a timeline by hand, you describe the edit you want — “cut the pauses, add captions, zoom in on the speaker” — and an AI agent does the cutting for you.
If you have ever spent an evening trimming a simple video, Kino AI is built for you. It is especially useful for creators, YouTubers, marketers, and small teams who make a lot of video and want the boring parts automated. This beginner guide walks you through what Kino AI is, how to set it up, and how to edit your first video with an AI coding agent — no video-editing experience needed.
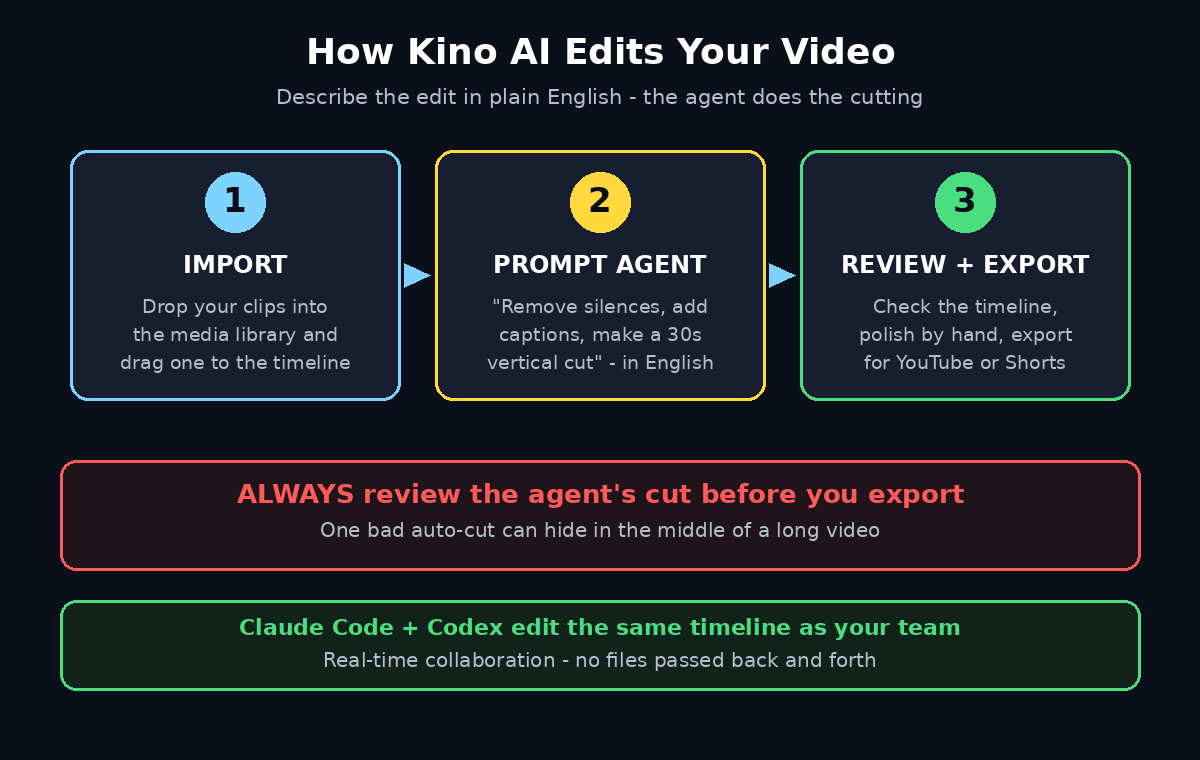
Step 1: Understand What Kino AI Actually Does
Kino AI is not a traditional video editor with a hundred buttons. It is a desktop app that treats your video project like a small software project. Your timeline, clips, cuts, captions, and effects are stored as editable code, and AI coding agents such as Claude Code and Codex can read and change that code on your instruction.
That sounds technical, but the result is simple: you talk to the editor in plain English, and it edits. Ask it to remove silences, reorder scenes, add b-roll, or create a vertical cut for TikTok, and the agent applies the change directly on the timeline. You can still open the timeline and adjust anything by hand, so you are never locked out of your own project.
Kino is a Y Combinator-backed product (YC S23) that relaunched in November 2026 with this agent-first approach. The big idea is collaboration: you, your teammates, and your AI agents all work on the same timeline at the same time, like a shared Google Doc for video.
What makes Kino different from a normal editor:
- Edits are code, so they are searchable, reviewable, and repeatable
- AI coding agents do the repetitive cutting for you
- Real-time collaboration with teammates on one timeline
- Built-in media manager keeps your footage organised
- Desktop app, so your project files stay on your own machine
Step 2: Check the Requirements and Get the App
Kino AI is a desktop application, so start by visiting the official Kino website and downloading the version for your operating system. The download is free to start — check the current plan on the official site, because free limits can change after a launch week.
Before you install, make sure your computer can handle video editing comfortably. A modern laptop or desktop with at least 8 GB of RAM works for short clips and social videos; 16 GB or more is better for longer 4K projects. You will also need a free account, which you create with your email during setup.
Quick setup checklist:
- Download Kino from the official website (avoid third-party download sites)
- Install it like any normal desktop app
- Create your free account and sign in
- Give the app permission to access your media folders if asked
- Connect your AI coding agent (Claude Code or Codex) when prompted — this is optional, but it unlocks the agent editing features
If you already use Claude Code for programming, connecting it takes only a minute. If you have never used a coding agent, do not worry: Kino also works as a normal editor, and you can connect an agent later when you are ready.
Step 3: Import Your Footage and Organise the Media Library
Open Kino and create a new project. Give it a clear name — for example “Product Demo Nov 2026” — and choose where the project should live on your computer. Then import your footage. You can drag video files, audio, and images straight into the media library, or use the import button and pick files from your folders.
Kino’s media manager is one of its quiet strengths. Every clip you import is indexed, so you can search your footage by filename or browse it visually. For a beginner, the habit that saves the most time is simple: import everything for one video into one project, and delete or archive clips you know you will not use.
Tips for a tidy media library:
- Import only the footage for the video you are making
- Rename important clips so you can find them later (“intro-take-2.mp4” beats “VID_4821.mp4”)
- Keep b-roll, music, and graphics in the same project folder
- Check that audio and video are in sync before you start cutting
Once your media is in, drag your main clip onto the timeline. You now have a project you can edit by hand or with an agent.
Step 4: Make Your First Edit by Prompting the Agent
This is where Kino feels different. Instead of cutting manually, open the agent panel and describe the edit in plain English. For example: “Remove all silent pauses longer than one second, then add captions for the whole video.” The agent reads your timeline, makes the changes, and shows you what it did.
Start with one small, safe instruction and review the result before asking for more. Good first prompts include removing filler words, trimming the start and end, cutting dead air, or creating a highlight version of a long recording. Each change appears on the timeline, so you can undo anything you do not like.
Example prompts that work well for beginners:
- “Cut out every silence longer than 0.8 seconds”
- “Remove the ‘um’ and ‘uh’ filler words from the first two minutes”
- “Make a 30-second vertical version for TikTok with captions”
- “Add a zoom-in every time the speaker changes topic”
- “Move the best quote to the start as a hook”
The agent works best when your instructions are specific. “Make it better” is vague; “cut the first 10 seconds and add captions” is a job it can do well. Think of it like directing a junior editor: clear instructions, one task at a time.
Step 5: Edit the Timeline by Hand When You Want Control
Agent editing is powerful, but you should still know your way around the timeline. Click any clip to select it, drag its edges to trim it, and split clips with the cut tool. Kino’s timeline looks familiar if you have used any editor: video tracks on top, audio tracks below, and a playhead you can drag to scrub through the footage.
Hand editing is the right choice when the change is visual and precise — moving a cut by half a second, fixing a transition, or aligning a clip with a beat in the music. Agent editing is the right choice for repetitive, rule-based work — removing silences across a 40-minute recording, or generating caption tracks.
Hand-editing basics to learn first:
- Split a clip at the playhead to remove a bad section
- Trim clip edges by dragging, instead of deleting and re-adding
- Use the zoom controls to work frame-by-frame on tricky cuts
- Keep your audio levels consistent between clips
- Save often — Kino stores your project as code, so every change is tracked
A practical workflow is to let the agent do the rough cut first, then polish the result by hand. You get the speed of automation and the judgement of a human editor, which is exactly what Kino is designed for.
Step 6: Add Captions, B-Roll, and Music
Captions are no longer optional for social video — most people watch with the sound off. Ask the agent to generate captions for your video, then read through them once and fix any names or technical terms it misheard. Kino places the captions on the timeline as editable text, so correcting a word is a quick click, not a re-render.
B-roll is the second layer that makes a video feel professional. When you mention a product, a place, or a result, cut away to a supporting clip for a few seconds. You can ask the agent to suggest b-roll placements, or drop clips onto a second video track yourself. Keep b-roll short — three to five seconds per shot is usually enough.
Music ties it together. Import a royalty-free track into your media library, place it on an audio track, and lower its volume so it sits under your voice instead of competing with it. A good rule of thumb: if you have to strain to hear the speaker, the music is too loud.
A quick polish checklist:
- Captions on, spell-checked, and easy to read
- B-roll over any section where the speaker is not on camera
- Music at a low level under the voice track
- One consistent font and colour for all on-screen text
Step 7: Collaborate With Your Team on the Same Timeline
Kino’s real-time collaboration is what sets it apart for teams. Invite a teammate to your project and you can both work on the same timeline at the same time — one person trimming the interview while another adds captions, with the agent handling the repetitive passes in between.
This is especially useful for small businesses and agencies. A creator can record a video, a teammate can run the agent rough cut, and a reviewer can leave time-stamped notes, all without exporting files back and forth. If you run a small content team or a digital agency, this shared-timeline workflow replaces a lot of messy file sharing — and if you work with outside help, a specialist team can take the finished video and build a campaign around it.
Set a simple rule for your team: only one person makes structural changes (reordering scenes) at a time, while others work on captions, graphics, or review. That keeps the timeline clean and avoids two people moving the same clip in opposite directions.
Step 8: Review, Export, and Publish Your Video
Before you export, watch the whole video once from start to finish. Check the beginning and the end most carefully — that is where sloppy cuts hide. Listen on headphones at least once, because audio problems are easy to miss on laptop speakers. Then export.
Choose your export settings based on where the video will live. For YouTube, export a horizontal 1080p or 4K file. For TikTok, Instagram Reels, or YouTube Shorts, export a vertical 1080×1920 version — Kino’s agent can reframe your horizontal footage for vertical automatically, which saves a lot of manual work. Name your export clearly so you can find it later, and keep the project file so you can re-export if a platform changes its requirements.
Before you hit publish, run this final check:
- First five seconds hook the viewer
- No black frames, frozen frames, or accidental silences
- Captions match the spoken words
- Audio is clear, with no sudden volume jumps
- The export plays correctly on your phone, not just your computer
Step 9: Build a Repeatable Workflow for Every Video
The real win with Kino is not one video — it is the tenth video, when your process is so smooth that editing takes minutes instead of hours. Save your best prompts as a checklist, and reuse them on every project: remove silences, cut fillers, add captions, make a vertical version. That turns Kino from a clever tool into a production line.
If you publish regularly, pair your editing workflow with a content plan. Decide your topics a week ahead, record in batches, and let the agent do the rough cuts in one sitting. Many creators find that batching the boring parts — captions, silence removal, vertical reframes — is where Kino pays for itself.
For teams that publish across many channels, it also helps to keep one place where your video ideas, scripts, and published links live. Some teams track this in a simple document; others use an AI automation service to connect their tools so a finished video flows straight into scheduling. The point is the same: the editing is only half the job, and a tidy system for the other half is what keeps you publishing consistently.
Kino AI vs Traditional Video Editors
| Feature | Kino AI | Traditional editor (Premiere, CapCut) |
|---|---|---|
| Editing method | Prompt an AI coding agent in plain English | Manual timeline dragging and cutting |
| Rough cut speed | Minutes — agent removes silences and fillers | Hours of manual trimming |
| Collaboration | Real-time shared timeline with teammates | Usually one editor at a time, files passed around |
| Learning curve | Low — describe what you want | Medium to high — many tools to learn |
| Precision control | Good, but hand edits still needed for fine cuts | Full frame-by-frame control |
| Best for | Creators and teams making lots of video | Film, complex effects, colour grading |
| Price | Free to start, check the official site for plans | Subscriptions or one-time purchase |
Frequently Asked Questions
Is Kino AI free to use?
Kino is free to start — you can download the desktop app and try the core editing features without paying. Free limits, such as export quality or agent usage, can change after launch, so check the current plan on the official Kino website before you commit to a big project.
Do I need to know how to code to use Kino AI?
No. You do not write code yourself. You describe edits in plain English, and the AI coding agent writes the code that changes your timeline. Knowing a little about how agents work helps, but it is not required — if you can write a clear instruction, you can use Kino.
Which AI agents work with Kino AI?
Kino is built to work with AI coding agents such as Claude Code and Codex, which can read and edit your project. The agent you connect depends on what you already use; check the official documentation for the current list of supported agents.
Can Kino AI edit vertical videos for TikTok and Shorts?
Yes. Kino can reframe horizontal footage into a vertical 1080×1920 format, and you can ask the agent to create a short vertical cut with captions. Always preview the vertical version on your phone before publishing, because reframing sometimes crops an important part of the frame.
Is my video stored in the cloud?
Kino is a desktop app, so your project files and footage live on your own computer by default. Collaboration features involve sharing project data with your team, so check the privacy settings in the app if you work with sensitive or unreleased footage.
Is Kino AI good for beginners?
Yes — it is one of the friendliest editors for beginners precisely because you can start by prompting instead of learning a toolbar. The learning curve is mostly about writing clear instructions and reviewing the agent’s work, both of which you learn by doing in your first two or three videos.
Final Thoughts
Kino AI is a genuinely new way to edit video: describe the edit, let an AI coding agent do the repetitive work, polish the result by hand, and collaborate with your team on one shared timeline. For beginners, the best way to learn it is to take one real video — a screen recording, a talking-head clip, a product demo — and run it through the full workflow: import, prompt a rough cut, add captions, export, and publish.
Start small, review every agent change, and save your best prompts. Within a few videos you will have a repeatable process that turns hours of editing into minutes — and that is the whole point of Kino AI.
Explore More Free AI Tools
Want to keep building your content toolkit? Try these free tools on AIToolSteps: the AI Title Generator for headlines that get clicks, the Meta Description Generator for search snippets that earn the click, the AI Rewriter for polishing rough drafts, and the Keyword Density Checker for keeping your SEO on track. You will find them all at https://aitoolsteps.com/ — free to use, no sign-up needed to start.