

Learning how to use FounderMail AI starts with a simple problem.
If you run a small business or a startup, email is probably the most boring — and the most expensive — tool you pay for every month. Every new team member costs another seat. Every AI agent you want to give an email address needs someone’s password. And the moment your AI assistant needs to read a verification code or reply to a customer, you are stuck sharing logins you should never share.
FounderMail AI fixes exactly that problem. Launched on Product Hunt on November 4, 2026, FounderMail gives you real email on the domains you already run on Cloudflare — with unlimited mailboxes, a free plan, and separate access for your AI agents. In this guide, you will learn how to use FounderMail AI step by step: create your account, connect Cloudflare, set up your first mailbox, give an AI agent its own inbox, and send your first email in under 30 minutes.
Step 1: Understand What FounderMail AI Actually Is
Before you click anything, it helps to know what you are signing up for. FounderMail is hosted email built for founders who ship on Cloudflare. You connect your Cloudflare account, and every domain on it gets real inboxes that you, your team, and your AI agents share.
Here is what makes it different from Gmail or Google Workspace:
- Your own domain, real mailboxes. Addresses like hello@, billing@, support@, and everyone’s personal address are real mailboxes on your domain — not aliases, not forwarding tricks.
- Unlimited mailboxes and domains on every plan. There is no per-seat pricing. The paid plan is a flat $20 a month, however many people, agents, or domains you add, and the first 14 days are free. The free plan is a real plan, not a trial.
- Agents get their own access. Instead of handing your AI agent your password, you give it its own login with granular permissions. It can read mail, draft replies, or send — only what you allow.
- Every mailbox has its own IMAP and SMTP login. Your mail opens in Apple Mail, Outlook, Thunderbird, or any mail client that speaks the protocol.
- An API and an MCP server. Your own software reads mail through the REST API, and Claude reads threads and writes drafts through the MCP server. Sending is a separate scope you grant on purpose.
The short version: FounderMail treats email as infrastructure you own, not as a seat you rent. If you already run your website on Cloudflare, it is the fastest way to get professional email on your own domain without paying per person.
Step 2: Create Your Free FounderMail Account
Getting started takes about two minutes, and you do not need a credit card for the free plan.
- Go to the FounderMail website and click the sign-up button.
- Create your account with your email address and a strong password. Use a password manager so you never have to type it again.
- Confirm your email address by clicking the verification link FounderMail sends you.
- You land on the dashboard. It is deliberately simple: your domains, your mailboxes, and your people are all in one place. The dashboard shows you the person, not the mailbox, so you can see who owns which address at a glance.
Tip: sign up with the same email address you use for your Cloudflare account. It makes the next step smoother, because FounderMail needs to match your Cloudflare identity to the domains it will manage.
Step 3: Connect Your Cloudflare Account
This is the step that makes FounderMail different from every other email host. FounderMail does not ask you to copy DNS records by hand. You connect your Cloudflare account, and it works with the domains you already run there.
- In the FounderMail dashboard, find the option to connect Cloudflare.
- Sign in to Cloudflare and approve the connection. FounderMail only asks for the permissions it needs to manage email for your domains.
- Once connected, FounderMail lists every domain on your Cloudflare account. Pick the domain you want email on — for example, your business domain.
- FounderMail configures the mail routing for that domain. Anyone can point a domain’s MX records at FounderMail, but only the domain’s owner can publish the verification token FounderMail gives you, so your mail stays yours.
What happens behind the scenes is simple: your domain’s mail now flows through FounderMail’s servers, which run the same code as DevInbox, the company’s other product. You do not need to understand MX, SPF, or DKIM records to use it — but it is worth knowing that outgoing mail is signed by your domain’s DKIM, so your emails look legitimate to Gmail and Outlook instead of landing in spam.
If you run a digital agency or you manage websites for clients, this is where FounderMail starts to pay for itself. A digital agency like the team at d365a.com can put every client’s domain on the same $20 flat plan instead of buying a new seat for every inbox. That is the kind of saving that adds up fast when you manage ten domains instead of one.
Step 4: Create Your First Mailbox
With Cloudflare connected, creating a mailbox takes seconds.
- Open your domain in the FounderMail dashboard.
- Click to create a mailbox and choose the address — start with the classics: hello@, support@, or billing@.
- Give the mailbox a name and, if it belongs to a person, assign it to them.
- Set a password for the mailbox. Every mailbox has its own IMAP and SMTP login, so this password is separate from your FounderMail account password.
Create a few shared mailboxes right away, even if you are a team of one:
- hello@yourdomain.com — your public contact address.
- support@yourdomain.com — customer questions, so they never get lost in your personal inbox.
- billing@yourdomain.com — invoices, receipts, and payment notices in one place.
Because mailboxes are unlimited, you do not have to ration them. A common beginner mistake is creating one catch-all address and letting everything pile into it. Separate mailboxes keep your work organised from day one, and you can always add more later at no extra cost.
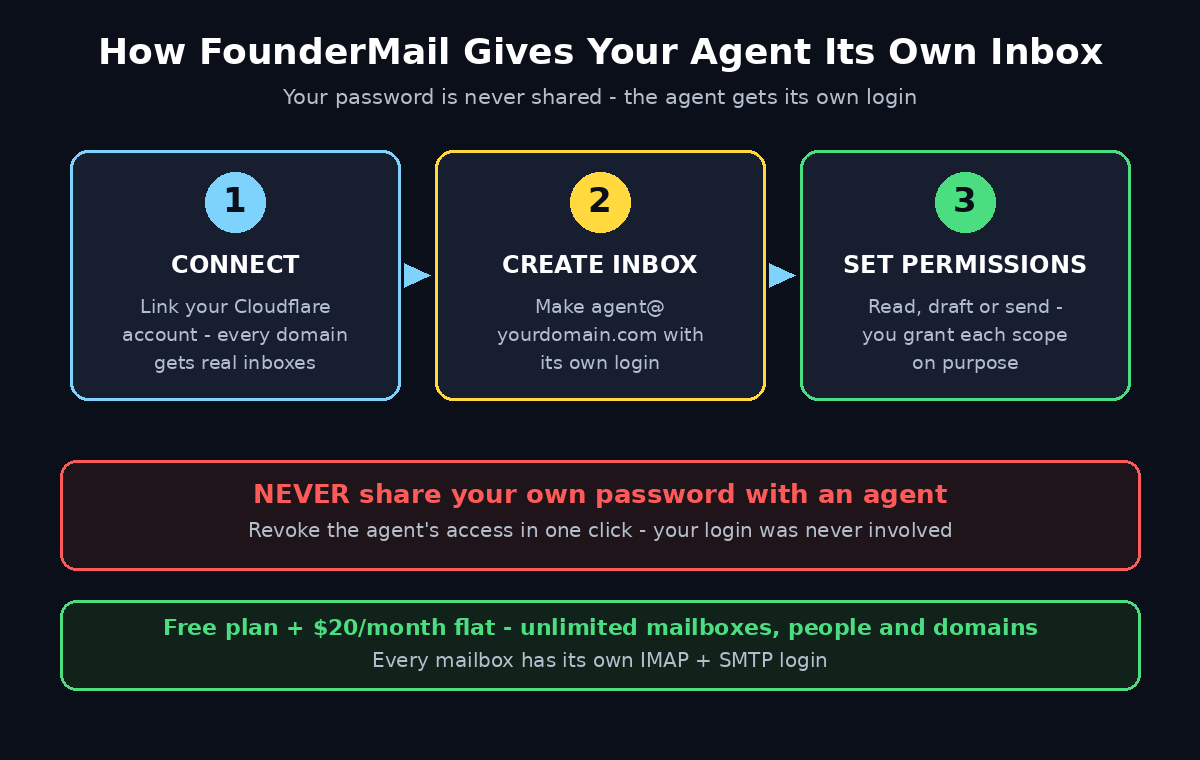
Step 5: Give Your AI Agent Its Own Inbox
This is the feature that earned FounderMail its Product Hunt launch, and it is the reason most people will try it. Your AI agents need email to do real work: they sign up for tools, wait for verification codes, and reply to customers. Until now, the only way in was someone’s login — and giving an AI agent access was worse, because that meant handing over a password.
FounderMail solves it by giving each agent its own identity:
- In the dashboard, create a new mailbox for your agent — for example, agent@yourdomain.com or claude@yourdomain.com.
- Give the agent its own access with granular permissions. You decide exactly what it can do: read mail only, draft replies for your approval, or send mail on its own.
- Connect the agent through the MCP server. Claude reads threads and writes drafts through MCP, and your own software can read mail through the REST API.
- Sending is a separate scope you grant on purpose. An agent that can read your inbox cannot send email unless you explicitly allow it.
A practical tip: put agent mailboxes on a subdomain, such as agents.yourdomain.com. That limits what a mistake can do to your main domain’s mail, and it keeps agent traffic visibly separate from human traffic. If an agent ever misbehaves, you revoke its access in one click — your own password was never involved.
For founders building with AI automation, this is a genuine unlock. Teams exploring AI automation services can now let agents handle the email parts of a workflow — triaging support mail, drafting replies, chasing invoices — without ever sharing a human login.
Step 6: How to Use FounderMail AI to Send and Receive Your First Email
Time to test that everything works.
- Open your new mailbox in the FounderMail webmail, or connect it to your favourite mail client using the IMAP and SMTP details FounderMail shows you (imap.foundermail.mx on port 993).
- Send a test email from your new address to your personal Gmail or Outlook address.
- Check that it arrives, and that the sender shows your domain — not a generic FounderMail address.
- Reply from Gmail and confirm the reply lands in your FounderMail inbox.
- Send from any mailbox on any of your domains. The reply goes out signed by that domain’s DKIM, so deliverability stays strong.
If the test email lands in spam, check two things: that your domain’s verification token is published, and that you are sending from the mailbox you verified. In almost every case, the fix is waiting a few minutes for DNS to propagate and trying again.
Drafts save themselves as you write, and they appear in your mail client’s Drafts folder too. That small detail matters: you can start a reply on the web, finish it in Apple Mail, and nothing gets lost.
Step 7: How to Use FounderMail AI’s Reply Companion
FounderMail includes an experimental AI reply companion that drafts answers in your voice.
- Open any thread in your inbox.
- Press Draft with AI. A panel opens beside the thread with a reply written in your voice.
- Read it, change anything you want, and send it yourself — or throw it away.
A few honest notes about this feature. The drafts are written by an AI model, and its provider does not train on your mail. Every plan includes some AI each month, shown as a percentage used, so you can see how much you have left. And because the companion only drafts — you always send — it is a safe way to handle routine replies without handing the keys to your inbox to a robot.
The best way to use it is for the repetitive 80%: order confirmations, “thanks, we received it”, meeting reschedules. Write the tricky 20% yourself. Over a week, the time saved is real, and your customers still get a human-approved reply every time.
Step 8: How to Use FounderMail AI to Connect Your Mail Client (IMAP and SMTP)
Webmail is fine for quick checks, but most people live in a mail app. FounderMail works with all of them, because every mailbox is a standard mailbox.
- Apple Mail: add the account, enter your mailbox address and its own password, and Apple Mail picks up the IMAP and SMTP settings.
- Outlook: add a new IMAP account with the same credentials. Your folders, sent mail, and drafts sync both ways.
- Thunderbird: the same IMAP/SMTP details work out of the box, and Thunderbird is free if you want a no-cost desktop client.
The server details you need are simple: IMAP at imap.foundermail.mx on port 993, and SMTP with the credentials FounderMail shows for that mailbox. Because each mailbox has its own login, you can add a shared support@ mailbox to your phone without exposing your personal inbox — your team members do the same with their own addresses.
Step 9: Set Permissions and Keep Your Agents Safe
Email is powerful, and powerful tools need guardrails — especially when AI agents are involved. Spend ten minutes on this step and you will avoid the mistakes that make founders nervous about agent email.
- Least privilege, always. Give each agent the smallest permission it needs. Read-only for triage, drafting for replies, sending only when you trust the workflow.
- Separate scopes for sending. Remember that sending is a separate scope in FounderMail. Never grant it by default; grant it per agent, per job.
- Use subdomains for agents. As mentioned above, agents.yourdomain.com keeps agent mail isolated from your main domain.
- Review the dashboard regularly. FounderMail shows you the person, not the mailbox, so a quick weekly glance tells you who — human or agent — has access to what.
- Revoke fast. If an agent’s behaviour changes, revoke its access immediately. You do not need to change any human password, because the agent never had one.
Email is untrusted input, and any agent that reads email can be tricked by a cleverly written message. Treat agent inboxes like you treat junior staff: useful, fast, and worth supervising until they prove themselves.
Step 10: FounderMail vs Other Agent Inboxes
FounderMail is not the only tool giving AI agents email addresses, so here is how it compares with the best-known alternatives in November 2026.
| Tool | What you get | Pricing | Best for |
|---|---|---|---|
| FounderMail | Real mailboxes on your Cloudflare domains, unlimited mailboxes, MCP + REST API, AI reply drafts | Free plan; $20/month flat, 14 days free | Founders on Cloudflare who want human + agent email together |
| AgentMail | Agent inboxes with threads, labels, drafts, scheduled sending | Free: 3 inboxes, 3,000 emails/month; $20/month for 10 inboxes | Developers building agent-first apps |
| Resend Inboxes | Inboxes on your own domain, added to a sending service | Free tier available; paid plans scale with volume | Teams already sending with Resend |
| Nylas Agent Accounts | Agent email plus its own calendar | From $15/month | Scheduling bots and calendar agents |
| Cloudflare Email Service | Email pipe for agents built on Workers | $5/month + $0.35 per 1,000 emails after 3,000 | Developers who want to build the inbox themselves |
The honest takeaway: if you already run your domains on Cloudflare and you want one place where humans and agents share email, FounderMail is the simplest option. If you are building a developer platform and need agents to create inboxes with one line of code, AgentMail is the more specialised tool. And if your agents live entirely inside Cloudflare Workers, Cloudflare’s own Email Service is the cheapest pipe — but you build the inbox yourself.
Frequently Asked Questions
Is FounderMail really free?
Yes. The free plan is a plan, not a trial: unlimited mailboxes and domains, with SMTP and IMAP on every mailbox. The paid plan is a flat $20 a month, however many people, agents, or domains you add, and the first 14 days are free. Every plan includes some AI reply-drafting each month.
Do I need a Cloudflare account to use FounderMail?
Yes. FounderMail is built for founders who ship on Cloudflare: you connect your Cloudflare account and every domain on it gets real inboxes. If your domains live somewhere else, you would need to move them to Cloudflare first — which is free and takes a few minutes per domain.
Can my AI agent send emails by itself?
It can, but only if you grant the sending scope on purpose. By default, an agent connected through the MCP server can read threads and write drafts. Sending is a separate permission you enable per agent, and you can revoke it at any time.
Does FounderMail work with Gmail or Outlook?
Your mailboxes are standard IMAP/SMTP mailboxes, so they open in Apple Mail, Outlook, Thunderbird, or anything else that speaks the protocol. FounderMail is a replacement for Gmail or Workspace on your own domain — not an add-on inside Gmail.
What happens if I want to leave FounderMail?
Your domain is yours, your MX records are yours, and your exit is yours. Because every mailbox is standard IMAP, you can move your mail to another provider with normal migration tools. There is no lock-in beyond the DNS records you control.
Is FounderMail safe for customer email?
Outgoing mail is signed by your domain’s DKIM, drafts are written by an AI model whose provider does not train on your mail, and agents get their own access instead of your password. As with any email tool, keep agent permissions minimal and review access regularly.
Final Thoughts
FounderMail AI is a small tool that solves a big, modern problem: email was built for one person typing, and now software needs to send, read, and remember too. By putting real mailboxes on the domains you already run on Cloudflare, charging a flat $20 a month instead of per seat, and giving every AI agent its own login with granular permissions, FounderMail lets a one-person startup run email like a much bigger company.
If you are a founder, start with the free plan, connect Cloudflare, and create your hello@, support@, and agent@ mailboxes today. Give your AI assistant its own inbox, let it draft replies in your voice, and keep the sending permission in your hands until you trust the workflow. That is how you use FounderMail AI — and it takes less time than reading this guide.
Explore More Free AI Tools
Want to keep building your AI toolkit? Try the free tools on AIToolSteps: the AI Title Generator writes headlines that get clicked, the Meta Description Generator crafts search snippets under 160 characters, the AI Rewriter polishes rough drafts into clean copy, and the Keyword Density Checker keeps your SEO on target. All four are free at https://aitoolsteps.com/ — no sign-up needed.