

Most teams do not have a tool problem. They have a scattered-work problem. Tasks live in one app, documents in another, email somewhere else, and meeting notes in a fourth place. Every time an AI agent is asked to help, it only sees a tiny slice of the picture, so it guesses, repeats work, or waits for a human to paste the missing context. Pharen Hub AI was built to fix exactly that. It is one shared workspace where your projects, tasks, docs, mail, meetings, data, and AI agents all share the same context, and it launched on Product Hunt on 11 November 2026, where it reached number 9 in the Week 47 rankings.
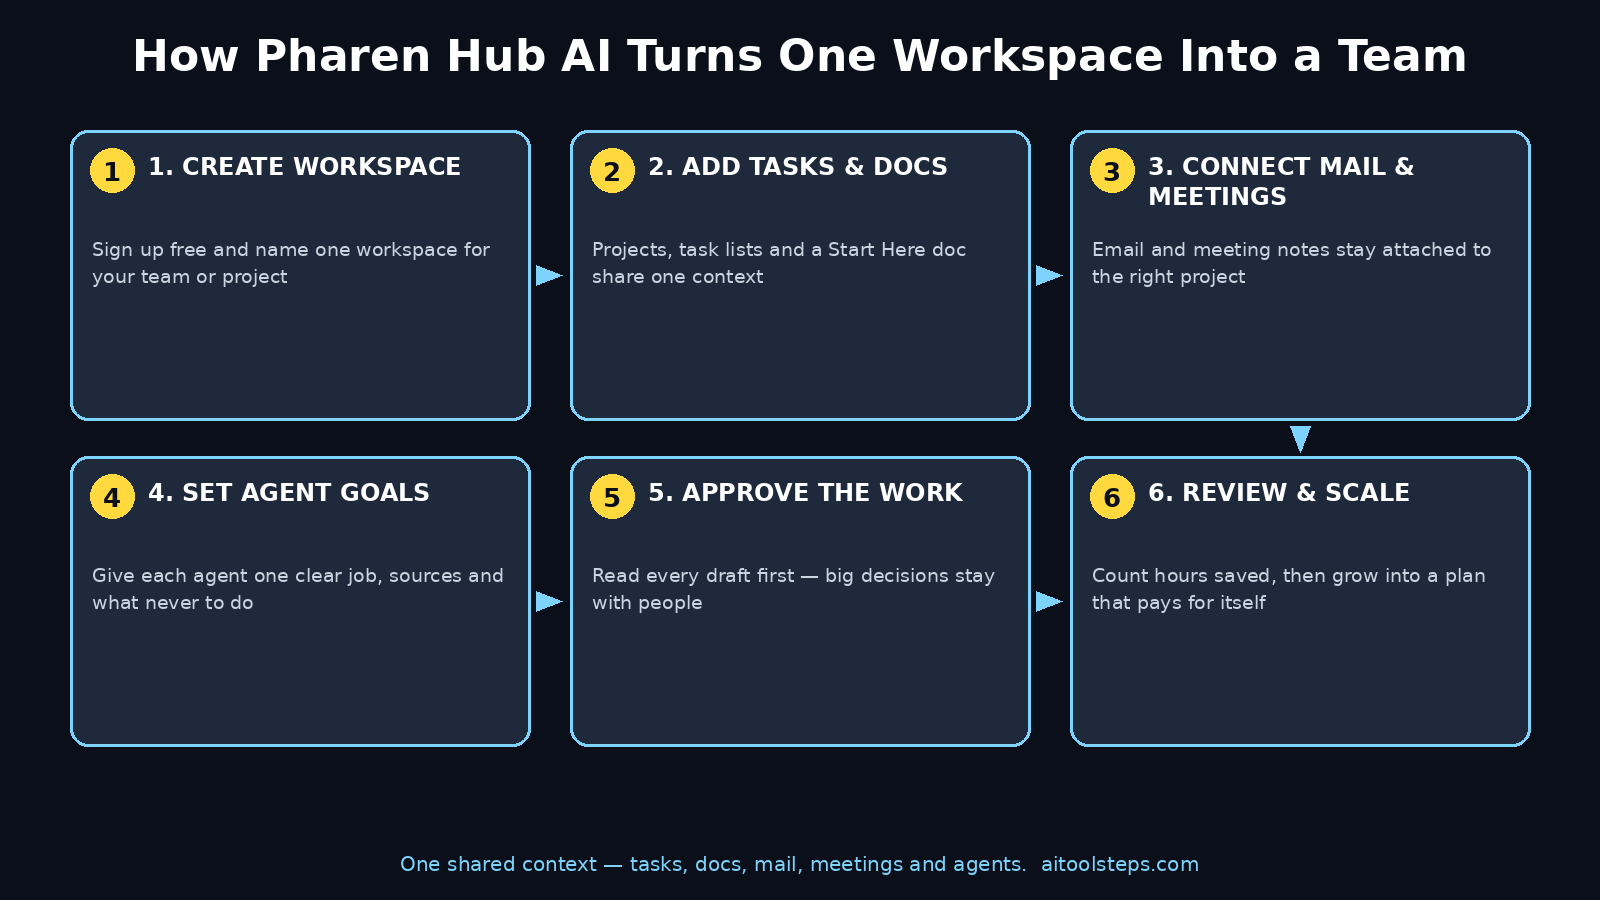
In this beginner-friendly guide, you will learn how to use Pharen Hub AI from zero: creating a free workspace, organizing your work, connecting mail and meetings, and giving your first AI agent a clear goal with human approval on every important step. You do not need coding skills, a budget, or any experience with AI agents. If you can use a to-do list, you can use Pharen Hub AI. And if you enjoy tools that bring many jobs into one place, you will also like our guides to OffiAI and AgentWatch AI, two other new AI workspaces covered here on AI Tool Steps.
Step 1: Understand What Pharen Hub AI Actually Is
Pharen Hub is an all-in-one AI workspace for a whole company, but it works just as well for one person. Instead of five separate tools, you get one place that holds your projects, your task lists, your documents, your email, your meetings, and your data. The important part is the shared context: everything in the workspace can see everything else, so an AI agent working on a task can read the related document, check the related email thread, and look at the meeting notes before it acts.
That shared context is what makes Pharen Hub different from a normal project tool with a chatbot bolted on. The agents inside Pharen Hub work with clear goals, allowed sources, and limits that you set. Big decisions stay with people. An agent can draft, summarize, organize, and prepare, but it does not ship work on its own unless you approve it. Think of it as a very capable junior colleague who always shows you the draft before sending it.
Two more facts matter for beginners. First, Pharen Hub is open fair-code, and its source code is published on GitHub, so you are not locked into a black box. Second, you can run it in the company’s EU cloud or host it on your own servers, which is a big deal for teams that handle sensitive client data. For a solo beginner, the free plan is the right place to start, and it costs nothing.
Step 2: Create Your Free Account and Your First Workspace
Start by opening the Pharen Hub website and creating an account with your email address. You will be asked to create a workspace, which is the home for one project, team, or company. Give it a simple name you will recognize, such as “My Business” or “Content Studio”. You can create more than one workspace later, and each workspace can run on its own plan, so a small side project and a client project never have to share a budget.
- Pick the free plan first. The free plan costs 0 euros, supports 1 member, and includes 10 workflow runs per month and 100 list records, with no time limit. That is enough to learn the tool properly before you spend anything.
- Name your workspace clearly. Use the real name of your team or project. You will thank yourself later when you have three workspaces and need to find the right one fast.
- Invite nobody yet. Learn the tool alone for a day or two. Adding teammates is easy later, and a tidy workspace makes a much better first impression.
Once your workspace opens, take five minutes to click through the sidebar: projects, tasks, docs, mail, meetings, and data. You do not need to understand everything yet. The goal is simply to know where things live, so that later steps feel familiar instead of confusing.
Step 3: Set Up Your Projects and Task Lists
A workspace without structure fills up with random notes very fast, so set up your projects before you add real work. This is the first practical lesson in how to use Pharen Hub AI well: structure first, automation second. Create one project for each area of your work. A freelancer might create “Client Work”, “Content”, and “Admin”. A small shop might create “Orders”, “Marketing”, and “Suppliers”. Keep the number small at first; three to five projects is plenty.
Inside each project, create lists for the actual work. A list is a simple table of records: each row is a task, and each column is a detail like status, owner, due date, or priority. On the free plan you get 100 list records in total, so keep your first lists short and focused. A good first list is “This Week”, with ten real tasks you actually need to finish.
- Write tasks as actions. “Email supplier about delayed order” beats “Supplier” every time, because the agent and your future self both know what done looks like.
- Add a due date and a status. Even two columns turn a pile of notes into a plan you can follow.
- Keep one list per outcome. A list called “Website Launch” is useful. A list called “Stuff” is not.
This is also the moment to think about how your work is organized today. If your tasks currently live in three apps and your head, moving them into one workspace is already a win, before any AI is involved. If you run a small business and want help setting up systems like this properly, a digital agency can design the workspace structure with you, so the AI agents have clean, well-organized work to start from.
Step 4: Bring Your Documents Into One Shared Knowledge Base
Documents are the memory of your workspace. Add the files your team actually refers to: price lists, service descriptions, brand guidelines, standard replies, product notes, and how-to documents. You can create docs directly inside Pharen Hub or bring in existing ones. The point is that the knowledge lives in the same place as the tasks, so an agent that picks up a task can read the document that explains how to do it.
Write one short “Start Here” document for your workspace. It should answer three questions in plain language: what does this workspace do, who is it for, and what does good work look like here? That single page becomes the most useful thing in the whole workspace, because every agent reads it as part of its context. Keep it under one page. If it takes longer than five minutes to read, it is too long.
Also add a “Frequently Used Answers” doc with the replies you type over and over: delivery times, refund rules, opening hours, contact details. Once these live in the workspace, an agent can draft accurate replies instead of inventing details. Accuracy is the whole reason the shared context matters, and this is where beginners get the biggest immediate benefit.
Step 5: Connect Your Mail and Meetings
Pharen Hub brings mail and meetings into the same workspace as your tasks and docs. Connecting your email means an agent can see the conversation behind a task instead of asking you to copy and paste it. Connecting meetings means the notes and decisions from a call stay attached to the project they belong to, instead of disappearing into a chat thread.
Connect only what you need at first. A calm start is part of how to use Pharen Hub AI without getting overwhelmed: one connection at a time, tested before you add the next. If email is where your work arrives, connect mail first and leave meetings for next week. If meetings are where decisions happen, start there instead. You can add the rest later, and a gradual setup is far less likely to overwhelm you than connecting everything on day one.
- Check what the agent can see. When you connect a source, confirm which folders or calendars are included. Shared context is powerful, but only when you know what is shared.
- Link emails to tasks. When an email creates work, turn it into a task in the right project instead of leaving it in the inbox. The inbox is for messages, not for project management.
- Keep meeting notes short. Decisions, owners, and dates. Three lines per meeting is usually enough, and short notes are easier for agents to use correctly.
Step 6: Give Your First AI Agent a Clear Goal
Now comes the fun part. Create your first agent and give it one small, clear job. Good first jobs are narrow and easy to check: “Summarize every email in the Support folder each morning and list the ones that need a reply”, or “Draft a reply to new inquiries using the Frequently Used Answers doc”. Bad first jobs are vague: “Handle customer service” is not a goal, it is a department.
A clear goal has four parts: what the agent should do, which sources it may use, what good output looks like, and what it must never do. Write all four down when you create the agent. For example: “Draft replies to new inquiries. Use only the Frequently Used Answers doc and the price list. Keep replies under 120 words, friendly, and in English. Never promise a delivery date or a discount.”
Start with one agent and one job. Watch what it produces for a few days before you add a second agent. Beginners who create five agents on day one usually cannot tell which one made a mistake, and the whole system gets blamed for one bad instruction. One agent, done well, teaches you more than five agents done in a rush.
Step 7: Set Allowed Sources and Limits for Your Agents
Allowed sources and limits are the guardrails that make AI agents safe to use in real work. In Pharen Hub, you decide which documents, lists, mail folders, and data an agent may read. An agent that drafts customer replies needs the price list and the answers doc. It does not need your payroll spreadsheet, and it should never get access to it.
Limits work the same way. Set how much an agent may do on its own: how many workflow runs it can use, which tools it can call, and whether it can send anything outside the workspace. The free plan’s 10 workflow runs per month is actually a helpful limit for a beginner, because it forces you to test with small jobs before you automate anything big.
- Give each agent the minimum it needs. If an agent only writes summaries, it does not need your inbox. Less access means fewer possible mistakes.
- Keep private data in a separate workspace. If something is sensitive, do not put it in the same workspace as a general-purpose agent.
- Review the limits monthly. As you trust an agent more, you can widen its access step by step, instead of all at once.
For teams exploring how agentic tools fit into real business workflows, Agentic Affairs covers the practical side of agent adoption, including the guardrails and approval habits that separate a useful agent from a risky one. The lesson is the same everywhere: the teams that succeed with agents are the ones that set clear limits first.
Step 8: Approve Agent Work Before It Goes Live
Human approval is the feature that makes Pharen Hub safe for beginners, so use it on everything that leaves the workspace. When your agent drafts a reply, a summary, or a plan, read it before it goes anywhere. Check three things: are the facts right, is the tone right, and did it invent anything? Agents are most likely to go wrong on details that sound confident but come from nowhere, like a made-up price or a promised date.
Build a simple approval habit. Every morning, open the agent’s output, approve what is correct, fix what is not, and note the fix. Those notes become better instructions. If the agent keeps making the same mistake, the instruction is wrong, not the agent. Rewrite the goal in clearer words, add an example of good output, and test again. Most agent problems are instruction problems, and they are cheap to fix when you catch them early.
Never let an agent send email, publish content, or change a price without approval until it has been correct ten times in a row on the same job. That simple rule protects your reputation while you learn what the agent is actually good at. Speed comes later. Trust comes first.
Step 9: Automate Repeating Work With Workflows
Once one agent works well, turn the repeating version of that job into a workflow. This is where learning how to use Pharen Hub AI starts paying off in saved time. A workflow is a saved sequence: when something happens, the agent does these steps, in this order, and then waits for your approval. A classic beginner workflow is: new email arrives in the inquiries folder, the agent reads it, drafts a reply from the answers doc, and puts the draft in your review queue. You approve, and the reply goes out.
Workflows are where the free plan’s limits matter. You get 10 workflow runs per month on the free plan, 100 on the Starter plan at 20 euros per month, 500 on the Team plan at 50 euros, and 5,000 on the Pro plan at 100 euros. Start with the one workflow that saves you the most time, measure it for two weeks, and only then decide whether a paid plan is worth it. Ten runs a month is enough to prove the value of one good workflow.
Pick workflows by boredom, not by excitement. The best first workflow is the job you repeat every day and slightly hate: triaging an inbox, turning meeting notes into tasks, or summarizing a long document. If a workflow saves you 15 minutes a day, it saves you more than five hours a month, which is a real return for a free tool.
Step 10: Track Results and Grow Into a Paid Plan When It Pays For Itself
After two weeks, review what the workspace actually did for you. Count three numbers: how many agent drafts you approved, how many hours you saved, and how many mistakes you caught. If the drafts are mostly right and the hours saved are real, the system works. If the drafts need heavy editing every time, the instructions need work, not the tool.
Compare the plans before you upgrade. The table below shows the published Pharen Hub plans, so you can see exactly what changes at each level. The jump that matters most for small teams is usually Starter to Team, because the member limit grows from 3 to 5 and the workflow runs grow from 100 to 500 a month. Pro, at 100 euros a month for up to 50 members and 5,000 workflow runs, is built for organizations running production AI workflows, not for a solo beginner.
| Plan | Monthly price | Members | Workflow runs / month | List records |
|---|---|---|---|---|
| Free | 0 euros | 1 | 10 | 100 |
| Starter | 20 euros | Up to 3 | 100 | 1,000 |
| Team | 50 euros | Up to 5 | 500 | 5,000 |
| Pro | 100 euros | Up to 50 | 5,000 | 50,000 |
| Enterprise | Custom | Unlimited | Unlimited | Unlimited |
Remember that AI credits are a separate balance from the workspace plan, and they are used whenever Pharen Hub calls an AI model inside a workflow or a workspace feature. Check your credit use in the first month so there are no surprises. A useful rule is to upgrade only when the paid plan saves you more time than it costs: if 20 euros a month saves you even two hours, it has already paid for itself.
Frequently Asked Questions
Is Pharen Hub AI free?
Yes, there is a free plan that costs 0 euros and has no time limit. It supports 1 member and includes 10 workflow runs per month and 100 list records. That is enough to learn the tool and run one real workflow. Paid plans start at 20 euros per month for the Starter plan. AI credits are a separate add-on balance on every plan, so check credit use alongside the plan limits.
Can I self-host Pharen Hub?
Yes. Pharen Hub runs in the company’s EU cloud, or you can host it on your own servers. Self-hosting suits teams that handle sensitive data or have strict rules about where their information lives. The project is open fair-code with its source code published on GitHub, which is why self-hosting is possible at all. Beginners should start with the hosted cloud version and consider self-hosting only when they have a real reason to.
Do Pharen Hub agents work without human approval?
No, not unless you set them up that way. Agents in Pharen Hub work with clear goals, allowed sources, and limits that you define, and big decisions stay with people. The normal setup is that an agent drafts, summarizes, or prepares work, and a human approves it before anything is sent or published. That approval step is the whole point, especially while you are learning what an agent does well.
How is Pharen Hub different from Notion or ClickUp?
Notion and ClickUp are excellent at organizing notes and tasks, but Pharen Hub was built around AI agents from the start. The difference is the shared context: tasks, docs, mail, meetings, and data all live in one workspace that the agents can actually use, with goals, allowed sources, and human approval built in. If you only need notes and checklists, a simpler tool may be enough. If you want agents that work across your whole operation, Pharen Hub is designed for that job.
Is my data safe in Pharen Hub?
Pharen Hub is hosted in the EU cloud, and you can also self-host it on your own servers if your data rules require it. The practical safety habits matter just as much as the hosting: give each agent only the sources it needs, keep sensitive data in a separate workspace, and approve everything before it leaves the workspace. No tool can replace those three habits, and they take five minutes to set up.
What should I automate first in Pharen Hub?
Start with the boring job you repeat every day: triaging an inbox, turning meeting notes into tasks, or summarizing long documents. Pick one workflow, run it for two weeks, and check how many drafts you approved and how much time you saved. If it works, add a second workflow. If it does not, fix the instructions before you automate anything else.
Final Thoughts
Pharen Hub AI is not another app to check. It is a way to stop checking five apps. One workspace, one shared context, and agents that work inside clear goals and human approval add up to something simple: less copying and pasting, fewer lost details, and more time for the work that actually needs a person. The free plan is genuinely usable, the setup takes an afternoon, and the approval habit keeps you in control while you learn.
That is how to use Pharen Hub AI the simple way: start small, create the workspace, add one project, write your Start Here doc, and give one agent one clear job. Get that right, and the rest of the workspace almost builds itself. If you want more beginner guides like this one, explore the rest of AI Tool Steps, where every day brings a new free AI tool explained the same plain way.
Explore More Free AI Tools
Keep building your free AI toolkit with these guides from AI Tool Steps:
- AI Title Generator — create catchy, SEO-friendly titles for your articles and videos in seconds.
- Meta Description Generator — write search-friendly descriptions that earn more clicks from Google.
- AI Rewriter — rewrite any text in a fresh, clear style without losing the meaning.
- Keyword Density Checker — check your keyword use and keep your articles SEO-safe before publishing.