

AI agents can do impressive work, but they are hard to trust. You give an agent a job, it disappears into a black box, and the result comes back with no clear trail of how it got there. When the answer is wrong, you have no idea which step failed. Mermaid Flow AI fixes that problem by putting the whole workflow on the page. It launched on November 18, 2026, and it lets you build agentic workflows as diagrams, then run them the same way every time.
This guide shows you how to use Mermaid Flow AI from zero. You will create a free account, draw your first workflow as a diagram, add AI steps, connect the tools it needs, and run it. The free plan includes 15 workflow runs a month, which is enough to prove the idea on a real job before you spend anything. Mermaid Flow finished at number one on Product Hunt on its launch day, and this guide explains why so many beginners are trying it this week.
Step 1: Understand What Mermaid Flow AI Actually Is
Mermaid Flow AI is a visual builder for agentic workflows. You lay the workflow out as steps in a diagram, connect the tools it needs, and run it. Each step is a box on the canvas. Each arrow shows what happens next. The AI model does the thinking inside each step, but it does not get to decide what the steps are. That one design choice is the whole point of the tool.
Most AI agents work the other way around. You describe a goal, and the agent plans its own steps. That freedom is powerful, but it makes the agent unpredictable. It can skip a step, take a shortcut you did not approve, or do the same job differently every time. Mermaid Flow AI keeps the steps fixed. It runs the same steps in the same order on every run, so the result is repeatable and easy to check. That is the first thing to understand when you learn how to use Mermaid Flow AI: the plan never changes, only the thinking inside each step changes.
The tool comes from Mermaid, the team behind the Mermaid.js diagram language. If you have ever seen a flowchart inside a GitHub readme or a docs page, you have probably seen Mermaid at work. The open-source library turns plain text into diagrams, and developers have used it for years. Mermaid Flow builds on that idea: the diagram is no longer just a picture of a process, it is the process itself.
The Four Ideas Behind Mermaid Flow AI
Four ideas explain the product. First, the steps are fixed, so every run follows the same path. Second, you can see the middle: every step between the input and the output sits on the page, so when a result looks off, you know exactly where to look. Third, there is one copy: anyone on the team can read the same workflow, and anyone who runs it gets the same steps as the person who built it. Fourth, the workflow is visual, so a non-technical teammate can follow it without reading code.
Step 2: How Mermaid Flow AI Pricing Works Before You Start
Before you build anything, understand the pricing, because it decides how much you can test for free. Mermaid Flow AI has a free plan with 15 workflow runs a month. A run is one full pass through your workflow, from the first step to the last. Fifteen runs is enough to build one real workflow, test it, fix it, and use it on live work for a few weeks. That is why learning how to use Mermaid Flow AI costs nothing to start: your first real workflow is free.
The paid plan is called Premium. It includes 500 shared runs a month across your organization, so a whole team draws from the same pool. That matters when a workflow becomes part of daily work and several people run it every day. For a beginner, the free plan is the right place to start. Build one workflow that saves you real time, and only upgrade when you run out of runs before the month ends.
One honest note: prices and free limits can change, because Mermaid Flow AI launched today. The launch announcement is the source of truth for the 15-run free plan and the 500-run Premium plan. Check the official pricing page before you plan a big rollout, and treat the free runs as a trial budget, not a permanent allowance.
Step 3: Create Your Free Mermaid Flow AI Account
Learning how to use Mermaid Flow AI starts at mermaid.ai/flow. Open the page and create your free account with your email. The sign-up takes about a minute, and you land on a dashboard that lists your workflows. There is nothing to install. Mermaid Flow AI runs in the browser, so it works on Windows, Mac, and Chromebook alike.
From the dashboard, create a new flow. You get a blank canvas with a toolbar for adding steps and arrows. Take a minute to look around before you build. The canvas is where the workflow lives. The side panel is where you set what each step does. The run button sits where you can reach it, and the run history shows every past run with its result.
If you already use Mermaid diagrams in your docs, the canvas will feel familiar. The shapes and arrows follow the same visual language. If you have never drawn a Mermaid diagram, do not worry. You build by dragging shapes and typing plain instructions, not by writing diagram code.
Step 4: Draw Your First Workflow as a Diagram
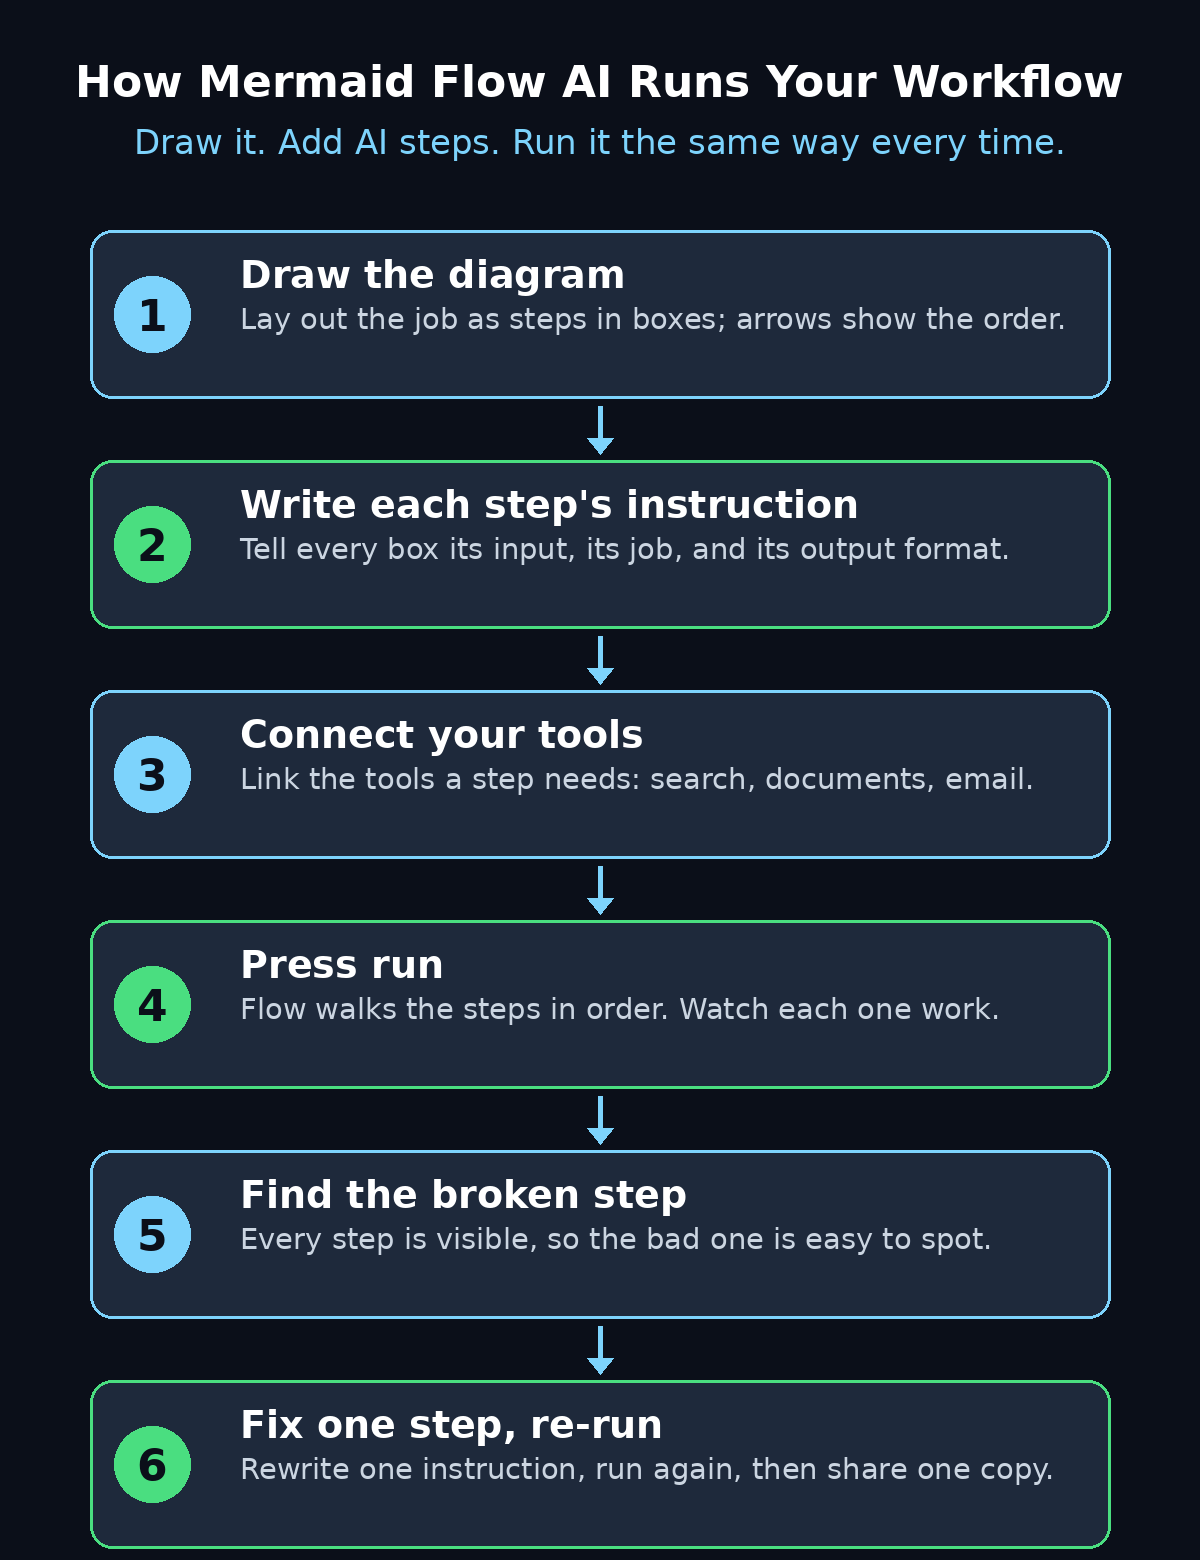
Every workflow starts as a simple diagram. Think of a job you repeat every week, then break it into four or five steps. A good first example is turning meeting notes into tasks. The steps are: paste the notes, pull out the decisions, list the action items with owners, and format the result as a checklist.
On the canvas, add one box for each step. Draw an arrow from the first box to the second, and keep going until the last box is the output. Put the input at the top and the output at the bottom, so anyone reading the diagram can follow it in one direction. Keep each box to one job. A box that says “summarize the meeting and email everyone” is really two jobs hiding in one box, and it will be harder to fix later.
Write a short label on every box. Labels like “Read notes” and “Extract tasks” are clear. Labels like “Process” and “Handle” are not, because nobody can tell what they mean a week later. This habit pays off fast. When a workflow has ten boxes, clear labels are the difference between a diagram you trust and a diagram you avoid.
Here is the diagram habit that makes Mermaid Flow AI different from a chatbot: the diagram is the contract. The model cannot add a step, skip a step, or reorder the steps. It can only do the thinking inside the boxes you drew. That is why the same workflow gives you the same shape of result every time. When you learn how to use Mermaid Flow AI, this habit matters more than any setting: draw the plan first, and let the model work inside it.
Step 5: Add AI to Each Step in Mermaid Flow AI
A box on the canvas is only a label until you tell it what to do. Click a step and write its instruction in plain language. For the meeting-notes workflow, the “Extract tasks” step might say: “Read the notes below. List every action item as a short task, with the name of the person who owns it and the date it is due. Skip anything that is not a clear commitment.”
Good instructions are specific about the input, the job, and the output format. Tell the step what it receives, what to do with it, and what shape the answer should take. A step that says “summarize this” will give you a different answer every run. A step that says “write three bullet points, each under twelve words, covering decisions only” will give you a steady, usable result.
Connect the tools the workflow needs when a step needs live information. A step can pull from the tools you connect, so the workflow can search the web, read a document, or check a mailbox instead of guessing. Keep the tool list short. Every tool you add is another thing that can break, so connect only what the workflow truly needs, and test each connection with a real run before you rely on it.
Agentic workflows like this are becoming the standard way small teams automate routine work. If you want a deeper look at how agent-based systems are changing everyday business software, the team at Agentic Affairs covers agentic AI news and workflows in plain language, and it is a useful companion read while you design your first flows.
Step 6: Run Your Workflow and Watch Every Step
Press run and watch the diagram come alive. Mermaid Flow AI walks through the steps in order, and you can see each step work. The input enters the first box, the result passes to the next box, and the final output lands at the end. Because every step is visible, you are never guessing what happened in the middle. This visible run is the moment most people finally get how to use Mermaid Flow AI: you watch the work happen instead of waiting for a mystery answer.
Read the output of each step, not just the final answer. The first time you run a workflow, the most useful information is where it goes wrong. Maybe step two pulls out the wrong items, or step three formats the list in a way you did not ask for. That is normal. A first run is a test, not a performance, and the fix is usually a clearer instruction in one box.
Run the same workflow three times with different inputs before you call it done. The first run finds the obvious mistakes. The second run shows whether the steps are stable. The third run proves the workflow works on a fresh input, not just on the example you built it around. Save the workflow only after the third run looks right.
Step 7: Fix a Step When the Output Looks Wrong
Something will go wrong, and that is where Mermaid Flow AI earns its keep. When a result looks off, open the run and find the step where the output first went bad. Because the diagram shows every step, the broken one is easy to spot. You do not have to re-read a long chat log or guess which prompt caused the problem.
Fix one step at a time. Rewrite its instruction to be more specific, or split a step that tries to do two jobs into two boxes. Then run the workflow again and check only that step. If you change three steps at once, you will never know which change fixed the problem, and you may break a step that was working fine. That is the debugging loop at the heart of how to use Mermaid Flow AI well: find the broken box, fix one thing, and run it again.
Keep a short note of what you changed and why. A one-line comment on the workflow, like “Step 3: added date format after run 4 failed”, saves you from repeating the same mistake next month. Teams that keep these notes build workflows that stay reliable, while teams that do not keep rebuilding the same flow from scratch.
Step 8: Share One Copy of the Workflow With Your Team
When a workflow works, share it. Everyone on the team reads the same diagram and runs the same steps, so the work comes out the same way no matter who presses run. That single shared copy is one of the four ideas behind the product, and it solves a real problem: the “same” process done five different ways by five different people.
Sharing also makes review easy. A teammate can open the diagram, read the steps, and suggest a fix without touching your chat history or your personal prompts. That matters for quality control. A workflow that handles customer replies or financial data should be readable by someone other than the person who built it.
If you run a digital agency or a small business, this is where Mermaid Flow AI pays for itself. Build the workflow once, share it with the team, and every client report, brief, or summary follows the same checked steps. The team spends its time on the judgment calls, and the workflow handles the repeatable parts.
Step 9: Four Starter Workflows to Copy in Mermaid Flow AI
Do not start with your hardest process. Start with one of these four simple workflows, get it working, then move on to bigger jobs. These examples are the fastest way to practice how to use Mermaid Flow AI without risking live work.
- Content brief to draft: paste a topic, then let the steps research the angle, outline the post, and draft the first version. You edit the draft, so quality stays in human hands.
- Support inbox triage: read new messages, sort them into billing, technical, and general, and draft a reply for each group. A human sends the replies, so nothing goes out unchecked.
- Meeting notes to tasks: paste raw notes, extract decisions and owners, and output a clean checklist. This is the best first workflow because the input and the output are both easy to judge.
- Research to summary: gather a few sources on a topic, pull out the key facts, and write a one-page summary with the sources listed. This is ideal for weekly market or competitor checks.
Build the simplest one first, even if it feels too easy. The goal of the first workflow is to learn the canvas, the step instructions, and the run history. Once those feel natural, the bigger workflows are just more boxes on the same canvas.
Step 10: Mermaid Flow AI vs Zapier, n8n and Make
Workflow tools are not all the same, and the right one depends on the job. Zapier connects thousands of apps and is best when the job is moving data between tools you already use. n8n is open and flexible, and it suits technical teams that want to self-host. Make is a strong visual automation builder for multi-step app workflows. Mermaid Flow AI is different: it is built for agentic work, where an AI model does the thinking inside each step of a fixed, visible diagram.
| Tool | How you build | Free starting point | Best for beginners who want |
|---|---|---|---|
| Mermaid Flow AI | Draw the workflow as a diagram, add AI steps | 15 runs a month | Visible, repeatable AI workflows |
| Zapier AI | Pick apps, connect triggers and actions | Free plan with limited tasks | App-to-app automation |
| n8n | Node canvas with code options | Free self-hosted option | Full control, technical teams |
| Make | Visual scenario builder | Free tier with limited operations | Multi-app visual scenarios |
If your job is “when a form is filled, add a row to a sheet”, Zapier or Make will do it faster. If your job is “read these notes, decide what matters, and draft the follow-up”, that is agentic work, and Mermaid Flow AI is built for it. Many teams end up using both kinds of tool side by side. If you want the Zapier side of that setup too, our guide on how to use Zapier AI for beginners walks through it step by step, and the Make AI beginner guide covers visual scenarios in the same style.
Frequently Asked Questions About Mermaid Flow AI
Is Mermaid Flow AI really free?
Yes, for light use. The free plan includes 15 workflow runs a month, with no card required to start. That covers building and testing one or two real workflows. Premium adds 500 shared runs a month for a whole organization, which is the plan to pick when a workflow becomes daily team work.
Do I need to know Mermaid code to use Mermaid Flow AI?
No. You build by dragging shapes on a canvas and typing plain-language instructions for each step. Knowing Mermaid diagram syntax helps you read the diagram faster, but the tool writes the diagram structure for you as you draw.
How is Mermaid Flow AI different from a chatbot?
A chatbot plans its own steps every time you ask it something, so the same question can take a different path on different days. Mermaid Flow AI runs fixed steps in a fixed order, and every step is visible on the diagram. The model still thinks inside each step, but it cannot change the plan.
Can I use Mermaid Flow AI for business workflows?
Yes. The shared-copy design is made for teams: one workflow, one set of steps, everyone runs the same version. Start with internal jobs like meeting notes, briefs, and triage, then move to client-facing work once the workflow has passed several test runs.
What happens when I use up my 15 free runs?
Runs reset each month on the free plan. If you run out early, wait for the reset or upgrade to Premium for 500 shared runs a month. Before you upgrade, check which workflows actually used the runs, and retire any test workflow you no longer need.
Can Mermaid Flow AI replace Zapier or n8n?
Not exactly. Those tools move data between apps, while Mermaid Flow AI runs AI thinking inside fixed steps. The tools solve different jobs, and most teams use them together: Zapier or Make moves the data, and Mermaid Flow AI does the reasoning on top of it.
Final Thoughts
Mermaid Flow AI is a small idea with a big payoff: put the workflow on the page, keep the steps fixed, and let the AI think inside each step. You get the power of an agent without the black box, and you get a diagram your whole team can read, run, and improve. The free plan gives you 15 runs a month, which is enough to automate one real weekly job and feel the difference.
Start tonight. Pick the meeting-notes workflow, draw four boxes, write clear instructions, and run it three times. When the third run looks right, share it with your team and pick the next job. The best way to learn how to use Mermaid Flow AI is to build one small workflow tonight, not to read about ten of them. That is how to use Mermaid Flow AI the way it was designed: one visible workflow at a time, each one saving a little time every week.
Explore More Free AI Tools
Want more free AI tools like this one? Try our AI Title Generator, Meta Description Generator, AI Rewriter, and Keyword Density Checker — free tools on AIToolSteps that help you write, polish, and check your content in minutes.