
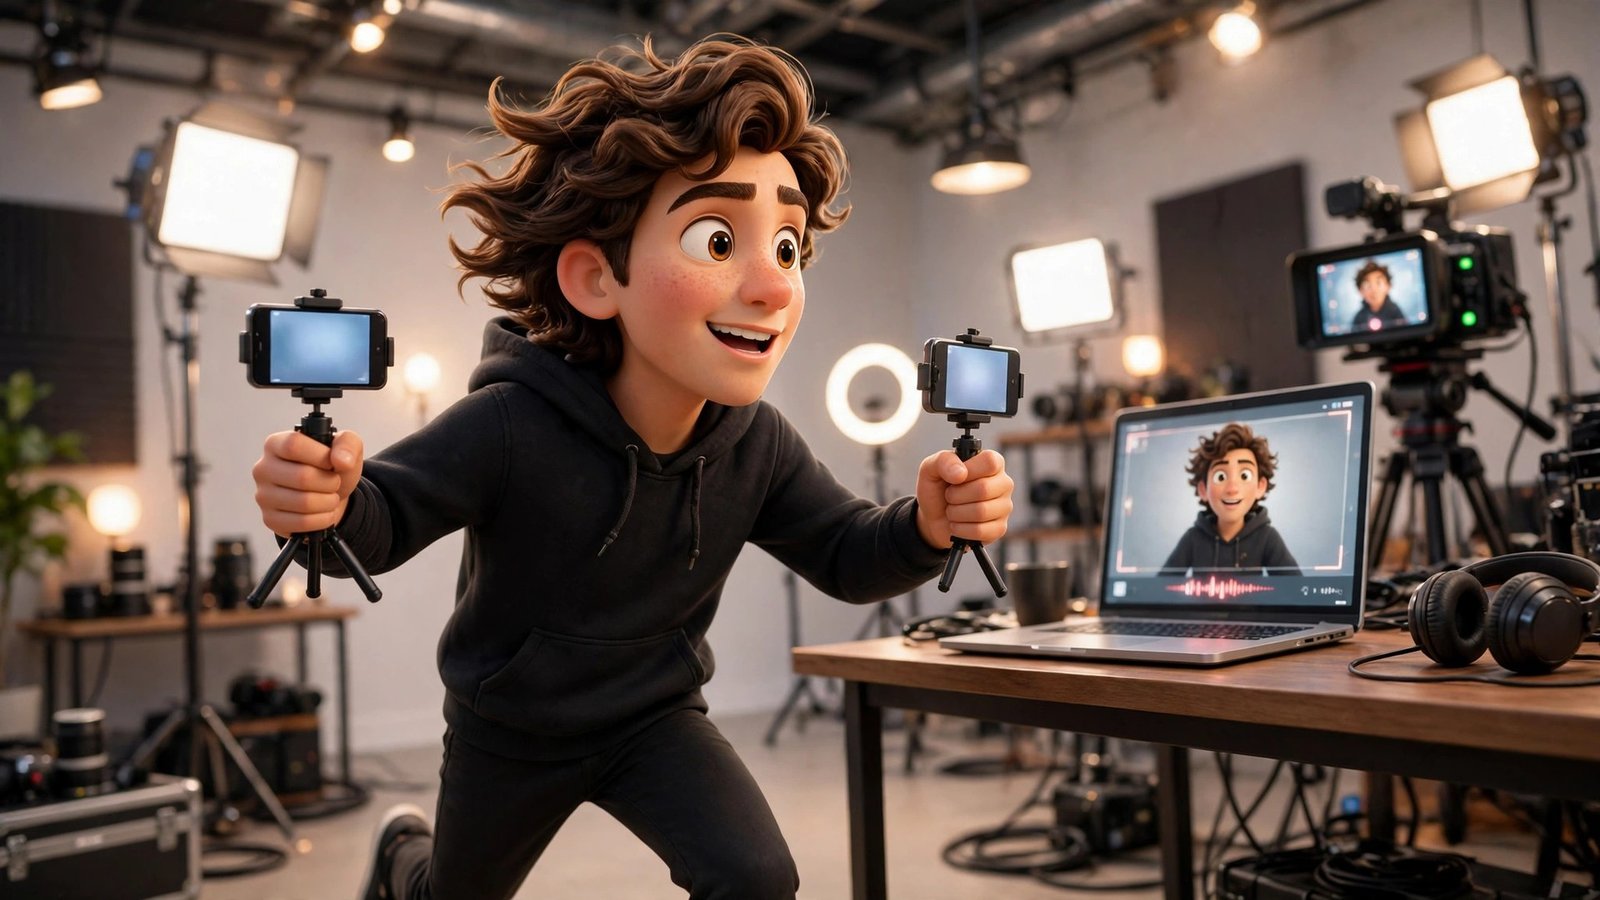
Most people record with one camera because more angles feel too hard. You need extra cameras, a way to keep them in sync, and hours in an editor to cut between them — so most tutorials, product demos and course lessons end up as one flat, static shot. Shot.video AI changes that trade-off completely. It turns the laptop and phones you already own into a multi-camera studio, records every angle in sync with one press, and then uses AI to make your first edit for you.
Shot.video AI launched on Product Hunt on 10 November 2026, and it is free to start with no card needed. In this beginner guide, you will learn exactly how to use Shot.video AI, from connecting your first phone with a QR code to reviewing the AI edit and exporting a video that looks like it was made by a small production team. No camera gear, no editing experience and no app install on your phones are needed — just the devices already sitting on your desk.
Step 1: Understand What Shot.video AI Does
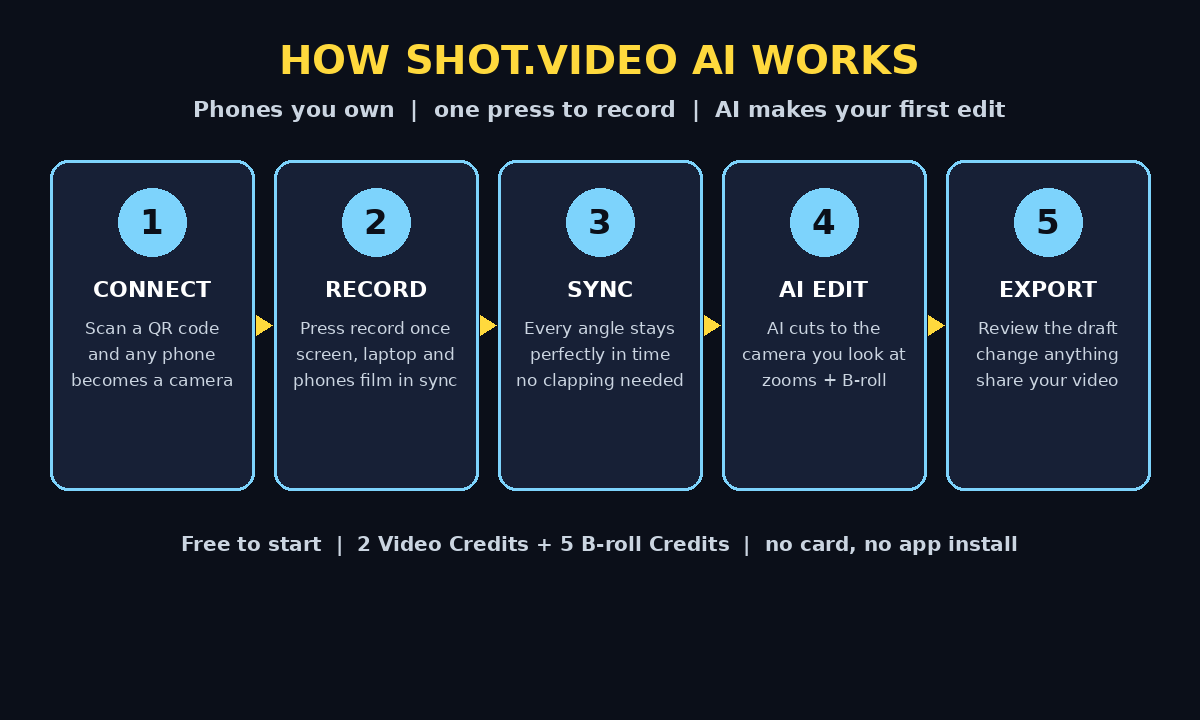
Before you set anything up, it helps to understand what Shot.video AI actually is. Shot.video AI is a browser-based tool that records your screen, your laptop camera and several phones at the same time, keeps every angle perfectly in sync, and then edits the footage into one finished video. You scan a QR code and any phone becomes another camera angle. There is no app to install on the phone, which is the part beginners usually find most surprising.
The AI part comes after you stop recording. Shot.video AI watches your footage, cuts to the camera you are looking at, and adds zooms, punch-ins and optional B-roll where they help. The idea is simple: a single static shot loses viewers, but cutting with purpose keeps their eyes where they should be. A 2026 study cited by Shot.video found that scene cuts made viewers look at the same thing at the same time, while too much visual clutter worked against it — so the AI cuts when it matters, not constantly.
Shot.video AI is built for anyone who explains things on camera: product demos, tutorials, online courses, team updates, reviews and podcasts. If you already record yourself talking through a screen, this tool simply gives that same recording more angles and a much better first edit, without adding a crew or a complicated workflow.
Step 2: Create Your Free Shot.video AI Account
Learning how to use Shot.video AI starts with the free plan, and the free plan is genuinely usable for a first project. New users get 2 Video Credits and 5 B-roll Credits, and no card is needed to sign up. That is enough to record and finish your first multi-camera video and see whether the workflow fits you before you spend anything.
- Head to shot.video and create your free account — no card is required.
- Check your credit balance inside your account so you know exactly how many videos and B-roll clips you have left.
- Do not spend your first video credit on a real client project. Record a short practice take first, such as a two-minute demo of a tool you already know.
- Keep your first project small. A short, simple recording teaches you the whole workflow faster than a long, complicated one.
Shot.video also offered a Product Hunt special at launch: sign up in the launch week and get 50 extra B-roll credits added to your account. Offers like that change over time, so check the current offer on the site when you sign up — but the free starting credits alone are enough to learn the tool properly.
Step 3: Set Up Your Laptop as the Main Camera
Your laptop is the heart of a Shot.video AI recording. It runs the session, shows you the live angles, and records your screen and your laptop camera alongside your phones. Set it up properly before you connect anything else, because a shaky main angle makes the whole video feel amateur, no matter how good the extra angles are.
- Put your laptop on a stable surface at eye level, not looking up at you from a desk. A stack of books works fine if you do not have a stand.
- Face a window or a lamp so light falls on your face, not behind you. Light from behind turns you into a silhouette.
- Choose what your screen will show before you record. Close extra tabs, silence notifications, and open the exact app or slides you will demonstrate.
- Test your laptop camera and microphone once, for ten seconds, and play it back. A quick test now saves a re-record later.
Think of the laptop camera as your main angle — the one viewers see most of the time. The phones are supporting angles: a close-up of your hands, a wide shot of your desk, or a second view of your face. When the main angle is clean and well-lit, the AI has a strong shot to cut back to again and again.
Step 4: Connect Your Phones with a QR Code
This is the step that makes Shot.video AI feel almost like magic the first time you try it. You do not install an app on your phone, you do not pair anything over Bluetooth, and you do not mess with cables. You scan a QR code, and your phone becomes another camera.
- Start a new recording session on your laptop in Shot.video AI.
- Point your phone camera at the QR code shown on your laptop screen.
- Allow the browser on your phone to use its camera when asked — that permission is what turns the phone into a camera angle.
- Repeat for a second phone if you have one. An old phone you no longer use every day makes a perfect second angle.
- Place each phone where it can see something useful: one close on your hands or keyboard, one wider on the whole scene.
Use whatever phones you already own — that is the whole point of Shot.video AI. A spare phone propped on a shelf, a partner’s phone on a small tripod, or a phone leaning against a mug can all work. Check that each phone is charged, or plugged in, before a long recording, because a phone that dies halfway through leaves a hole in your angles. Also check that each phone is on the same wifi network as your laptop if the connection asks for it, and keep the phone browser open while you record.
Step 5: Plan Your Angles Before You Press Record
A multi-camera video is only better than a single-camera video if each angle shows something different. Two cameras pointed at the same thing from almost the same place add nothing. Spend two minutes planning before you record, and the AI edit will be ten times better.
A simple three-angle plan works for almost every beginner project. Angle one is your laptop camera: your face, talking to the viewer. The second angle is a phone close-up: your hands, your keyboard, or the product you are holding. The third angle is your screen: the app, website or slides you are explaining. When you look at your screen, the AI cuts to the screen. When you look back at the camera, it cuts back to you. That is the rhythm that makes a tutorial feel professional.
If you run a digital agency or create demos for clients, this planning step is where your experience shows. Think about what the client needs to see at each moment — your face for trust, the screen for proof, and a close-up for detail — and place your phones to match. The same thinking applies if you work with AI automation services and want to show an agent workflow on screen while you explain it to camera: the screen angle carries the evidence, and your face carries the explanation.
Step 6: Press Record Once and Film Your First Take
When your angles are set, recording with Shot.video AI is refreshingly simple: you press record once, and your screen, laptop camera and phones all record in sync. You do not start each device separately, and you do not clap to sync them later. One press, everything together.
- Do a final check: all phones connected, screen showing the right thing, microphone working, and nobody about to walk into the room.
- Press record once in Shot.video AI and wait a beat before you start talking, so the AI has a clean opening to work with.
- Talk naturally and look where you want the camera to cut. Look at the screen when you explain something on it, and back at the camera when you address the viewer directly.
- If you make a mistake, pause, take a breath, and restart the sentence. The AI edit and your own trimming can remove the stumble later.
- Keep the take as short as you honestly can. A tight five-minute demo beats a rambling fifteen-minute one every time.
Beginners often worry about looking perfect on the first take. Do not. Shot.video AI is designed so that your first edit is already watchable, and you can change anything you do not like afterwards. The goal of the first take is to learn the rhythm — record once, review the AI edit, and notice what you would do differently next time.
Step 7: Let Shot.video AI Make Your First Edit
After you stop recording, Shot.video AI turns your synced angles into a first edit. This is the part that saves the most time. Instead of importing four clips, syncing them by hand and cutting between them for an hour, you get a finished draft in minutes.
The AI cuts to the camera you are looking at, so the edit follows your attention. It adds screen zooms and pans when you point at something on screen, and it suggests B-roll for you to approve. B-roll is extra footage — a close-up, a product shot, a cutaway — that covers a jump or illustrates a point while you keep talking. You stay in control: the AI proposes, and you approve or change it.
Watch the first edit all the way through before you touch anything. Notice where the cuts feel natural and where they feel early or late. That first watch tells you more about your recording habits than any settings page will. If a cut feels wrong, it usually means you looked away at the wrong moment during recording — and that is a habit you can fix in one take.
Step 8: Review the Cuts, Zooms and B-roll
Reviewing the AI edit is a skill, and it gets faster every time you do it. Watch once for the story: does the video make sense from start to finish? Watch once for the visuals: does each cut land on the right angle at the right moment? Then watch once for the details: are the zooms helping, or are they distracting?
- Keep cuts that follow your gaze — they feel invisible to the viewer, which is exactly right.
- Remove zooms that punch in for no reason. A zoom should highlight something you are pointing at, not decorate a quiet moment.
- Approve B-roll only when it adds information. A random clip over your explanation is clutter, not production value.
- Check the audio on every angle. The AI edit should never jump to a camera whose audio is worse than the main angle.
- Watch the first ten seconds twice. If the opening is slow or confusing, viewers leave — no edit can save a weak opening.
If you are making videos for a business, this review pass is also where you check the message. Does the video say what you meant it to say? Would a new customer understand it? A digital agency client does not care how many cameras you used — they care whether the video is clear, trustworthy and easy to follow. The AI edit gives you the polish; your review gives it the judgment.
Step 9: Fine-Tune the Edit Yourself
Shot.video AI makes the first edit, but you make the final one. The tool lets you change anything you like: swap a cut to a different angle, trim a pause, move a zoom, or replace a B-roll suggestion with something better. This is where a good video becomes a great one, and it is also where beginners should spend the least time on their first project.
- Fix the biggest problem first — usually the opening, a long pause, or a wrong cut — and ignore small imperfections.
- Change one thing at a time and re-watch that section before moving on, so you always know what each change did.
- Trim dead air at the start and end of sentences. Short pauses keep energy up; long ones make viewers click away.
- Do not add effects for the sake of it. One clean style, used consistently, looks far more professional than five different transitions.
- Stop when the video is clear and watchable. Perfectionism is the most common reason beginner videos never get published.
A useful rule is to spend no more than fifteen minutes fine-tuning your first video. After that, export it, publish it, and start the next one. Your fifth video will be much better than your first, and you only get to a fifth video by finishing the first four.
Step 10: Export and Share Your Video
When the edit looks right, export your video from Shot.video AI and share it where your audience already is. The tool turns your angles into a single, share-ready edit that combines your screen, you and every extra angle — so you do not need to assemble anything in another editor unless you want to.
- Export at the resolution your platform needs — horizontal for YouTube, vertical for Shorts, TikTok and Reels.
- Give the video a clear title that says what the viewer will learn, not just what the tool is called.
- Write a short description that repeats the main benefit in one sentence, and add a link to the tool or guide you mentioned.
- Post the video, then watch the first comments and questions. They tell you what your next video should cover.
- Save your session notes: which angles worked, which phone position was best, and what you will change next time.
Shot.video AI is at its best when it becomes a habit rather than a one-off experiment. Record one short multi-camera video a week — a demo, a tip, a walk-through — and within a month you will have a small library of professional-looking videos made with nothing more than the devices you already own. That is the real promise of Shot.video AI: not a studio you have to buy, but a studio you already have.
Shot.video AI vs Single-Camera vs Traditional Multi-Camera
It helps to see where Shot.video AI sits next to the two ways people usually record. The table below compares them honestly, so you can decide whether this workflow fits your videos.
| Feature | Shot.video AI | Single camera | Traditional multi-camera |
|---|---|---|---|
| Gear needed | Laptop + phones you own | One phone or webcam | Multiple cameras, tripods, sync tools |
| Setup time | Minutes — scan a QR code | Seconds | An hour or more |
| Recording | One press, all angles in sync | One angle only | Start each camera separately |
| First edit | AI cuts, zooms and B-roll | You edit everything by hand | You sync and cut by hand |
| Cost to start | Free — 2 video credits, no card | Free | Hundreds or more in gear |
| Best for | Tutorials, demos, courses | Quick clips and calls | Professional productions |
Frequently Asked Questions
Is Shot.video AI really free to start?
Yes. The free plan gives you 2 Video Credits and 5 B-roll Credits, and no card is needed to sign up. That is enough to record and finish your first multi-camera video. Shot.video also offered 50 extra B-roll credits as a Product Hunt launch special, so check the current offer when you create your account.
Do I need to install an app on my phone to use Shot.video AI?
No. You scan a QR code shown on your laptop, and your phone becomes another camera through its browser. No app install is needed on the phone, which also means you can borrow a spare phone for an extra angle without setting anything up on it.
How many phones can I connect to Shot.video AI?
You can connect one or more phones alongside your laptop camera and screen. For beginners, one extra phone is plenty — it gives you a close-up or a wide shot to cut to. Add a second phone only when you have a clear job for it, such as a dedicated product close-up.
Can Shot.video AI really edit the video for me?
Yes — it makes your first edit. The AI cuts to the camera you are looking at, adds zooms and punch-ins, and suggests B-roll for you to approve. You can change anything in the edit afterwards, so the AI draft is a starting point, not a final decision.
What kind of videos is Shot.video AI best for?
It is best for anyone who explains things on camera: product demos, tutorials, online courses, team updates, reviews and podcasts. If your video is mostly you talking through a screen, Shot.video AI gives that same recording more angles and a much better first edit.
Do I need expensive cameras to get good results with Shot.video AI?
No. The tool is built around the devices you already own — your laptop and your phones. Good lighting, a stable laptop position and a clear plan for your angles matter far more than expensive gear. Start with what you have, and upgrade only when you know exactly what is limiting you.
Final Thoughts
Shot.video AI solves a problem that has kept most beginners on a single camera for years: multi-camera video felt too hard, too expensive and too slow. By turning your laptop and phones into a synced studio and letting AI make the first edit, it removes the three hardest parts — the gear, the syncing and the first cut — and leaves you with the one part that actually matters: explaining something clearly on camera.
Start small. Create your free account, connect one phone, and record a two-minute demo of something you already know well. Watch the AI edit, fix the biggest problem, and publish it. Then do it again next week. Within a few videos, you will have a workflow that looks professional, costs nothing to start, and uses only the devices already on your desk. That is exactly what a good beginner tool should do — get out of your way and let your explanation shine.
Explore More Free AI Tools
Want to keep building your AI toolkit? Try the free tools on AI Tool Steps: the AI Title Generator, the Meta Description Generator, the AI Rewriter, and the Keyword Density Checker. Each one is free, beginner-friendly, and built to help you create better content faster — just like Shot.video AI helps you create better videos faster.