

How to Use Huxly AI for Beginners (Free Guide 2026)
Imagine describing an app idea in one sentence — “a fitness tracker that reminds me to drink water and logs my workouts” — and watching a real, working mobile app appear on your screen a few minutes later. That is exactly what Huxly AI does. Launched on Product Hunt on November 2, 2026, Huxly is an AI mobile app builder that turns plain-language prompts into real apps written in clean code, with a live preview running in your browser as you build.
Most “build an app with AI” tools stop at a pretty mockup. Huxly goes further: it writes real code in Expo (React Native), Flutter, or SwiftUI, gives you full source-code export, and can push your project straight to GitHub. You can even run your app on a streamed iPhone simulator to see how it feels on a real phone. And you do not need to write a single line of code to get started.
In this beginner-friendly guide, you will learn exactly how to use Huxly AI — from creating your free account and writing your first prompt, to previewing, refining, testing, and finally shipping your app. Whether you are a student with an idea, a small business owner who needs an app, or a creator testing a concept, this guide walks you through every step.
Step 1: Understand What Huxly AI Actually Builds
Before you type your first prompt, it helps to know what Huxly actually produces. Huxly is not a website builder and it is not a slide deck generator. It builds real mobile apps — the kind you install on a phone, with screens, buttons, navigation, and saved state.
Here is what makes Huxly different from the AI website builders you may already know:
What Huxly AI Builds for Beginners
- Real mobile code, not a mockup: Huxly writes clean code in Expo (React Native), Flutter, or SwiftUI — the same frameworks professional developers use.
- Live preview as you build: A working preview runs in your browser while the AI works, so you see your app take shape in real time.
- Full source export: You own the code. Export it, open it in your own editor, or hand it to a developer later.
- GitHub push: Send your project directly to a GitHub repository from inside Huxly.
- Streamed iPhone simulator: Test your app on a simulated iPhone streamed to your browser, so you can check how it feels on a real device.
- Figma import: Paste a Figma frame and Huxly turns it into working screens with navigation and state wired up.
- Templates for common ideas: Start from templates for e-commerce, education, fitness, and finance apps instead of a blank screen.
Think of Huxly as a junior developer who never sleeps: you describe the app, it writes the code, and you stay in charge of the decisions. If you have ever used an AI website builder such as Lovable, the idea will feel familiar — but Huxly is built for mobile apps from the ground up, which is a very different job.
For small businesses, this matters a lot. A digital agency would normally charge thousands of dollars and take weeks to build even a simple app. Huxly lets you test the idea first, for free, and only invest in professional help once you know the app is worth building. That is a smarter order of operations for any founder on a budget.
Step 2: Create Your Free Huxly Account
Getting started with Huxly takes only a few minutes. You do not need a credit card, and you do not need to install anything — Huxly runs entirely in your browser.
Follow these steps to set up your account:
- Open the Huxly website: Go to the Huxly homepage in your browser (search “Huxly AI” or open it from the Product Hunt launch page).
- Sign up with your email or Google account: Pick the option that is easiest for you. A Google sign-in is the fastest route for most beginners.
- Confirm your email: If you signed up with an email address, check your inbox for a confirmation link and click it.
- Complete the short onboarding: Huxly may ask what kind of app you want to build. Answer honestly — it helps the tool suggest the right template.
- Open your dashboard: You will land on a clean dashboard with a big prompt box, template options, and your projects list.
Take a minute to look around before you build anything. Find where your projects live, where the preview panel sits, and where the export and GitHub buttons are. Knowing the layout now saves you hunting later when you are in the middle of a build.
Step 3: Describe Your App Idea in One Clear Prompt with Huxly AI
Everything in Huxly starts with a prompt. The quality of your app depends directly on the quality of this first description, so it is worth spending five minutes on it. A vague prompt gives you a vague app; a specific prompt gives you something you can actually use.
A strong Huxly prompt has four parts:
- What the app is: “A habit tracker app for students.”
- Who it is for: “Busy university students who want to build study habits.”
- What it must do: “Let users add habits, check them off daily, see a weekly streak, and get a gentle reminder at 8 pm.”
- How it should look and feel: “Clean and calm design, dark blue and white, big touch-friendly buttons.”
Here is an example of a complete first prompt you can adapt:
“Build a habit tracker app for university students. Users can add habits like reading, exercise, and revision, check them off each day, and see a weekly streak with a simple chart. Send a gentle reminder at 8 pm. Use a calm design with dark blue and white colours, large buttons, and a friendly tone.”
Do not try to describe every tiny detail in the first prompt. Give Huxly the big picture, let it generate the first version, and then refine it step by step. That loop — prompt, preview, refine — is the whole workflow, and it works far better than one giant prompt.
If you are stuck for an idea, start with something small and personal: a recipe saver, a water reminder, a budget tracker, or a flashcard app for your exams. Small ideas teach you the tool faster than ambitious ones, and you can always grow the app later.
Step 4: Pick a Template or Start From a Figma Frame in Huxly AI
If a blank prompt box feels intimidating, Huxly gives you two faster starting points: templates and Figma import.
Templates cover the most common app ideas — e-commerce stores, education apps, fitness trackers, and finance tools. Pick the closest match, and Huxly builds a working version you can reshape with prompts. A template is not a finished app; it is a head start. Change the colours, rename the screens, swap the features, and make it yours.
Figma import is the more powerful option if you already have a design. Paste a Figma frame into Huxly and it converts your design into working screens, with navigation and state wired up. This is genuinely useful for designers and for small teams: the designer draws the screens, and Huxly turns them into a tappable app instead of a static picture.
Which starting point should you choose?
- Prompt from scratch: Best when your idea is unusual or you have no design yet.
- Template: Best when your idea matches a common pattern and you want speed.
- Figma frame: Best when you (or a designer you work with) already have screens drawn.
Whichever route you take, the result is the same: a real project with real code that you can keep editing. There is no wrong choice here — you can switch approaches on your next project.
Step 5: Preview Your App Live in the Browser with Huxly AI
As soon as Huxly starts building, a live preview appears in your browser. This is one of the best parts of the tool: you do not wait for a finished app to see what you are getting. You watch screens appear, buttons take shape, and navigation come alive while the AI is still working.
While the preview is running, do three things:
- Tap through every screen: Click the buttons, open the menus, and follow the flows a real user would follow. If a button does nothing, note it down.
- Check the layout on different widths: Resize the preview or switch between phone sizes. Text that overlaps or buttons that run off the edge are easy to spot now and harder to fix later.
- Read every label out loud: If a label sounds confusing to you, it will confuse your users too. Short, plain words beat clever ones.
Do not expect perfection on the first pass. The first version is a draft — a working draft, but a draft. Its job is to show you what Huxly understood from your prompt so you can correct it. If the app missed a feature or misunderstood a screen, that is normal. The next step is where you fix it.
Step 6: Refine Screens, Navigation and State With Prompts
Refining is where a good app becomes a great one, and it is the skill that separates beginners who get a usable app from beginners who give up after version one. The rule is simple: one change at a time, in plain language.
Good refinement prompts sound like this:
- “Make the home screen show today’s habits at the top and the weekly chart below them.”
- “Add a settings screen where users can change the reminder time.”
- “Change the main colour from blue to deep green and make the buttons rounder.”
- “When a user completes all habits, show a small celebration message.”
Bad refinement prompts sound like this: “Make it better.” The AI cannot read your mind, so tell it exactly what to change, where, and how it should behave. After each change, check the live preview again before asking for the next one. Stacking five changes in one prompt makes it hard to tell which change broke something — and something will break eventually, because that is how software works.
A practical rhythm for beginners is: change one thing, preview it, and either keep it or ask for a fix. Repeat that loop ten times and you will be amazed how far the app has come. This patient, step-by-step approach is also how professional teams work with AI automation services — small, testable changes beat giant rewrites every time.
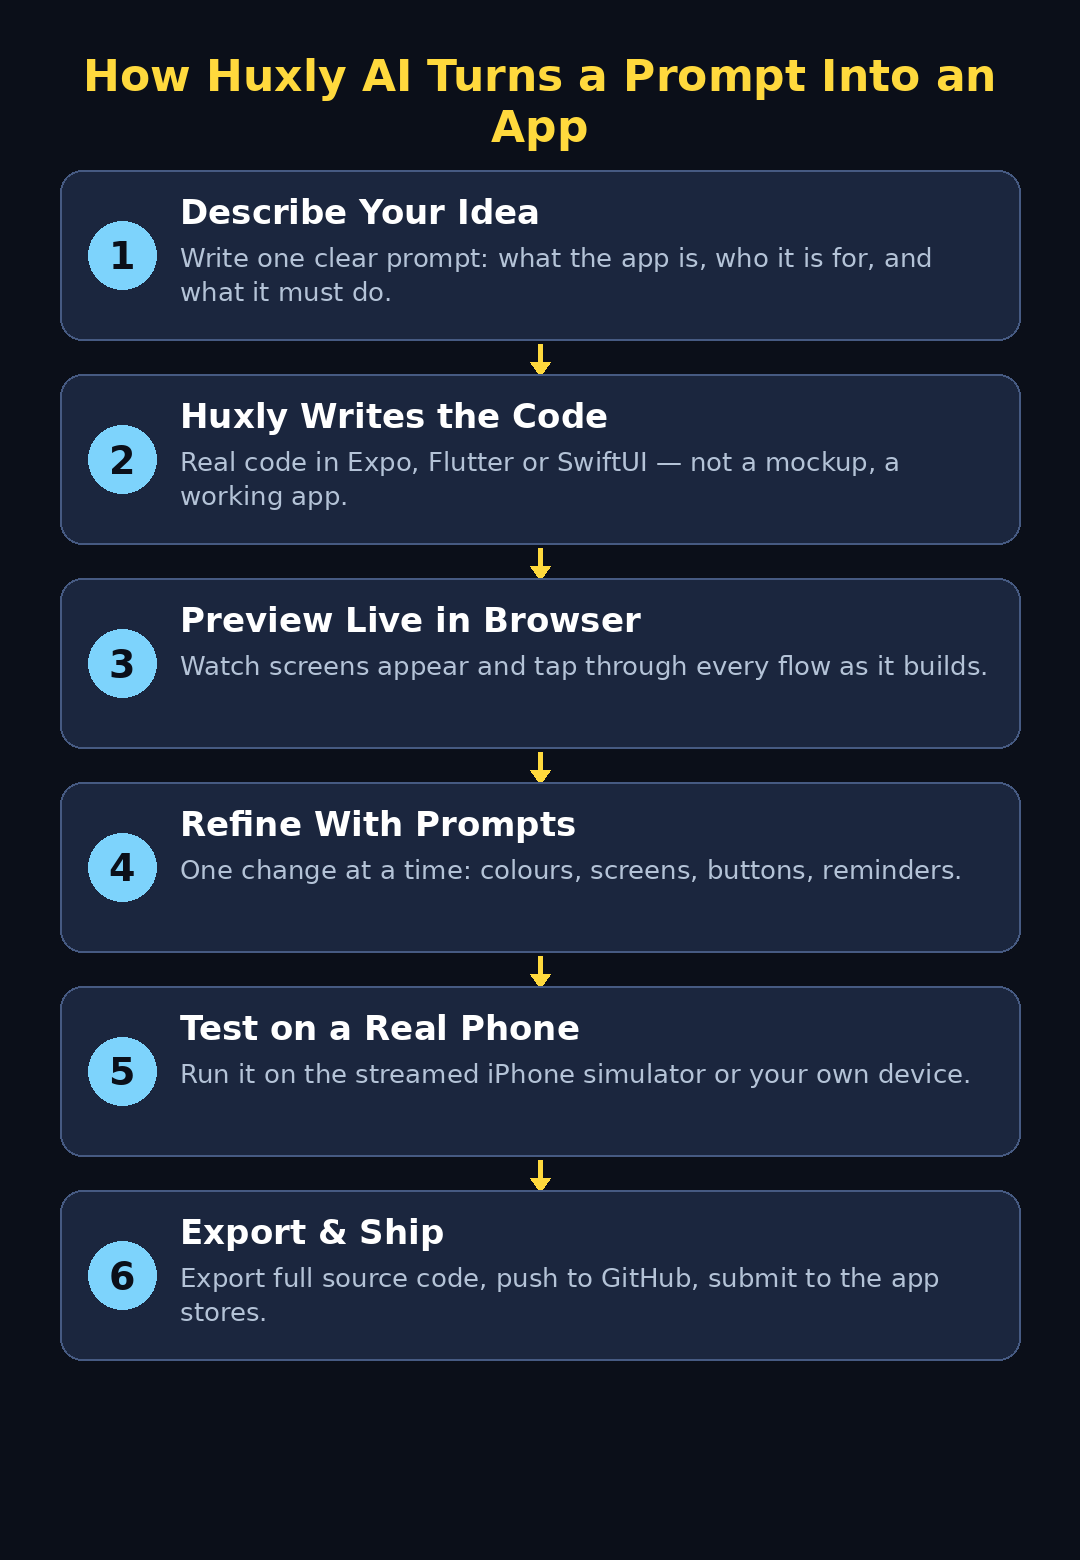
Step 7: Test on a Real Phone With the Streamed Simulator
A browser preview is useful, but an app lives on a phone. Huxly lets you run your app on a streamed iPhone simulator, so you can check how it actually feels in your hand — or at least on a phone-sized screen.
When you open the simulator, test the things that only matter on a real device:
- Thumb reach: Can you reach the important buttons with one thumb? If the main action sits at the very top of a tall screen, move it down.
- Scrolling: Does each screen scroll smoothly, and does anything get cut off at the bottom?
- Keyboard behaviour: When you tap a text field, does the keyboard cover the button you need next?
- Loading states: Does the app show something sensible while data loads, or does it flash a blank screen?
If you have a real iPhone or Android phone nearby, use the Expo Go app to run your project on it as well — Huxly builds with Expo, so this works naturally. Nothing replaces holding the app in your hand. A button that looked fine in the browser can feel tiny on a real phone, and you want to find that out before your users do.
Step 8: Export Clean Code and Push to GitHub in Huxly AI
This is the step that makes Huxly a serious tool instead of a toy. When you are happy with your app, export the full source code — or push it straight to GitHub from inside Huxly.
To export your project:
- Click Export or Push to GitHub: Find the option in your project menu and follow the prompts.
- Connect your GitHub account: The first time, you will authorise Huxly to create a repository for you. Use a clear repository name, like “habit-tracker-app”.
- Check what was pushed: Open the repository on GitHub and confirm the code, screens, and assets are all there.
- Keep a backup: Even if you never write code yourself, having the project on GitHub means your work is safe if anything happens to your Huxly account.
Why does this matter? Because most AI app builders lock you in: your app only exists inside their tool. Huxly gives you the code, which means you can hire a developer to extend it, move it to another tool, or keep building it yourself as your skills grow. For a beginner, that ownership is the difference between a demo and a real asset.
If the code looks intimidating, do not worry — you do not need to read it. Just know it is there, it is yours, and it is written in standard frameworks that any React Native, Flutter, or SwiftUI developer can pick up.
Step 9: Ship Your App to the App Store and Google Play with Huxly AI
Building the app is only half the job. Shipping it means getting it into the App Store and Google Play, and Huxly’s clean-code export is what makes that possible — but there are a few real-world steps no AI tool can skip for you.
Here is the honest checklist:
- Apple Developer account: You need an Apple Developer membership (paid, yearly) to publish on the App Store. Enrol with your real name or business name.
- Google Play developer account: A one-time fee gives you a Play Console account for Android publishing.
- App icons and screenshots: Both stores need an icon and screenshots in exact sizes. Huxly’s preview and simulator help you capture clean screenshots.
- Privacy policy: If your app collects any data — even an email address — the stores require a privacy policy. Free generators can draft one, but read it before publishing.
- Test on a real device first: Run the app on your own phone for a few days. Fix the crashes and the confusing screens before strangers meet them.
For your very first app, consider a softer launch: share it with ten friends, collect their feedback, fix the top three complaints, and only then submit to the stores. A small, honest launch teaches you more than a big, silent one.
Step 10: Grow, Update and Fix Your App With AI in Huxly AI
An app is never truly finished. Users ask for features, phones update, and small bugs appear. The good news is that Huxly stays useful after launch: you can keep prompting it to add features, fix bugs, and improve screens, then export the updated code and ship a new version.
Build a simple update routine:
- Collect feedback in one place: A short form inside the app, or even a shared document, beats scattered messages.
- Fix the most-reported problem first: One fix per update keeps your releases stable and your users happy.
- Add one feature at a time: A new screen or a new setting per release is plenty. Big rewrites introduce big bugs.
- Re-test after every change: Run the live preview and the phone simulator before every export, even for tiny fixes.
- Keep your GitHub repository tidy: Push every stable version so you can always roll back to the last version that worked.
Over time, this loop — feedback, one change, test, ship — turns a weekend experiment into a product people rely on. That is how independent makers grow, and it is exactly the workflow Huxly was designed for.
Huxly AI vs Other AI App Builders
How does Huxly compare with the other AI builders beginners usually consider? Here is a quick side-by-side look. Prices and free tiers change often, so check each tool’s own pricing page before you commit.
| Tool | What it builds | Code export | Best for beginners who… |
|---|---|---|---|
| Huxly AI | Real mobile apps (Expo, Flutter, SwiftUI) | Yes — full source + GitHub push | Want a real phone app with no coding |
| Lovable | Web apps and websites | Yes — GitHub sync | Want a website or web app first |
| Bolt | Web apps in the browser | Yes — download or deploy | Want fast web prototypes |
| v0 by Vercel | Web interfaces and components | Yes — copy or deploy | Want polished UI code quickly |
| Adalo | Mobile apps (no-code builder) | Limited | Prefer drag-and-drop over prompts |
The honest takeaway: if you want a mobile app, Huxly is the most direct route for a beginner in November 2026, because mobile is its whole job. If you want a website, Lovable or Bolt is the better fit. Many makers end up using both — a Huxly app for phones and a web builder for the landing page — and that combination is a strong, cheap stack for a first product.
Frequently Asked Questions
Is Huxly AI really free?
Huxly launched with a free tier that lets beginners build and preview real apps without paying. Like most AI tools, heavier use — more generations, bigger projects, or team features — may eventually need a paid plan. Start free, build a real project, and only pay when the app earns its keep.
Do I need to know how to code to use Huxly AI?
No. You describe your app in plain language, and Huxly writes the code. You only need to know what you want the app to do and be able to describe it clearly. Knowing a little about how apps work helps you write better prompts, but it is not required.
What kind of apps can I build with Huxly AI?
Almost any common mobile app: habit trackers, fitness apps, recipe savers, budget trackers, flashcard apps, small e-commerce stores, education apps, and finance tools. Templates cover the most popular patterns, and custom prompts handle the rest. Very complex apps — like a social network with millions of users — still need a professional team.
Can I publish my Huxly app on the App Store?
Yes, because Huxly exports real code in standard frameworks (Expo, Flutter, or SwiftUI). You still need an Apple Developer account for iOS and a Google Play developer account for Android, and your app must pass each store’s review. Exporting the code is what makes publishing possible at all.
Who owns the code Huxly generates?
You do. Huxly gives you full source-code export and GitHub push, so the project is yours to keep, modify, or hand to a developer. That ownership is one of Huxly’s biggest advantages over builders that lock your app inside their platform.
What if Huxly builds the wrong thing?
That happens to everyone, and it is easy to fix. Describe the change in plain language — one change at a time — and check the live preview after each fix. If a screen is completely wrong, you can ask Huxly to rebuild that screen from scratch while keeping the rest of the app.
Final Thoughts
Huxly AI arrives at a perfect moment for beginners. Just a few years ago, building a mobile app meant hiring a developer, learning to code, or settling for a drag-and-drop builder that could not grow with you. Huxly removes that wall: describe your idea, watch a real app take shape in your browser, test it on a phone, and export code you actually own.
The beginners who get the most from Huxly are not the ones with the biggest ideas — they are the ones who start small, refine one step at a time, and ship something real. Pick a simple app today, write one clear prompt, and see what appears in the preview. Your first app will not be perfect, but it will be yours, and it will teach you more in an afternoon than weeks of reading about app development.
If you want to go deeper into AI tools that build things for you, keep exploring — the guides below will help you pick the right tool for your next project.
Explore More Free AI Tools
Love building with AI? Try these free tools next: AI Title Generator, Meta Description Generator, AI Rewriter, and Keyword Density Checker — all free on AIToolSteps.com.