

Most meetings end the same way: everyone nods, someone says “I will send the notes,” and by the next morning half the decisions are already forgotten. The average professional spends hours every week in calls, yet the value of those calls evaporates the moment the tab closes. That is the problem MeetGeek AI solves. It is an AI meeting assistant that records, transcribes and summarizes your Zoom, Google Meet and Microsoft Teams calls automatically. It then turns them into searchable notes with clear action items. And the free Basic plan gives you 3 hours of transcription every month, with an AI summary for every meeting, so you can try the whole workflow without paying a cent.
In this beginner-friendly guide, you will learn how to set up MeetGeek AI from scratch, record your first meeting with or without a bot, read and share the AI summary, search across all your past meetings with AI Chat, and decide whether the free plan is enough for you. No technical background is needed — if you can join a video call, you can use MeetGeek.
Step 1: Create Your Free MeetGeek Account
Start by opening meetgeek.ai in your browser and clicking the sign-up button. You can create an account with your Google account or your work email. The free Basic plan is free forever — there is no credit card step and no trial countdown — so you are signing up for a real free plan, not a 7-day teaser.
During sign-up, MeetGeek AI will ask you to connect your calendar. This is the step that makes the whole tool work. Once your Google Calendar or Outlook calendar is connected, MeetGeek AI can see your scheduled meetings and know which ones to record. Connect the calendar you actually use for work calls. If you use Google Calendar for client calls and Outlook for internal meetings, connect the one with the most meetings first — you can add the other later from Settings.
After connecting your calendar, complete the short onboarding. Pick your time zone, your usual meeting platforms (Zoom, Google Meet or Microsoft Teams), and your preferred language. MeetGeek transcribes in 100+ languages with automatic language detection, so even if your team switches between English and another language mid-call, the transcript keeps up. Finish by confirming your email address, and your dashboard is ready.
Step 2: Connect Your Calendar and Pick How MeetGeek Joins
With your account ready, open Settings and check the recording rules. MeetGeek AI offers two ways to capture a meeting. The classic way is the Notetaker bot. It is a small AI participant that joins the call from your calendar invite, records the audio and video, and leaves when the call ends. The bot appears in the participant list, so everyone can see that the meeting is being recorded.
The second way is bot-free recording, and it is one of MeetGeek AI’s best features — it works on the free plan too. Install the MeetGeek Chrome extension or the Desktop App 2.0 (available for Mac and Windows since September 2026) and the tool records the call from your own computer, without any bot joining. The desktop app even records offline and uploads the recording later, and it works across Zoom, Meet, Teams, Webex, Slack Huddles, WhatsApp calls and in-person conversations. If your clients dislike bots in their meetings, bot-free recording is the polite option.
Choose your default capture method in Settings, then decide which meetings get recorded automatically. A smart beginner rule is to auto-record only meetings you host, and manually add MeetGeek to other calls when you need notes. This keeps your 3 free hours from disappearing on calls you only attend to listen. You can also set rules to skip specific meetings, recurring stand-ups or one-to-ones — the Business plan adds consent notifications and skip rules, but the basic controls are available from the start.
Step 3: Record Your First Meeting with MeetGeek AI (Bot or Bot-Free)
Recording your first meeting takes almost no effort. If you chose the bot, simply join your scheduled call as normal — the MeetGeek Notetaker joins automatically from the calendar invite. If you chose bot-free recording, open the desktop app or Chrome extension before the call and press record. Either way, tell the other participants that the meeting is being recorded. It is good manners, and in many places it is a legal requirement. A simple sentence at the start — “I am recording this so we get accurate notes” — is enough.
During the call, you do not need to do anything special. Speak normally, and let the meeting run its course. MeetGeek AI handles the rest: it captures the audio, identifies who is speaking, and builds a transcript in real time. One limit to remember on the free plan is that each recording is capped at 2 hours. Most team calls and client meetings fit comfortably inside that window, but if you run long workshops, split them into two sessions or plan around the cap — the Business plan raises it to 3 hours.
When the call ends, MeetGeek starts processing automatically. A short call usually produces a summary within a few minutes. You will get an email notification, and the meeting appears on your dashboard with a transcript, a summary and a list of action items. If you recorded offline with the desktop app, remember to let it upload the file first — processing only starts after the upload finishes.
Step 4: Read the AI Summary and Action Items
Open the meeting from your MeetGeek AI dashboard and you will see the AI summary at the top. Every meeting gets one on every plan, including free. The summary is structured around what actually happened: the key discussion points, the decisions that were made, and the action items with the name of the person responsible for each one. This is the part that replaces the notebook you used to scribble in during calls.
Below the summary sits the full transcript, with speaker labels and timestamps. Click any sentence in the summary and you jump to that exact moment in the transcript. That way you can check the precise wording before you quote anyone. If a sentence looks wrong, you can edit the transcript directly. The company reports a word error rate as low as 2.8%, but no transcription tool is perfect — accents, background noise and overlapping speech can still cause mistakes, so a quick skim of the important parts is always worth it.
Before you share the notes, spend two minutes on quality control. Check that the action items have the right owners and realistic deadlines. Fix any misspelled names in the transcript. Then use the share button to send the summary to your team. On the free plan you can share the notes inside MeetGeek; sending summaries automatically to other tools needs the Pro plan, which we cover in Step 8. For most beginners, copying the summary into an email or a Slack message is enough to start with.
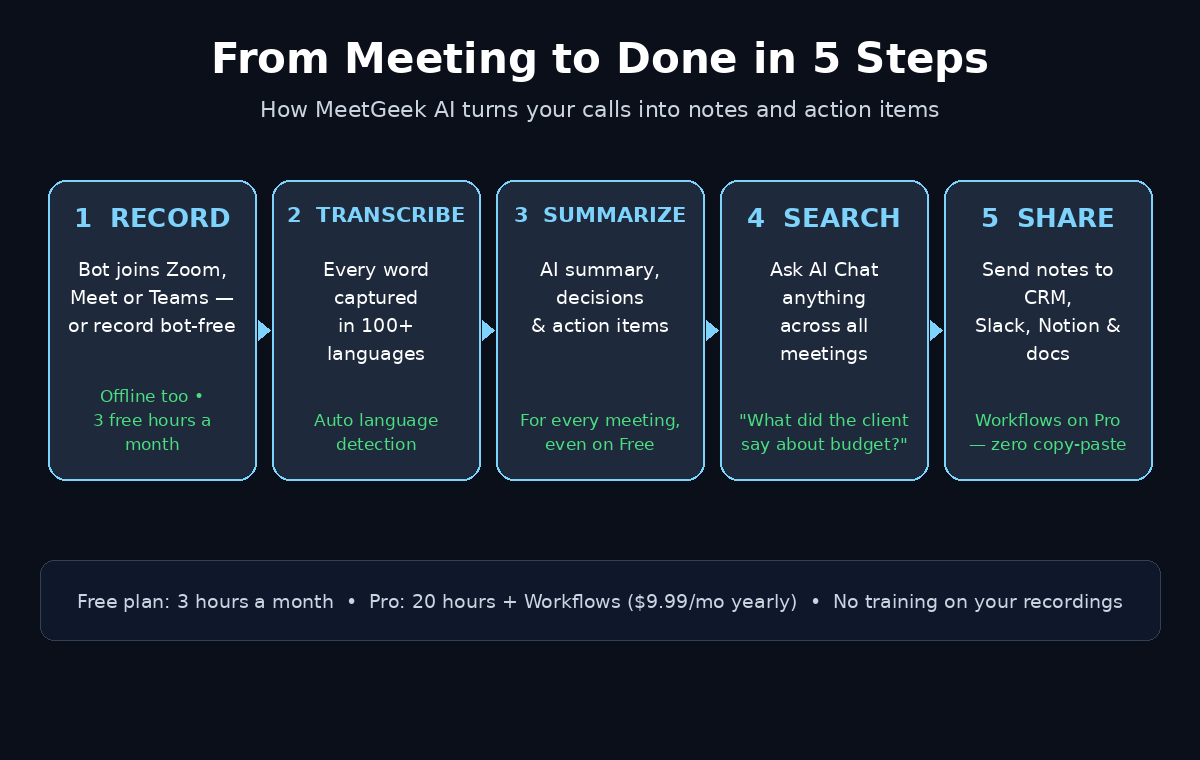
Step 5: Search Every Meeting with MeetGeek AI Chat
The summary of one meeting is useful. The real power of MeetGeek AI shows up when you have twenty meetings in your history and someone asks, “What did the client say about the budget last month?” Instead of opening twenty transcripts, open AI Chat from your dashboard and ask the question in plain English. MeetGeek searches across all your meetings — every plan includes AI Chat — and answers with the relevant quotes and links back to the exact meetings.
Try questions like “What did we promise the client in the kickoff call?”, “List all action items assigned to me this week,” or “Summarize everything we discussed about pricing.” This turns your meeting history into a searchable memory. For a freelancer juggling five clients, or a small team where decisions live in calls instead of documents, this feature alone can justify using the tool daily.
Build the habit early: once a week, open AI Chat and ask it for a digest of your week — decisions made, open action items and anything you promised to follow up on. It takes thirty seconds and replaces the Friday-afternoon scramble of trying to remember what you agreed to on Monday. If you run a digital agency with several client accounts, that weekly digest becomes your account-management briefing without any extra admin work.
Step 6: Share Notes and Action Items with Your Team
Meeting notes only create value when the right people see them. MeetGeek AI gives you several ways to share. The simplest is the share link: open a meeting, click Share, and send the link to anyone who needs the notes. You can also export the notes to Google Docs, Word or Excel, which is handy when a client wants the minutes in a document they already use.
For recurring meetings, set a sharing routine. After every client call, send the summary and action items within an hour — while the conversation is still fresh in everyone’s mind. After internal stand-ups, drop the action items into your task tracker. The faster notes travel, the fewer “who was supposed to do that?” messages you get later.
If your team lives in Slack, the Pro plan’s Workflows can push summaries and action items there automatically. On the free plan, the manual share still works fine — it just takes ten extra seconds. Either way, keep the loop tight: record, review, share, follow up. Teams that adopt AI automation services for this kind of busywork usually find that meeting follow-up is the first workflow worth automating, because it saves time every single day instead of once a quarter.
Step 7: Set Up MeetGeek AI Meeting Templates for Different Call Types
Not every meeting needs the same kind of summary. A sales call needs objections and next steps. A stand-up needs blockers and today’s priorities. A job interview needs strengths and concerns. MeetGeek’s Meeting Templates let you shape the AI summary for each type of call, and Pro adds custom summary templates plus automatic meeting-type detection, so a sales call and a stand-up get different structures without you doing anything.
On the free plan, you can still get most of this benefit with a simple habit: after opening a summary, add a short note at the top in your own words — one line for the decision, one line for the next step. Over a month, that two-line habit turns a pile of summaries into a decision log you can scan in seconds.
If you upgrade to Pro later, set up one template per recurring meeting type. Start with three: client calls, internal stand-ups and interviews. Give each template clear headings — Decisions, Action Items, Risks — and MeetGeek AI will fill them the same way every time. Consistency is what makes meeting notes searchable later, and it is also what makes AI Chat answers more accurate.
Step 8: Automate Follow-Ups with Workflows (Pro)
Workflows are the Pro plan’s headline feature, and they are what turn MeetGeek from a note-taker into an automation tool. A Workflow is a rule in MeetGeek AI: when a meeting ends, send its summary and action items to a destination you choose — HubSpot, Salesforce, Pipedrive, Notion, Slack, Asana or Google Drive — without anyone copying and pasting. Zapier, Make and n8n cover everything else.
A practical first Workflow is the CRM update. After every sales call, MeetGeek pushes the summary and the next steps into the matching HubSpot or Salesforce record. Your pipeline stays current without the rep typing a single note after the call. A second useful Workflow sends action items to Asana or Notion, so tasks appear in the team’s tracker minutes after the meeting ends.
Workflows need the Pro plan at $15.99 per user per month, or $9.99 per month when billed yearly, which also raises your transcription allowance to 20 hours a month. Before upgrading, test the value manually for two weeks: if you find yourself copying summaries into your CRM or task tracker every day, the Workflow will pay for itself in saved time. If you only record two or three calls a month, the free plan already covers you.
Step 9: Use the Desktop and Mobile Apps for In-Person Meetings
MeetGeek is not only for video calls. The Desktop App 2.0 and the mobile app record in-person conversations too — a coffee-shop meeting with a client, a whiteboard session in the office, or a phone call on WhatsApp. Open the app, press record, and the audio is captured on your device. You can record offline and upload later, which is useful in places with weak internet.
The same processing applies: transcript, AI summary, action items and AI Chat search. In-person recordings are especially useful for founders and consultants, because the most important conversations in a small business often happen away from a laptop. One tip: place the phone or laptop in the middle of the table, not in a pocket, so every voice is captured clearly.
For developers and power users, every MeetGeek AI plan — including free — includes API and MCP access, so you can query your meetings from Claude or ChatGPT. The AI Studio layer adds Meeting Skills (26+ ready-made analyses such as a sales call scorer), Voice Agents and a Copilot Mode that answers questions during a call. Beginners can ignore all of this at first, but it is good to know the tool grows with you.
Step 10: Manage Your 3 Free MeetGeek AI Hours and Upgrade Only When You Need To
The free Basic plan includes 3 hours of transcription a month, 3 months of transcript storage and 1 month of audio storage. That is enough for roughly six 30-minute meetings a month. Treat those hours like a budget: auto-record the meetings that matter, skip the ones that do not, and check your usage on the dashboard before the month ends. When the hours run out, recording pauses until the next month — nothing is charged, because there is no card on file.
Upgrade to Pro only when you hit a real limit: you regularly record more than 3 hours a month, you need integrations and Workflows, or you want longer transcript storage (Pro keeps transcripts for a year). Pro costs $15.99 per user per month, or $9.99 per month billed yearly, with 20 hours of transcription and $0.50 for each extra hour. Business, at $27 a month or $17 billed yearly, adds unlimited transcription, a 3-hour recording cap and team spaces. MeetGeek also offers 30% off for startups, non-profits and education, so check the discount page before you pay full price.
A final note on privacy: MeetGeek’s privacy policy, updated 9 September 2026, says your recordings, transcripts, summaries, chat prompts and AI outputs are not used to train or improve AI models — neither MeetGeek’s own nor its AI providers’. That matters when your calls contain client data, pricing or strategy. You still own the responsibility of telling participants you are recording, but your meeting content is not feeding anyone’s training set.
MeetGeek Plans Compared: Free vs Pro vs Business
Choosing a plan is easier when you see the limits side by side. Here is what each MeetGeek plan includes, based on the pricing page checked in November 2026.
| Feature | Basic (Free) | Pro | Business |
|---|---|---|---|
| Price | $0 forever | $15.99/month or $9.99/month billed yearly | $27/month or $17/month billed yearly |
| Transcription | 3 hours a month | 20 hours a month, then $0.50 per extra hour | Unlimited |
| Max length per recording | 2 hours | 2 hours | 3 hours |
| AI summary for every meeting | Yes | Yes | Yes |
| AI Chat across meetings | Yes | Yes | Yes |
| Bot and bot-free recording | Yes | Yes | Yes |
| Transcript storage | 3 months | 1 year | Unlimited |
| Video storage | No | No | 12 months |
| Workflows and integrations | No | Yes | Yes |
| Meeting templates | Standard | Custom + auto detection | Custom + auto detection |
For most beginners, the free plan answers the only question that matters: does this save me time? If the answer is yes after a month of real meetings, Pro is the natural next step.
Frequently Asked Questions
Is MeetGeek AI really free?
Yes. MeetGeek AI’s Basic plan is free forever, with 3 hours of transcription a month, an AI summary for every meeting, bot and bot-free recording, AI Chat and API access. There is no credit card step at sign-up. You only pay if you upgrade to Pro or Business, and you can stay on the free plan as long as it covers your meeting load.
Does MeetGeek work without a bot joining the call?
Yes. The Chrome extension and the Desktop App 2.0 record from your own computer without any bot joining the meeting. Both options work on the free plan, across Zoom, Google Meet, Teams, Webex, Slack Huddles and WhatsApp calls, and the desktop app can even record offline and upload later.
Which languages does MeetGeek transcribe?
MeetGeek lists transcription in 100+ languages with automatic language detection on every plan. You do not need to set the language before a call — the tool detects it for you, which is handy for multilingual teams.
Is it legal to record meetings with MeetGeek?
It depends on where you and the other participants are located. Many places require at least one person in the call to consent, and some require everyone to agree. The safe rule is simple: always tell participants at the start of the call that it is being recorded. The Business plan adds consent notifications to help with this, but announcing it yourself works on every plan.
Does MeetGeek use my recordings to train AI models?
No. MeetGeek’s privacy policy, updated 9 September 2026, states that recordings, transcripts, summaries, chat prompts and AI outputs are not used to train or improve AI models — neither MeetGeek’s own nor its AI providers’ models.
What happens when I use up my 3 free hours?
Recording pauses until your allowance resets the next month. Nothing is charged and no card is billed, because the free plan has no payment method attached. If you regularly run out, Pro gives you 20 hours a month for $15.99, or $9.99 a month when billed yearly.
Final Thoughts
MeetGeek AI earns its place in a beginner’s toolkit because it removes the most boring part of meetings — the notes — without asking you to learn anything new. Sign up free, connect your calendar, record one call, and read the summary. If the action items match what you remember agreeing to, the tool works for you. If you run a small team, the weekly AI Chat digest alone can replace an hour of admin. And if you only take two or three calls a month, the free plan may be all you ever need.
Start with the free Basic plan today. Record your next client call or team stand-up, share the summary within the hour, and ask AI Chat one question about a meeting from last week. That single test tells you more about the tool than any review can — and it costs you nothing but one meeting.
Explore More Free AI Tools
Want to keep building your free AI toolkit? Try our AI Title Generator to write better headlines, our Meta Description Generator for search-ready snippets, our AI Rewriter to polish rough drafts, and our Keyword Density Checker to keep your pages SEO-friendly. All free, all on aitoolsteps.com.