
How to Use Mailpipe AI for Beginners (Free Guide)
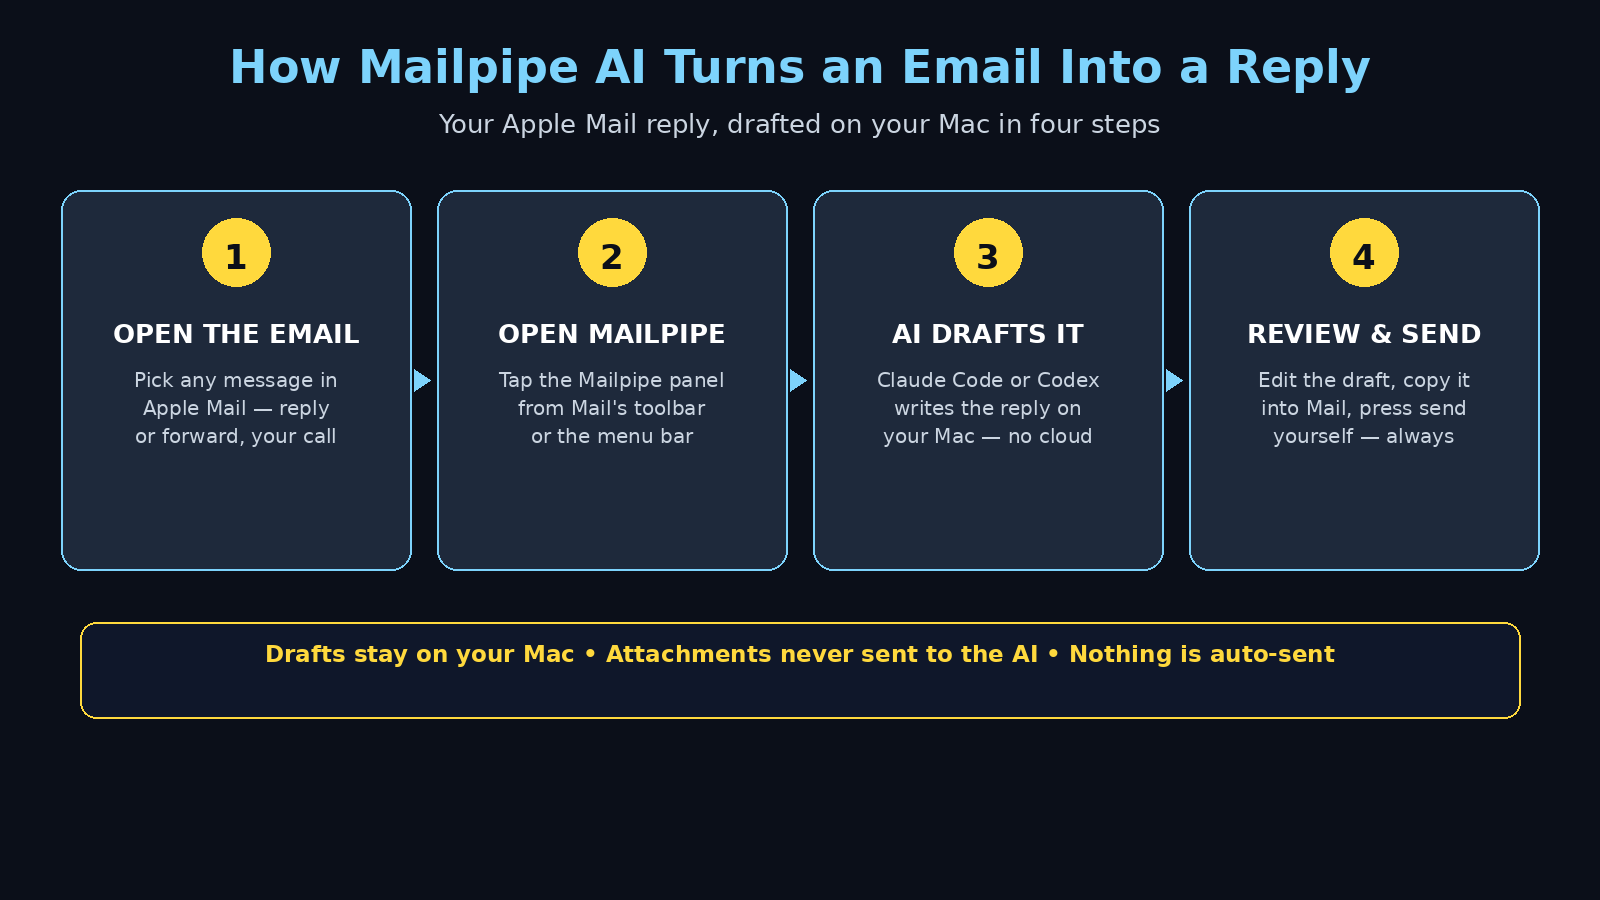
Learning how to use Mailpipe AI is the fastest way to clear your inbox without handing your email to another cloud service. Mailpipe is a free Mac tool that drafts replies to your Apple Mail messages using the AI agent you already run on your own computer — Claude Code or Codex — through their command-line interface. You open an email, ask Mailpipe for a draft, review it, and send it yourself. Nothing is auto-sent, your attachments are never passed to the agent, and the draft itself stays on your Mac.
Mailpipe launched on Product Hunt on November 19, 2026, and it arrives at a moment when email AI is splitting into two camps: big cloud assistants that read everything on a remote server, and small local tools that keep your data where it belongs. Mailpipe is firmly in the second camp. If you already use Claude Code or Codex from the terminal, this guide will show you exactly how to use Mailpipe AI — from installation to your first sent reply — in about fifteen minutes. You do not need any coding skills beyond installing an app and picking your agent.
Step 1: What Mailpipe AI Is (and Why It Is Different)
If you are learning how to use Mailpipe AI, start with the idea that makes it different from every other email AI. Most AI email tools work like this: you connect your inbox to their server, their server reads your mail, and their AI writes replies in the cloud. Mailpipe flips that around. It is a small Mac panel that sits on top of Apple Mail and talks to the AI agent CLI already installed on your computer — Claude Code or Codex. The agent reads the email you selected, drafts a reply in your style, and hands the draft back to you. Your mail never goes to Mailpipe’s servers because Mailpipe has no servers to send it to.
That local-first design is part of a bigger shift toward tools that do work on your behalf instead of waiting for instructions. Agentic Affairs explains how agentic systems are changing everyday work, and Mailpipe is a practical example of that idea sitting inside your inbox: an agent that drafts, while you stay in charge of what actually gets sent.
Why Mailpipe AI Stands Out for Beginners
Here is what Mailpipe does in plain words:
- Drafts Apple Mail replies with your own AI agent. It uses Claude Code or Codex from your terminal — the same tools developers already use for coding.
- Keeps everything on your Mac. Drafts are generated locally and stay on your computer. Attachments are never passed to the agent.
- Never sends anything by itself. Every draft comes back to you for review. You copy it into Mail, edit it if you like, and press send yourself.
- Works from Mail’s own toolbar. You open the Mailpipe panel from the reply or forward button, so there is no separate inbox to learn.
- Costs nothing extra to try. Mailpipe itself is free to try. Model processing and any costs depend on your own agent’s configuration — if your Claude Code or Codex plan already covers it, there is nothing new to pay for.
One honest note for beginners: Mailpipe is brand new — it launched on Product Hunt on November 19, 2026. Early apps change fast, so treat the official site and the app itself as the source of truth for features and pricing, and expect small rough edges in the first weeks.
Step 2: What You Need Before You Start
Before you install anything, check that you have the three things Mailpipe needs. Getting these ready first saves you from a half-finished setup.
- A Mac running Apple Mail. Mailpipe is built for Apple Mail on macOS. It is not a Gmail or Outlook add-on, and it does not run on Windows or iPhone.
- Claude Code or Codex installed on your Mac. Mailpipe does not include its own AI model. It borrows the agent CLI you already have. If you have never installed one, install Claude Code or Codex first and confirm it answers a simple question in your terminal before you move on.
- An active plan or API access for that agent. Because Mailpipe uses your agent, any model cost follows your agent’s own billing. Check your Claude Code or Codex plan so a long reply thread never surprises you.
If you do not have an agent CLI yet, pick Claude Code if you want the most polished experience, or Codex if you already live in the OpenAI ecosystem. Either one works with Mailpipe, and you can switch later without reinstalling anything.
Step 3: Download and Install Mailpipe AI
Installing Mailpipe takes about five minutes, and you do not need a credit card to try it.
- Get Mailpipe from its official launch page. Go to Mailpipe’s Product Hunt launch page and follow the download link to the official site. Download only from the official source, never from a random mirror.
- Open the downloaded app. Drag it into your Applications folder, then open it. macOS may ask you to confirm that you want to open an app from the internet — click Open.
- Grant the permissions it asks for. Mailpipe needs permission to work with Apple Mail so it can read the message you selected and show its panel. Grant only what it asks for during setup; it does not need access to your whole disk.
- Confirm it appears in Mail. Open Apple Mail and look for the Mailpipe option on the reply or forward toolbar. If you see it, the install worked and you are ready for the next step.
If the toolbar option does not appear, quit and reopen Apple Mail, then reopen Mailpipe. On a brand-new launch, a restart of Mail is the most common fix.
Step 4: Connect Your AI Agent CLI (Claude Code or Codex)
This is the step where Mailpipe meets your AI agent. It is simpler than it sounds because Mailpipe does not ask you to paste in an API key or create yet another account.
- Open Mailpipe’s settings. From the Mailpipe panel or the menu bar icon, open settings and find the agent section.
- Pick your agent. Choose Claude Code or Codex — whichever CLI is installed and working on your Mac.
- Let Mailpipe detect it. Mailpipe finds the CLI on your computer and uses its existing login. You do not type a password or a key into Mailpipe itself.
- Run a quick test. Ask for a draft on a short, unimportant email first. If a sensible draft appears, your agent is connected and working.
If the test fails, open your terminal and run your agent once by hand. Nine times out of ten the problem is that the CLI is not logged in, or its session expired — fixing that in the terminal fixes Mailpipe too.
Step 5: Open Mailpipe From Apple Mail
Once the agent is connected, the daily workflow is delightfully boring — and that is the point. You stay inside Apple Mail the whole time.
- Select the email you want to answer. Click any message in Apple Mail, the way you normally would.
- Open the Mailpipe panel. Use the reply or forward toolbar button, where Mailpipe adds its panel. The panel opens next to your message.
- Read the original first. Mailpipe shows the email it will answer. A quick glance now prevents a wrong draft later, especially on long threads where the latest message changes the whole meaning.
- Choose reply or forward. Mailpipe works for both. A forward draft is handy when you need to pass a message on with a short note of your own at the top.
There is also a menu-bar option if you prefer to review drafts without opening Mail’s toolbar at all. Both routes lead to the same draft, so use whichever feels faster.
Step 6: Generate Your First Reply Draft
Now the fun part — your first AI-drafted reply.
- Click generate in the Mailpipe panel. Mailpipe sends the selected email to your local agent CLI and asks for a reply draft.
- Wait a few seconds. The agent reads the message, works out what the sender wants, and writes a draft in a natural tone. Longer threads take a little longer.
- Read the whole draft before touching it. Check names, dates, numbers, and any promises the draft makes on your behalf. AI drafts are good, but they can confidently invent a detail — a meeting time, a price, a deadline — that was never in the original email.
- Regenerate if the tone is off. One click asks the agent for a fresh version. If the first draft is too formal, too short, or misses the point, regenerate rather than rewriting by hand.
Your first few drafts are a learning exercise, not a race. Spend a minute on each one and you will quickly learn what instructions make the agent write the way you do.
Step 7: Edit, Regenerate and Send the Draft
Mailpipe drafts — it never sends. That boundary is the whole safety model, and the send step is deliberately yours.
- Copy the draft into Mail. When the draft looks right, copy it from the Mailpipe panel and paste it into your reply in Apple Mail.
- Use the reply arrow shortcut. Click the reply arrow next to the copy button in Mailpipe and it opens a prefilled message in Mail, so you skip the copy-and-paste entirely.
- Make it yours before sending. Add one personal line, fix any awkward phrase, and delete anything you would not say yourself. The best AI drafts are starting points, not finished letters.
- Press send in Mail, not in Mailpipe. The message goes out through your normal Apple Mail account, with your signature and your sender address, exactly like a message you typed yourself.
That last point matters for trust. The recipient sees an ordinary email from you — no “sent by an AI assistant” footer, no strange formatting, no third-party server in the headers.
Step 8: Use the Mailpipe AI Menu Bar for Quick Reviews
Not every email deserves the full panel treatment. For a fast inbox sweep, the menu-bar view is the quicker route.
- Click the Mailpipe icon in your menu bar. It shows your recent drafts and lets you review them without opening Mail.
- Skim, approve, or toss drafts in seconds. Short acknowledgements and confirmations are perfect for this view — read, approve, send.
- Save the panel for the hard ones. Negotiations, apologies, and anything with numbers or commitments deserve the full panel and a careful read.
- Keep your review habit. The menu bar makes it tempting to approve everything fast. Keep the rule: if a draft makes a promise, read it twice.
Think of the menu bar as your triage desk and the panel as your writing desk. Both use the same agent and the same drafts — only the speed changes.
Step 9: Set Your Tone and Reply Style
Out of the box, Mailpipe drafts sound polite and neutral. A few small habits will make its drafts sound like you instead of a template.
- Give the agent a one-line style note. Tell it how you write — short and direct, warm and friendly, or formal and careful — and it will hold that tone across drafts.
- Keep a few example replies handy. If you have two or three replies you are proud of, show them to your agent once. It will copy your sentence length, your greetings, and your sign-offs far better than any settings page can.
- Match the sender’s energy. A quick “Thanks — confirmed” needs a short reply. A detailed proposal deserves a structured one. Ask for a short draft on short emails and a full draft on long ones.
- Build a small library of openers and closers. Keep your favorite first lines and sign-offs in a note. Paste the right one into a draft instead of accepting the agent’s default every time.
If email is a big part of how your business wins clients, this is also the kind of workflow a digital agency can help you standardize across a whole team — shared tone, shared templates, and one consistent voice in every inbox.
Step 10: Stay Safe — Privacy, Attachments and What Mailpipe Never Sends
Mailpipe’s privacy story is simple, but a few habits keep it airtight.
- Your drafts stay on your Mac. Mailpipe generates drafts locally through your own agent CLI. There is no Mailpipe cloud inbox holding copies of your mail.
- Attachments are never passed to the agent. If an email has files attached, Mailpipe does not send them to the model. The agent drafts from the message text alone, so a contract or a photo never leaves your computer.
- Review before you send — always. No draft leaves your Mac until you paste it into Mail and press send. That one rule blocks almost every AI email accident: wrong recipient, wrong figure, wrong promise.
- Be careful with sensitive threads. Legal, medical, and financial emails deserve a human-only reply, or at least a very careful read of the draft. When in doubt, write it yourself.
- Keep your agent CLI updated. Mailpipe is only as good as the agent behind it. Update Claude Code or Codex when new versions arrive, and re-check your login after each update.
One more honest note: because model processing and costs depend on your agent’s configuration, a long or complex thread can use more of your agent’s allowance than a short one. If you draft dozens of replies a day, glance at your agent usage once a week.
Mailpipe AI vs Other Ways to Answer Email
How does Mailpipe compare with the alternatives most Mac users already have? The table below keeps it simple.
| Option | Where the AI runs | Works in Apple Mail | You control sending | Best for |
|---|---|---|---|---|
| Mailpipe AI | On your Mac, via your own agent CLI | Yes, native panel | Yes, always | Mac users who already run Claude Code or Codex |
| Gmail Smart Reply | Google’s cloud | No, Gmail only | Yes | One-tap short replies in Gmail |
| Apple Intelligence | On-device + cloud | Yes, built in | Yes | Quick summaries and short rewrites |
| ChatGPT copy-paste | OpenAI’s cloud | No, manual paste | Yes | Occasional tricky emails |
| Cloud email AI apps | The vendor’s servers | Sometimes | Usually | Teams that want a shared AI inbox |
Mailpipe wins on privacy and on control: your mail stays on your Mac, your agent does the thinking, and nothing is sent until you say so. Its trade-off is that it needs a Mac, Apple Mail, and an agent CLI already set up — it is not a one-click tool for someone who has never touched a terminal.
Frequently Asked Questions About Mailpipe AI
Is Mailpipe AI really free?
Mailpipe itself is free to try, with no credit card needed to start. The catch — if you can call it one — is that it uses your own AI agent, Claude Code or Codex, so any model cost follows your agent’s own plan. If your agent plan already covers your usage, Mailpipe adds no new bill.
Does Mailpipe AI work on Windows or iPhone?
No. Mailpipe is built for Apple Mail on macOS. It works with the Mac version of Apple Mail and its toolbar, plus a menu-bar view. Windows and iPhone users need a different tool, because Mailpipe has no version for those platforms.
Does Mailpipe send emails automatically?
No, and that is the point. Mailpipe only drafts. Every reply comes back to you for review, and you copy it into Apple Mail and press send yourself. Nothing leaves your outbox without your click.
Are my attachments safe with Mailpipe AI?
Yes. Attachments are never passed to the agent, so a file attached to an email stays on your Mac while the agent drafts from the message text alone. That is one of the strongest privacy features Mailpipe has.
Do I need Claude Code or Codex to use Mailpipe?
Yes. Mailpipe has no AI model of its own — it drafts through your local AI agent CLI, Claude Code or Codex. Install one of them first, confirm it works in your terminal, and then connect it in Mailpipe’s settings.
Can I use Mailpipe AI for forwarded emails too?
Yes. Mailpipe’s panel opens from both the reply and the forward toolbar in Apple Mail, so you can draft a short covering note and forward a message in the same flow.
Final Thoughts
Mailpipe is a small tool with a big idea: your email AI should run on your computer, use the agent you already trust, and never send anything without your say-so. For Mac users who already run Claude Code or Codex, it turns the most boring part of the day — the reply queue — into a five-second review instead of a five-minute write. Set it up once, test it on a few unimportant emails, teach it your tone, and keep the review habit that makes it safe. Your inbox will get shorter, and your mail will still sound like you.
If this guide helped, share it with a Mac user who drowns in email. And remember: the best AI email workflow is the one you actually check before you hit send.
Explore More Free AI Tools
Want to keep exploring? Try our free tools on the AI Tool Steps homepage: AI Title Generator, Meta Description Generator, AI Rewriter, and Keyword Density Checker. They are free, they run in your browser, and they pair perfectly with the writing workflow you just learned.