

Every AI chat starts from zero. You explain your project to ChatGPT on Monday, repeat the same background to Claude on Tuesday, and by Friday your coding assistant in Cursor has no idea what either of them decided. Living Brain AI fixes exactly that problem. It is a persistent memory layer that sits outside any single AI model, so the knowledge from one tool can be reused in another. In this beginner guide, you will learn how to use Living Brain AI step by step, from creating your first brain to connecting ChatGPT, Claude, Cursor and Codex, without writing a single line of code unless you want to.
Living Brain comes from ChatAndBuild, the Singapore company behind the chatchat AI agents, and it launched on 4 November 2026 before ranking number two Product of the Day on Product Hunt on 5 November 2026. Its founder, Christel Buchanan, previously worked at X. The core idea is simple to understand and powerful once you use it: instead of each AI tool keeping its own separate memory, one shared brain remembers your projects, decisions and preferences, and every connected tool can read from it.
Step 1: Understand What Living Brain Actually Is
Think of Living Brain AI as a notebook that every AI assistant you use can read and write in. When you save a project brief, a customer requirement or a decision in Living Brain, it does not stay trapped inside one chat window. It becomes a page in your brain, linked to related pages, and any connected tool can pull that context back when you ask it to work.
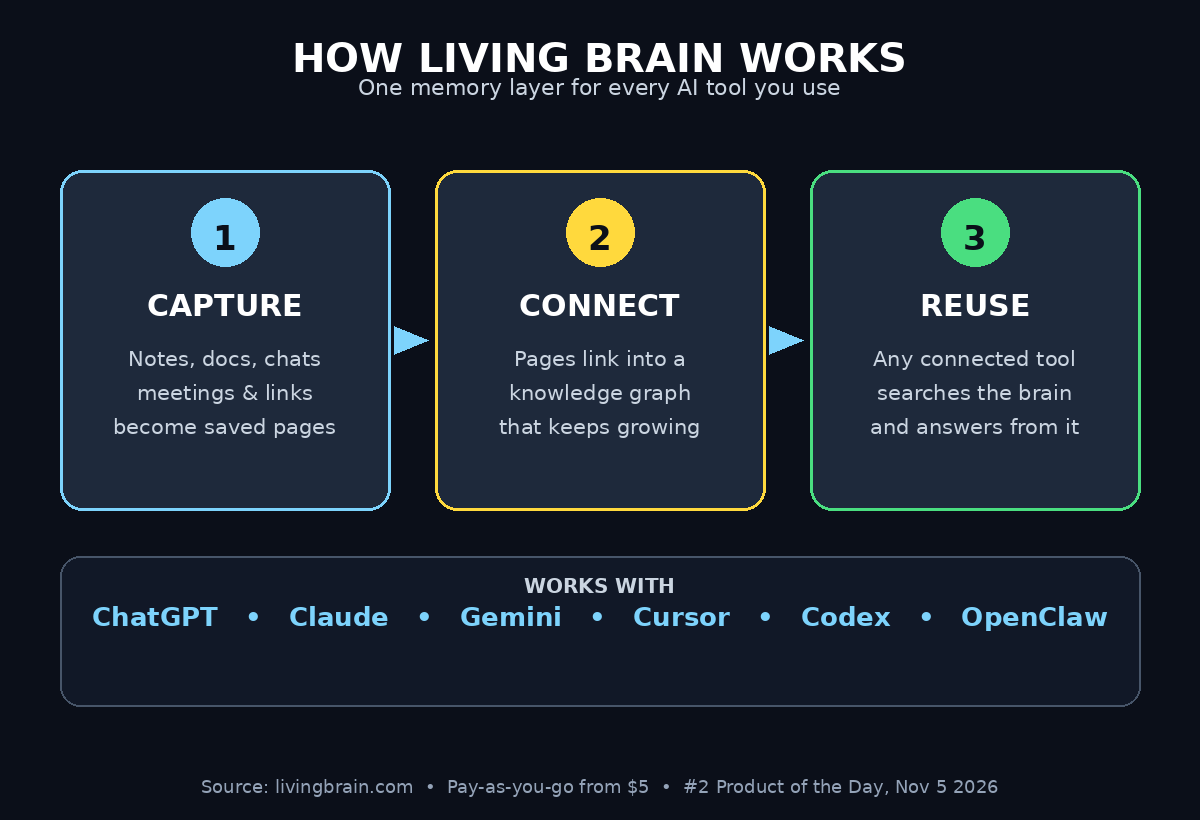
The workflow has three stages, and the names are worth remembering because the whole product is built around them:
- Capture: Living Brain pulls the useful knowledge out of your conversations, documents, meetings, notes and links. It does not just dump raw chat logs; it extracts what is worth keeping.
- Connect: Every capture becomes a page, and the system links related pages together into a knowledge graph as it compiles them, so a decision connects to the brief it came from.
- Reuse: Any connected model or agent can search that memory on demand and answer using it, instead of you re-explaining everything from scratch.
This matters because switching AI tools is expensive in time and tokens. If your history lives in a separate layer, moving from one assistant to another no longer means rebuilding context. A digital agency juggling client work across several AI tools feels this pain daily, and a shared memory layer is the most direct fix. It is also why memory layers are becoming a whole category in late 2026, alongside agent testing and agent hosting tools.
Step 2: Create Your Living Brain Account
Start at the official Living Brain website and create an account with your email or Google sign-in. Existing ChatAndBuild plan holders already have access, so if you use chatchat, check your account before paying for anything new. After signing in, you land on your brain dashboard, where your brains, pages and connected tools live.
Take two minutes to explore the dashboard before capturing anything. Find the list of brains, the page view where captured knowledge appears, and the connections or integrations screen. Knowing where these three areas live will make every later step faster. There is no software to install for the basic web experience, which is good news for beginners.
One honest note before you go further: Living Brain is not a free-forever product with unlimited use. Its API plan is pay-as-you-go, with top-ups starting from five dollars, and its Workspace plan costs 99 dollars a month. The beginner path in this guide uses the low-cost pay-as-you-go route, so your first experiments cost very little. Always check the current pricing page before you commit, because early-access pricing can change.
Step 3: Build Your First Brain
A brain is a container for one area of your life or work, such as a client project, a course you are studying, or your small business. Create your first brain around a single real project rather than a vague topic like “everything I know”. A focused brain gives better answers because its memory is not diluted.
Give the brain a clear name, for example “Website Redesign Project” or “November Product Launch”. Add a one-line description of what the brain is for. This description helps the system decide what is relevant when it retrieves memory later. Then create your first pages in one of two ways: type a note directly, or upload a document. Living Brain accepts PDF, DOCX, PPTX, HTML and plain text files up to 100 MB each, so a project brief, a meeting transcript or a set of notes can go in as it is.
Start with three to five pages only. A short project brief, a list of decisions already made, and your key preferences are enough. You can always add more later, and a small clean brain beats a large messy one. Each page you add becomes part of the knowledge graph, and related pages get linked automatically as the system compiles them.
Step 4: Connect ChatGPT in Minutes
ChatGPT is the easiest connection, and it is the best first test of the whole idea. Living Brain connects to ChatGPT and Claude through account sign-in, with no API key and no code. Open the connections screen, choose ChatGPT, and sign in with your account when asked. Grant the permissions it requests so the two tools can share memory.
Once connected, try a simple test. In ChatGPT, ask a question that only your brain knows the answer to, such as a decision you saved in Step 3. If the answer pulls in that detail, the connection works. Then try the reverse: have a useful conversation in ChatGPT and save the outcome into your brain, so the knowledge is there for your next tool. This two-way flow is the whole point. A memory layer that only reads is a search box; one that reads and writes is a real second brain.
If the first test answer ignores your saved pages, do not panic. Check that you selected the right brain in the connection settings, and that the page you are testing against is actually saved and compiled. Most first-time failures come from connecting the wrong brain or testing against a page that has not finished processing yet.
Step 5: Connect Claude and Claude Code with MCP
Claude connects the same account-based way as ChatGPT, so repeat the sign-in flow for your Claude account. The more interesting connection is Claude Code, the coding agent, because that is where shared memory saves the most repeated explaining. Coding tools connect through a hosted MCP server, and setup is a single snippet you paste into the tool.
Open the integrations or MCP section in Living Brain and copy the setup snippet for Claude Code. Paste it into your Claude Code configuration, restart the tool if asked, and confirm the Living Brain tools appear in its tool list. The hosted MCP server exposes the main operations as tools: search your memory, retrieve a page, inspect connections, capture new knowledge, and create brains and projects. Once it is live, you can ask Claude Code to check the brain before it starts work, for example: “Check my Website Redesign brain for the decisions we made, then start on the homepage.”
The same one-snippet pattern works for Codex, Cursor, VS Code, Hermes and OpenClaw. Connect one tool at a time and test each one before adding the next, so a problem is easy to trace. Teams that run agentic AI services for clients often connect the coding tools first, because that is where repeated context costs the most tokens and the most time.
Step 6: Connect Cursor and Codex the Same Way
Cursor and Codex follow the same MCP route as Claude Code, so Step 5 already taught you the pattern. Copy the snippet for your tool, add it to the MCP configuration, and verify the connection with a question your brain can answer. A good test is to ask the coding assistant about a preference you saved, such as your coding style or the tech stack for a project, and see whether it answers from memory instead of asking you again.
One practical tip: keep a short “preferences” page in every brain. Put your coding style, tone of voice, naming conventions and things you never want the AI to do on that page. Because every connected tool reads the same brain, that one page improves every assistant at once. When a preference changes, update the page once and all your tools learn the new rule together.
Step 7: Capture Knowledge Automatically
Manual notes are only half the story. Living Brain also captures knowledge from the places where decisions actually happen. Upload meeting recordings and let it transcribe them, forward useful links, or use the Telegram capture bot to send notes and files straight into a brain from your phone. Audio transcription means a voice memo recorded on a walk can become a searchable page by the time you sit down.
Build a small capture habit and the brain stays fresh on its own. A simple routine that works for most beginners is: save decisions the moment they are made, forward one useful article or document per project per week, and transcribe one meeting a week. Review the new pages once a week, fix anything the system misunderstood, and delete duplicates. A brain you trust is one you have checked, and the page view lets you inspect every captured item and the sources behind it.
Be deliberate about what you capture. Meeting notes, decisions, requirements and preferences belong in a brain. Passwords, private keys and sensitive personal data do not. Check the privacy settings for each brain before you connect it to a shared tool, and remember that anything a connected assistant can read is only as private as that assistant’s own handling of it.
Step 8: Ask Questions and Check the Answers
Now use the memory. Ask a connected assistant a question that needs knowledge from more than one page, such as “What did we decide about pricing, and what is still open?” A good answer will combine the decision page with the open-questions page and, ideally, show its sources. Living Brain reports a brain score for how well grounded an answer is, and you can open the knowledge graph to see which pages were used.
The company reports strong benchmark numbers: 92.2 percent judged accuracy on the LoCoMo long-conversation memory benchmark, against 72.3 percent for a full-context model-only baseline, with median retrieval taking 464 milliseconds and a median end-to-end answer time of 3.7 seconds. It also claims up to 22.6 times fewer tokens per question than stuffing full context into the model. Treat these as the company’s own evaluations, not independent verification, and judge the tool by your own tests instead. Run the same five questions with and without the brain connected and compare the answers yourself. Your own small test tells you more than any benchmark.
When an answer is wrong, correct the underlying page rather than arguing with the chat. Memory tools fail most often because the stored knowledge is outdated or wrong, not because retrieval broke. Fix the page once and every connected tool benefits from the correction.
Step 9: Use the Daily Brief and the Knowledge Graph
Two features turn Living Brain from a storage box into a daily habit. The scheduled daily brief summarises what changed in your brains and what deserves your attention, so you can start the morning knowing what your agents learned yesterday. The knowledge graph view shows how your pages connect, which helps you spot gaps: a decision with no linked requirement, or a project with notes but no stated goals.
Open the graph once a week and look for orphaned pages that nothing links to. Either link them to the right project page or delete them. A tidy graph retrieves better, because the system follows connections when it decides what is relevant. You can also export your brain to Markdown, which is a useful safety net: your knowledge is not locked into a format only one tool can read.
Step 10: Manage Pricing, Cost and Limits
The pay-as-you-go API plan charges eight dollars per million input tokens plus fifty cents per million output tokens, with top-ups from five dollars, one shared balance across the API, SDK, CLI and MCP, one gigabyte of storage and 100,000 monthly requests. The Workspace plan at 99 dollars a month adds three team seats, 10 GB of storage, 500,000 monthly requests, scheduled briefs and 90-day page history, and it is bundled with ChatChat Pro+. Business pricing is custom.
For a beginner, the five-dollar top-up is the sensible start. Watch your usage for the first two weeks and note which connections consume the most tokens. Because the brain retrieves only the relevant pages instead of the whole history, each question should cost far less than pasting your full context into the model every time, and that is where the claimed token savings come from. If a brain grows past a gigabyte or you need team seats and scheduled briefs, that is the moment to look at Workspace rather than before.
Also note the limits that matter in practice: the API is still in early access, so expect occasional rough edges, and the headline benchmarks are company-reported rather than independently audited. Check the official pricing and documentation pages for the current numbers before you build anything that depends on them.
Living Brain AI vs the Alternatives
| Option | Memory lives | Works across tools | Best for |
|---|---|---|---|
| Living Brain AI | One shared layer | Yes: ChatGPT, Claude, Cursor, Codex and more | People using several AI tools daily |
| ChatGPT built-in memory | Inside ChatGPT only | No | ChatGPT-only users |
| Claude built-in memory | Inside Claude only | No | Claude-only users |
| Mem0 / Harness Memory | Separate memory layer | Yes, developer-focused | Developers building agents |
| Notes app (Notion, Obsidian) | Your files | Only by copy-paste | Manual note-taking |
The honest summary is that built-in memories are simpler but trapped, developer memory libraries are powerful but need code, and Living Brain sits in the middle: a no-code shared memory that non-developers can actually set up. If you only ever use one chatbot, its built-in memory is enough. The moment you use two or more AI tools on the same project, a shared layer starts paying for itself.
Frequently Asked Questions
Is Living Brain AI free?
There is no unlimited free plan. The API plan is pay-as-you-go with top-ups starting from five dollars, and existing ChatAndBuild plan holders already have access. A five-dollar top-up is enough for a beginner to test the full workflow, and the Workspace plan costs 99 dollars a month for teams.
Which AI tools work with Living Brain?
ChatGPT and Claude connect through account sign-in with no API key. Claude Code, Codex, Cursor, VS Code, Hermes and OpenClaw connect through a hosted MCP server with a one-snippet setup. Gemini is also listed among the supported tools, and developers can build on the API or SDK for custom agents.
Does Living Brain replace ChatGPT memory?
No, it sits alongside it. Built-in memory remembers things inside one chatbot. Living Brain remembers things outside all of them, so a decision saved from ChatGPT can be used by Claude Code tomorrow. Use both: built-in memory for chat habits, Living Brain for project knowledge.
Is my data private in Living Brain?
Your pages live in your Living Brain account, and connected tools can read the brains you connect. Review the privacy settings per brain, avoid capturing passwords or sensitive personal data, and remember that anything a connected assistant can read follows that assistant’s own data handling too.
How accurate is Living Brain’s memory?
The company reports 92.2 percent judged accuracy on the LoCoMo benchmark, versus 72.3 percent for a full-context baseline, with 464-millisecond median retrieval. These are company-run evaluations, not independent audits, so test it with your own questions before trusting it with important decisions.
Can beginners use Living Brain without coding?
Yes. The web dashboard, the ChatGPT and Claude sign-in connections, file uploads and the Telegram capture bot need no code at all. The MCP snippet for coding tools is copy-paste, and only custom agent development through the API or SDK needs programming.
Final Thoughts
Living Brain AI solves a problem that gets worse the more AI tools you use: every assistant forgets what the others learned. Setting it up takes less than an hour, and the habit that makes it work is small: capture decisions as they happen, connect one tool at a time, and check the answers against the pages they came from. Start with one project brain and a five-dollar top-up, run your own five-question test, and let the results decide whether shared memory earns a place in your daily workflow. The tools that remember are the ones that compound, and a memory layer is the cheapest way to make every AI assistant you already pay for noticeably smarter.
Explore More Free AI Tools
Want more beginner-friendly AI guides? Try our AI Title Generator, Meta Description Generator, AI Rewriter and Keyword Density Checker on AIToolSteps, and explore the full collection of free AI tools on aitoolsteps.com.